R5906848 /04 DP2K SLP Series88
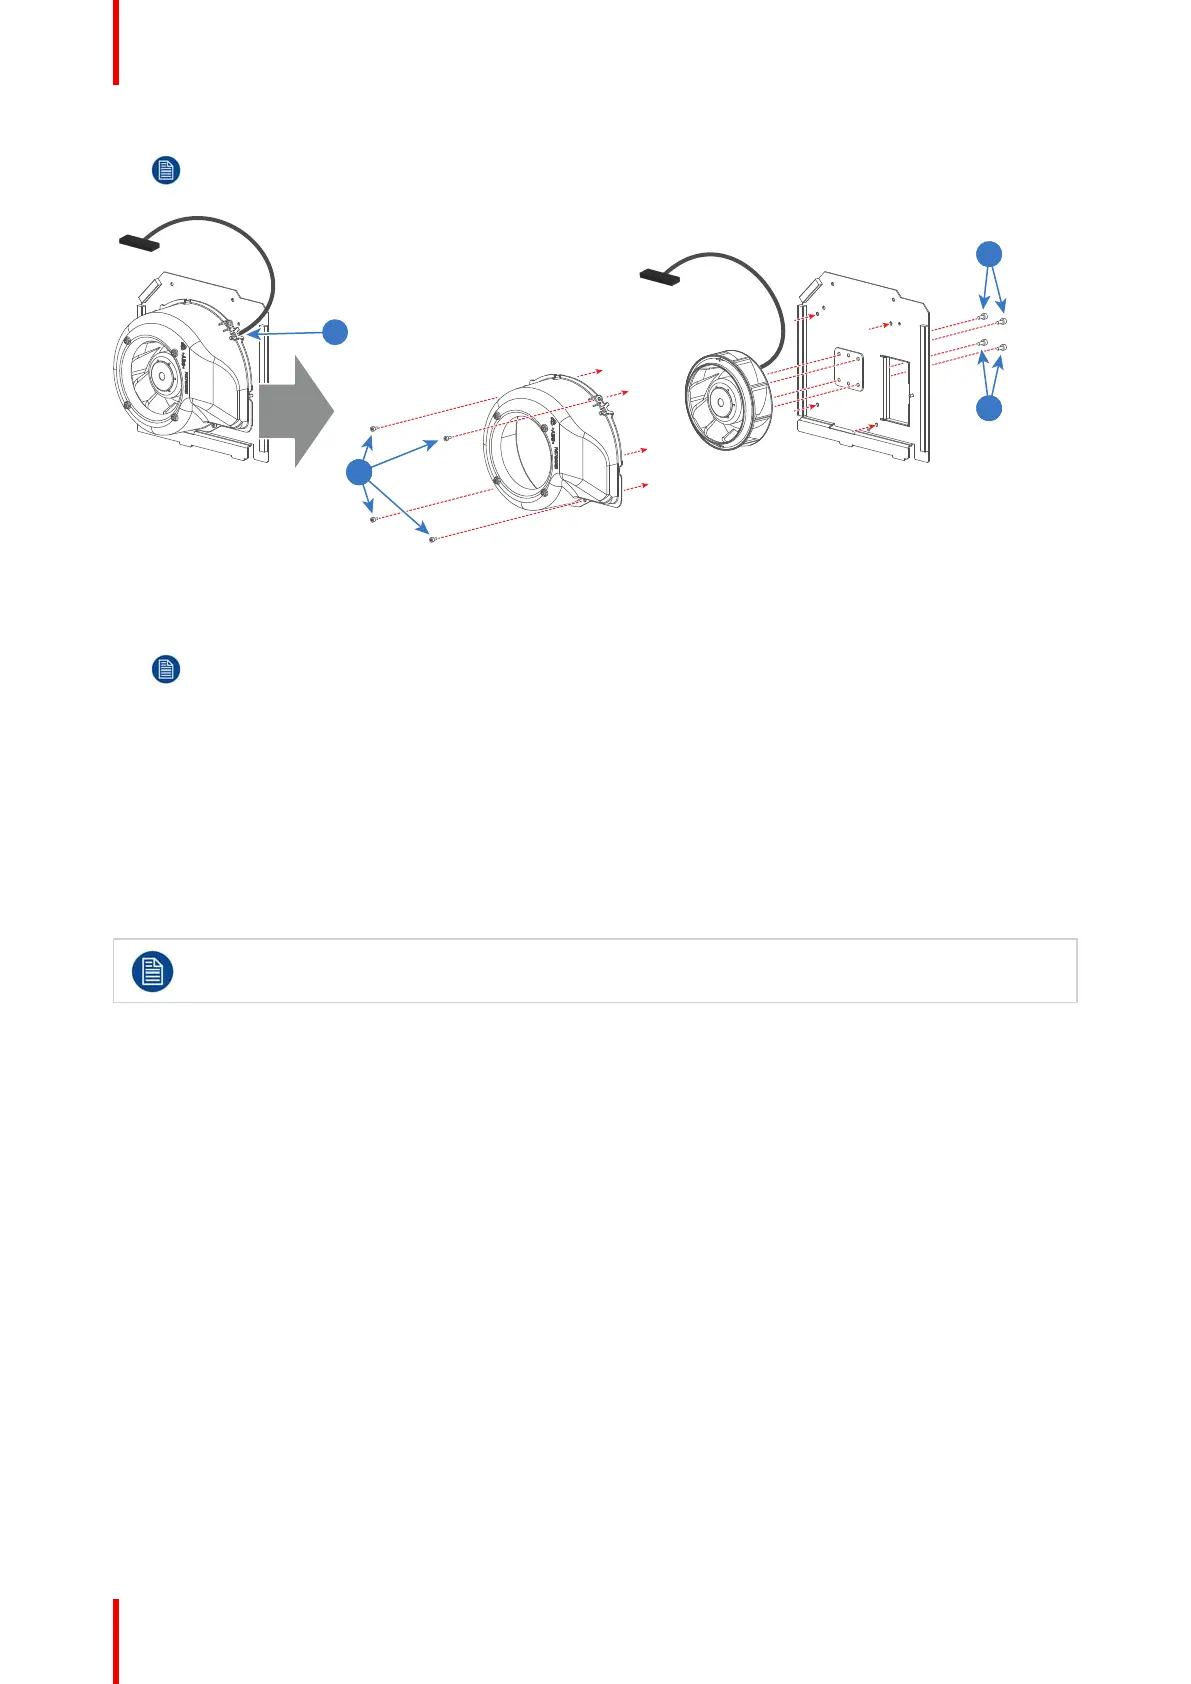
Note: Ensure that the wire of the Cathode Fan is oriented as illustrated to match it with the cut out in
the cover. (reference 6 Image 7-56)
Image 7-56
7. Install the cover of the Cathode Fan. Fasten the cover with four screws (reference 4 Image 7-56). Use a 2.5
mm Allen wrench.
Note: Ensure that the wire of the Cathode Fan fits in the cut out of the cover (reference 6 Image 7-56)
8. Reconnect the wire of the Cathode Fan (reference 3 Image 7-55).
9. Install the Cathode Fan assembly in the projector. Ensure that both teeth (reference 2 Image 7-54) at the
bottom of the Cathode Fan assembly are engaged in the foreseen slots in the projector chassis.
10. Secure the Cathode Fan assembly with two screws (reference 1 Image 7-54). Use a 3 mm Allen wrench.
7.19 Replacement of the Cold Mirror fan
To access the Cold Mirror fan assembly the projector left cover has to be removed. This procedure
assumes that the projector left cover is already removed.
Required tools
2.5mm Allen wrench
How to replace the Cold Mirror fan?
1. Remove the two fixation screws (reference 1 Image 7-57) of the Cold Mirror fan assembly. Use a 2.5mm Allen
wrench.
2. Pull the Cold Mirror fan assembly a few centimeters out of its compartment.
3. Disconnect the wire (reference 2 Image 7-57) of the Cold Mirror fan.
4. Remove the Cold Mirror fan assembly completely from the projector.
Laser Phosphor Light Source
 Loading...


