R5906848 /04 DP2K SLP Series190
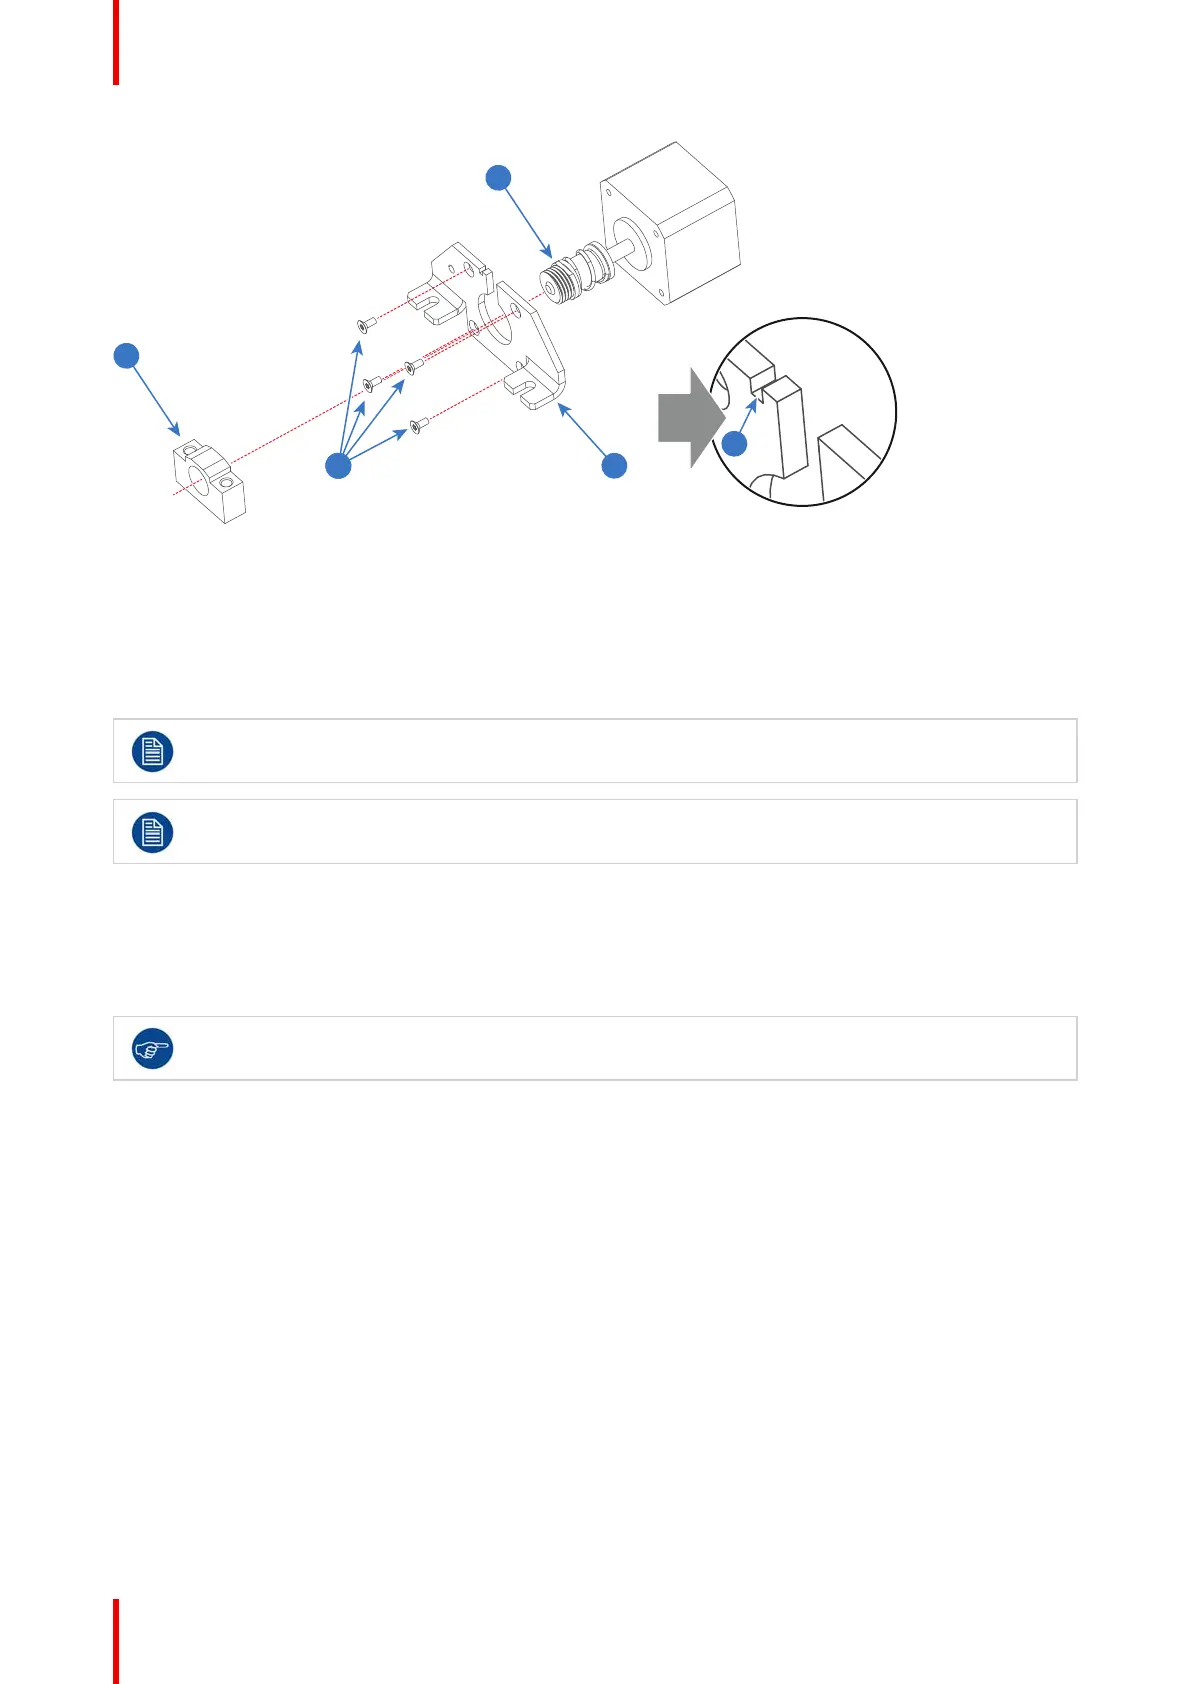
Image 16-32
4. Reinstall the stepper motor on the assembly as illustrated in Image 16-31. Fasten the four screws (reference 5
Image 16-31) with a 3mm and 4mm Allen wrench.
5. Reinstall the front plate from the Lens Holder. Use a 13mm open end wrench to fasten the four Scheimpflug
nuts (reference 3 Image 16-30). Fasten the big nuts crosswise bit by bit. Ensure that the upper two rods and
the lower left rod contain a big spring (reference 4 Image 16-30).
Proceed with reinstalling the Lens Holder. See procedure “Installation of the Lens Holder cover
plate”, page 185.
The Lens Holder has to be adjusted after installation. See chapter “Scheimpflug”, page 199.
16.13 Replacement of the motor assembly for 0.69"
DC2K lenses (Type 'M')
To know which type of lens motor assembly is mounted on the projection lens see chapter
“Available lenses”, page 174.
Required tools
• 2.5mm Allen wrench with ball end.
• Adhesive (anti-loosening agent for hex socket screws).
Required parts
• One motor assembly.
• One connector plate.
• One motor assembly cover.
• Two hex socket screw M3x3.
• Two hex socket screw M3x8.
How to replace the lens motor assembly?
1. Remove the lens from the projector.
2. Release the connector plate from the lens by loosening the two screws (reference 1 Image 16-33). Use
2.5mm Allen wrench.
Lens Holder
 Loading...


