R5906848 /04 DP2K SLP Series 193
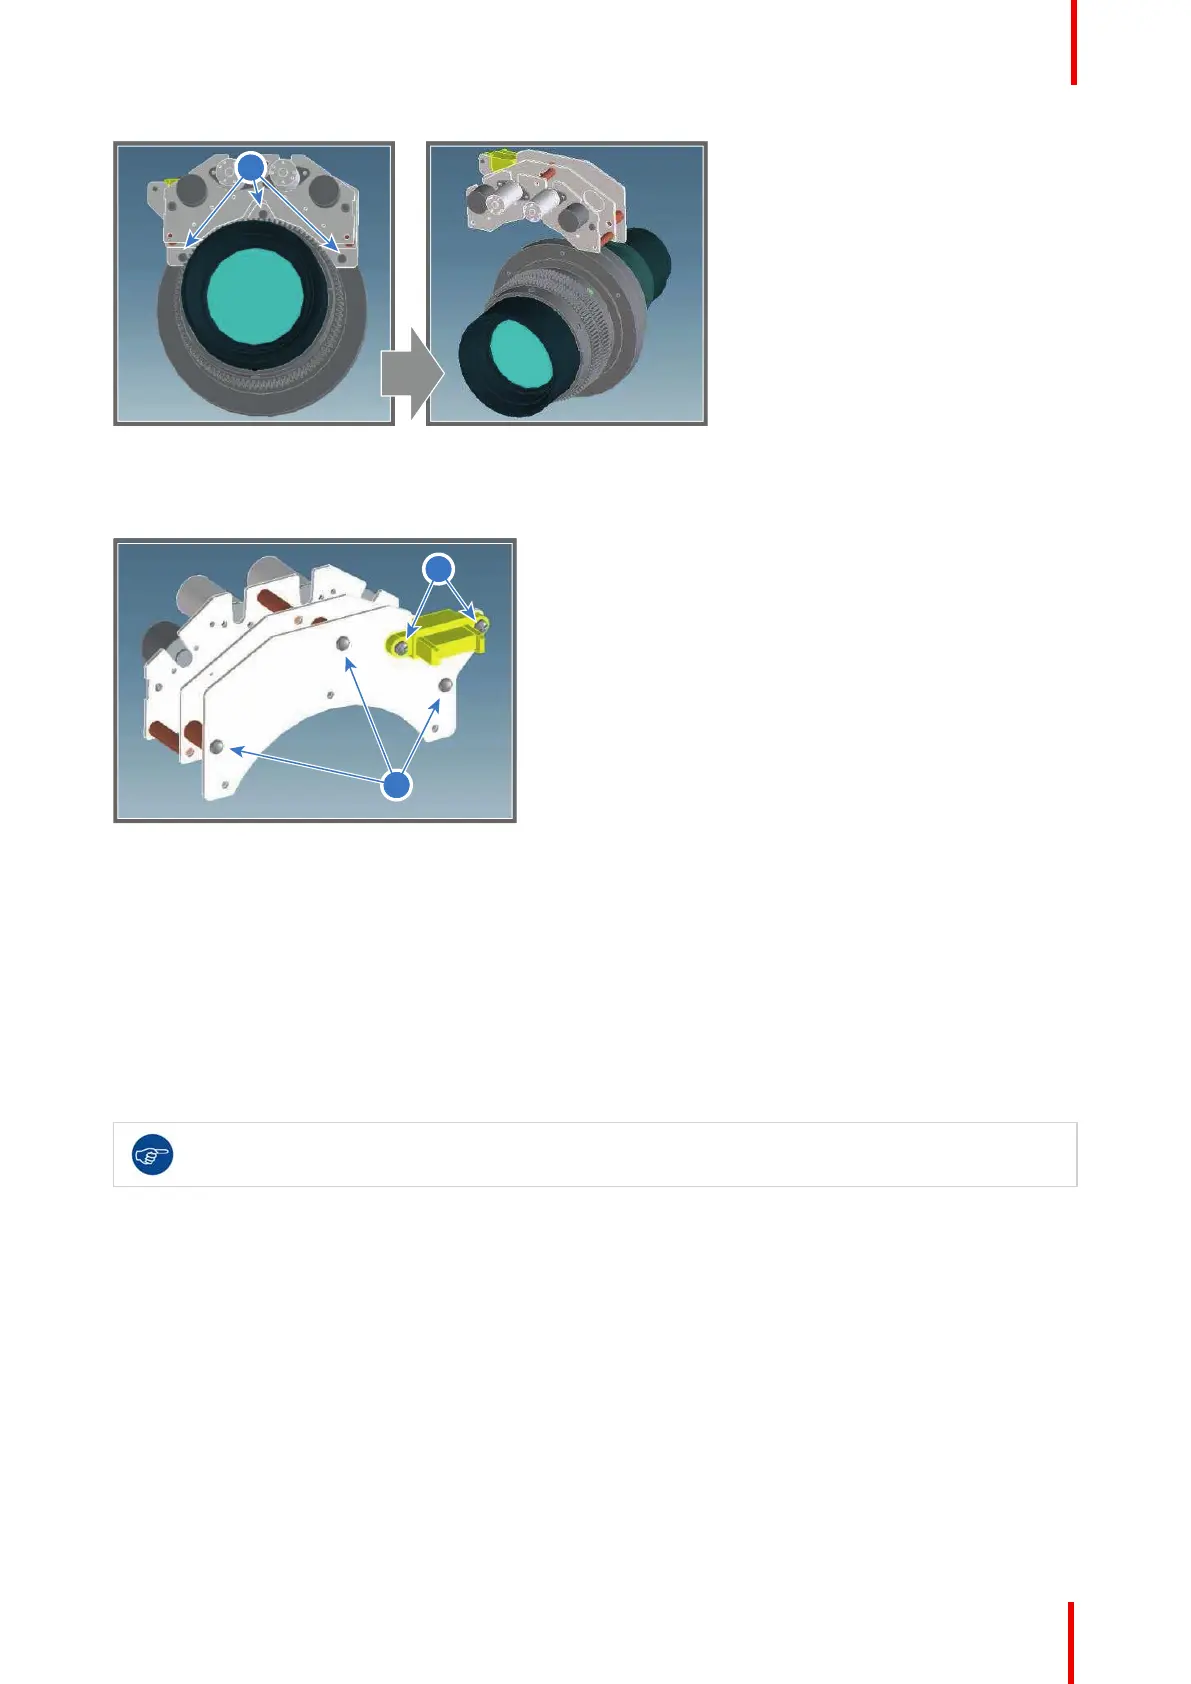
Image 16-38
5. Remove the connection plate from the lens motor assembly by releasing the five screws (reference 6 and 7
Image 16-39) as illustrated.
Image 16-39
6. Install the new lens motor assembly onto the connection plate. See Image 16-39.
7. Mount the lens motor assembly onto the projection lens. See Image 16-38.
8. Install the top cover and front cover of the lens motor assembly. See Image 16-37.
16.15 Replacement of the motor assembly for 0.69"
DC2K lenses (Type 'B')
To know which type of lens motor assembly is mounted on the projection lens see chapter
“Available lenses”, page 174.
How to replace the lens motor assembly?
1. Remove the lens from the projector.
2. Place the lens in vertical position as illustrated and remove the cover of the motor block. Use an Allen wrench
to loosen the three screws (reference 1 Image 16-40).
Lens Holder
 Loading...


