OPERATION MACHINE OPERATIONS AND CONTROLS
3-103
Inversion 3
1. Place the bucket in contact with a flat surface.
REMARK
When removing the pins, place the bucket so that it is in light
contact with the ground.
If the bucket is lowered strongly to the ground, the resistance
will be increased and it will be difficult to remove the pins.
NOTICE
After removing the pins, make sure that mud or sand does
not get on them. Dust seals are fitted at both ends of the
bushings, so be careful not to damage them.
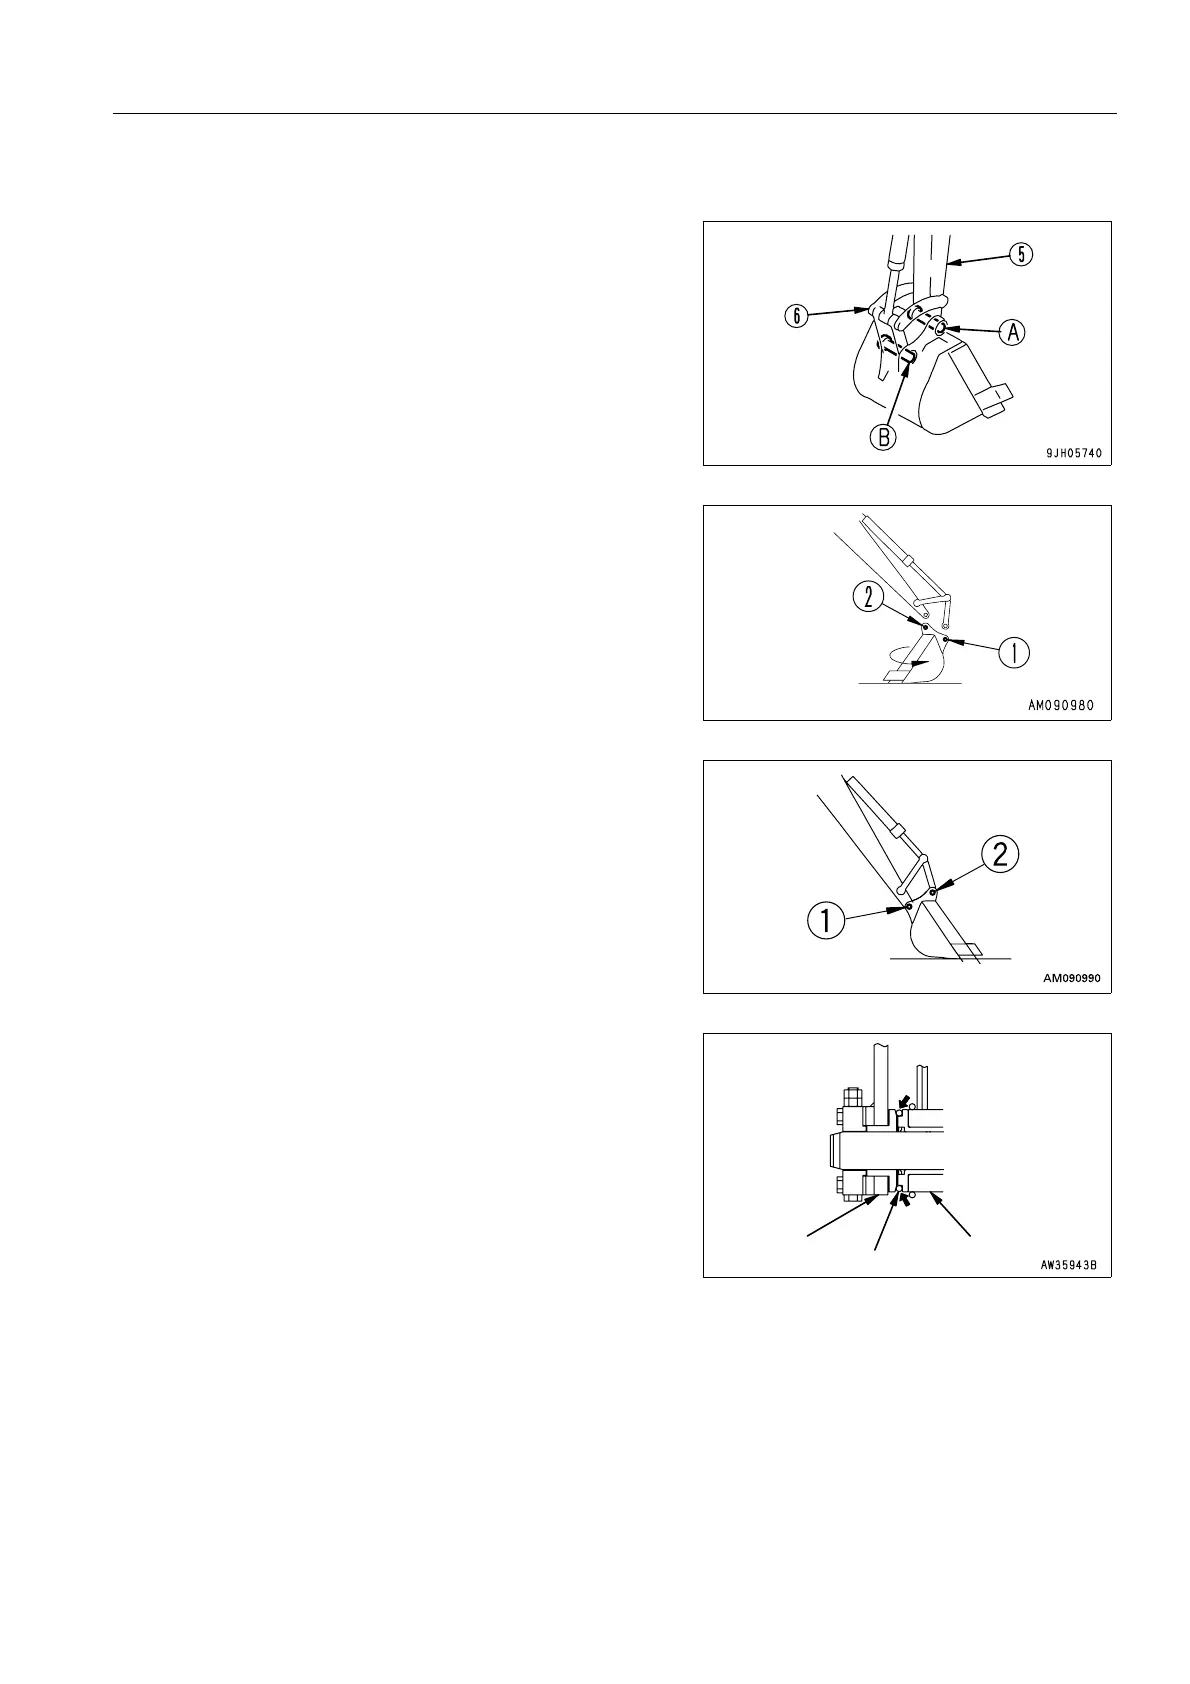
2. Remove the double nut of the stopper bolt for arm pin (A)
and link pin (B), remove the bolt, pull out arm pin (A) and
link pin (B), and then remove the bucket.
3. Turn the removed bucket. After turning the bucket, align
the arm with link mounting hole (1), then align the link with
arm mounting hole (2) and install.
4. Align the arm with holes (1) of the replacement bucket and
the link with holes (2), then insert grease-coated pins (A)
and (B) into hole (1) and hole (2) respectively.
REMARK
Install the O-ring into retaining hole (1) of the arm and bucket.
When installing the bucket, the O-rings are easily damaged, so
fit the O-rings on the boss of the arm end as shown in the dia-
gram on the right. When knocking in the pins, move the O-ring
down to the regular groove.
5. Install the stopper bolts and nuts for each pin, then grease
the pin.
Arm
O-ring
Bucket
 Loading...