Page 9 of 12 TP1B001–1 English
Jun 2013
12
How To Use Dynamic Message
Orientation
Linx 5900
3 Example
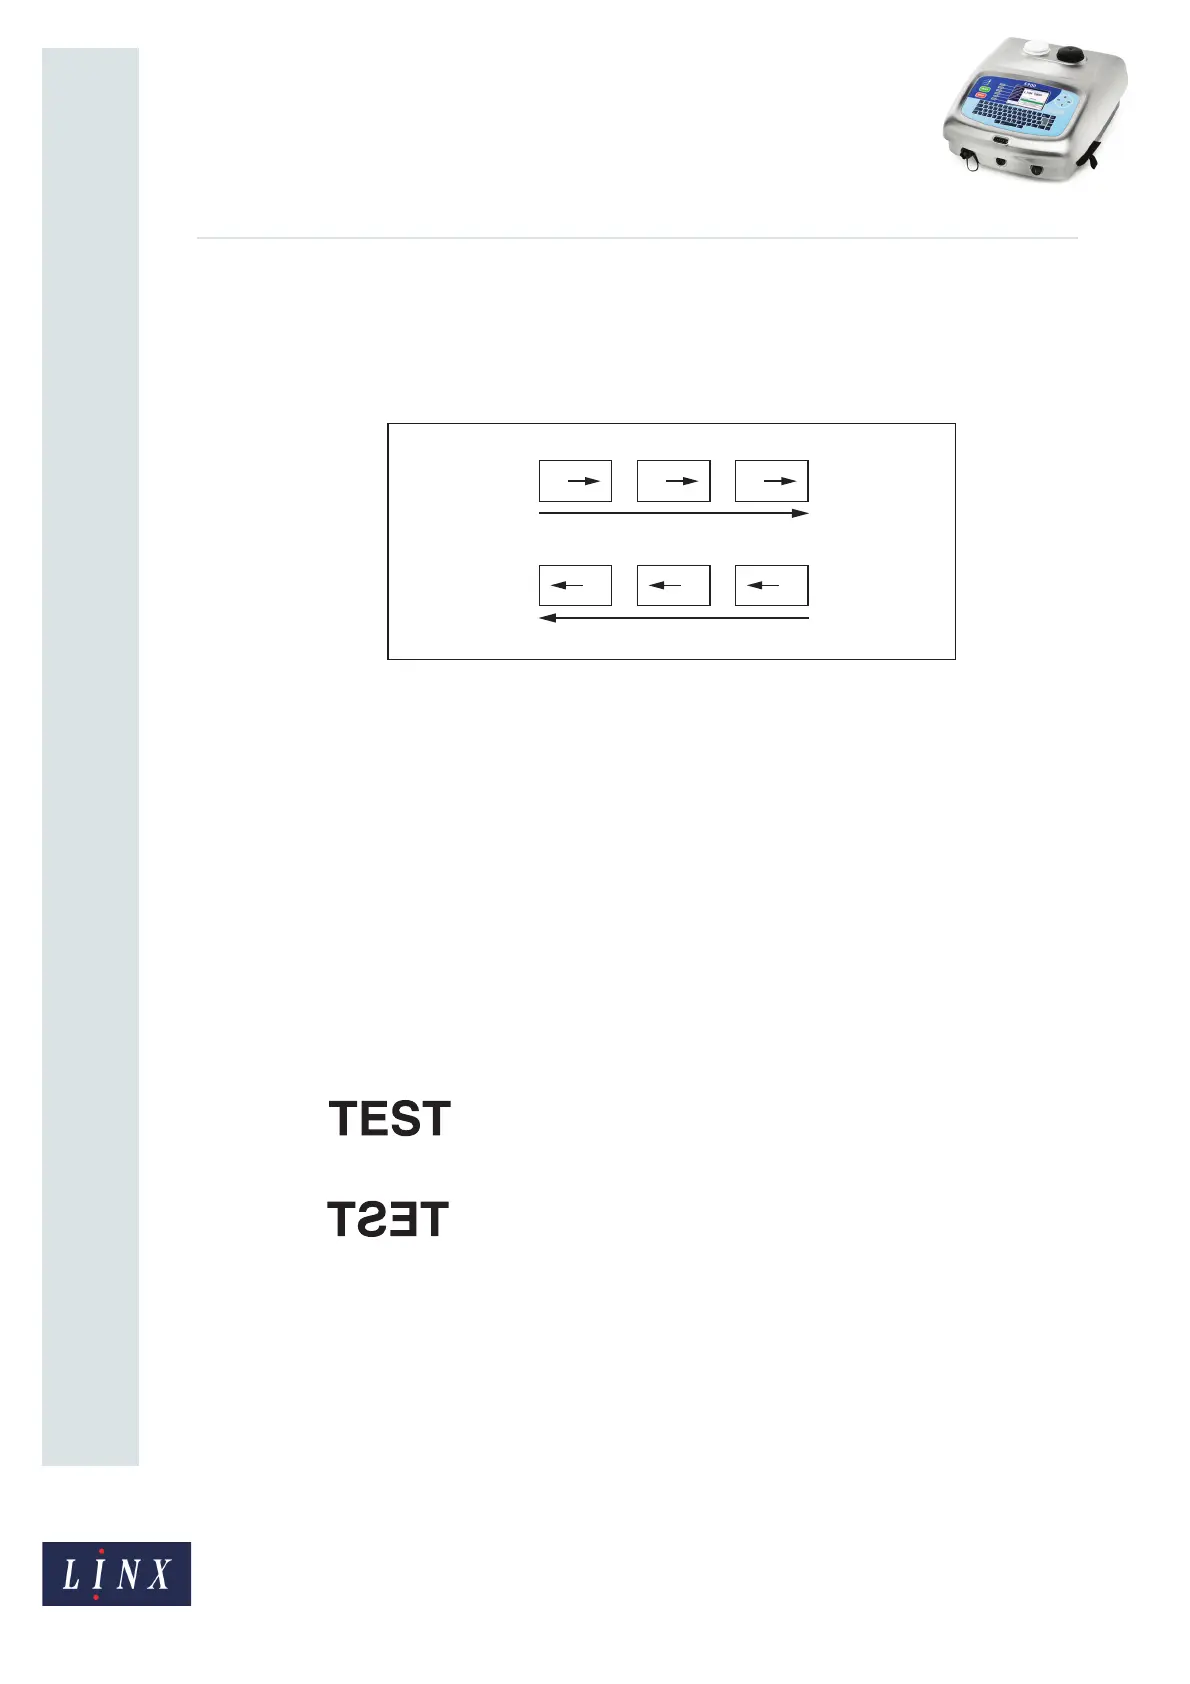
The printer in this example is on a production line that has three lanes (Figure 8). The
printhead is on a traversing arm, and moves across the three lanes to mark the products.
Figure 8. Printing a message with reverse text
NOTE: The printer prints the same message on all of the products.
The printer marks the first three items (A, B, and C) with normal orientation. then the
conveyor moves to put the next row of products under the traversing arm.
The printhead direction reverses, and the printer marks the next three items (D, E, and F)
with reversed (Horizontal Flip) orientation.
The direction signal from the traversing arm has two levels: High and Low. The signal level
indicates the current direction of the traversing arm, as follows:
High level: Forward direction
Low level: Reverse direction
The printer uses the level to set the orientation of the printed messages. The following
orientations are used:
• Normal:
• Horizontal Flip:
(Two other orientations are also available: Vertical Flip and Horizontal + Vertical Flip. This
example does not use these orientations.)
6110

 Loading...