Page 9 of 13 FA69349–2 English
Jun 2013
13
How To Create a Logo
Linx 7900
2.4 Options page
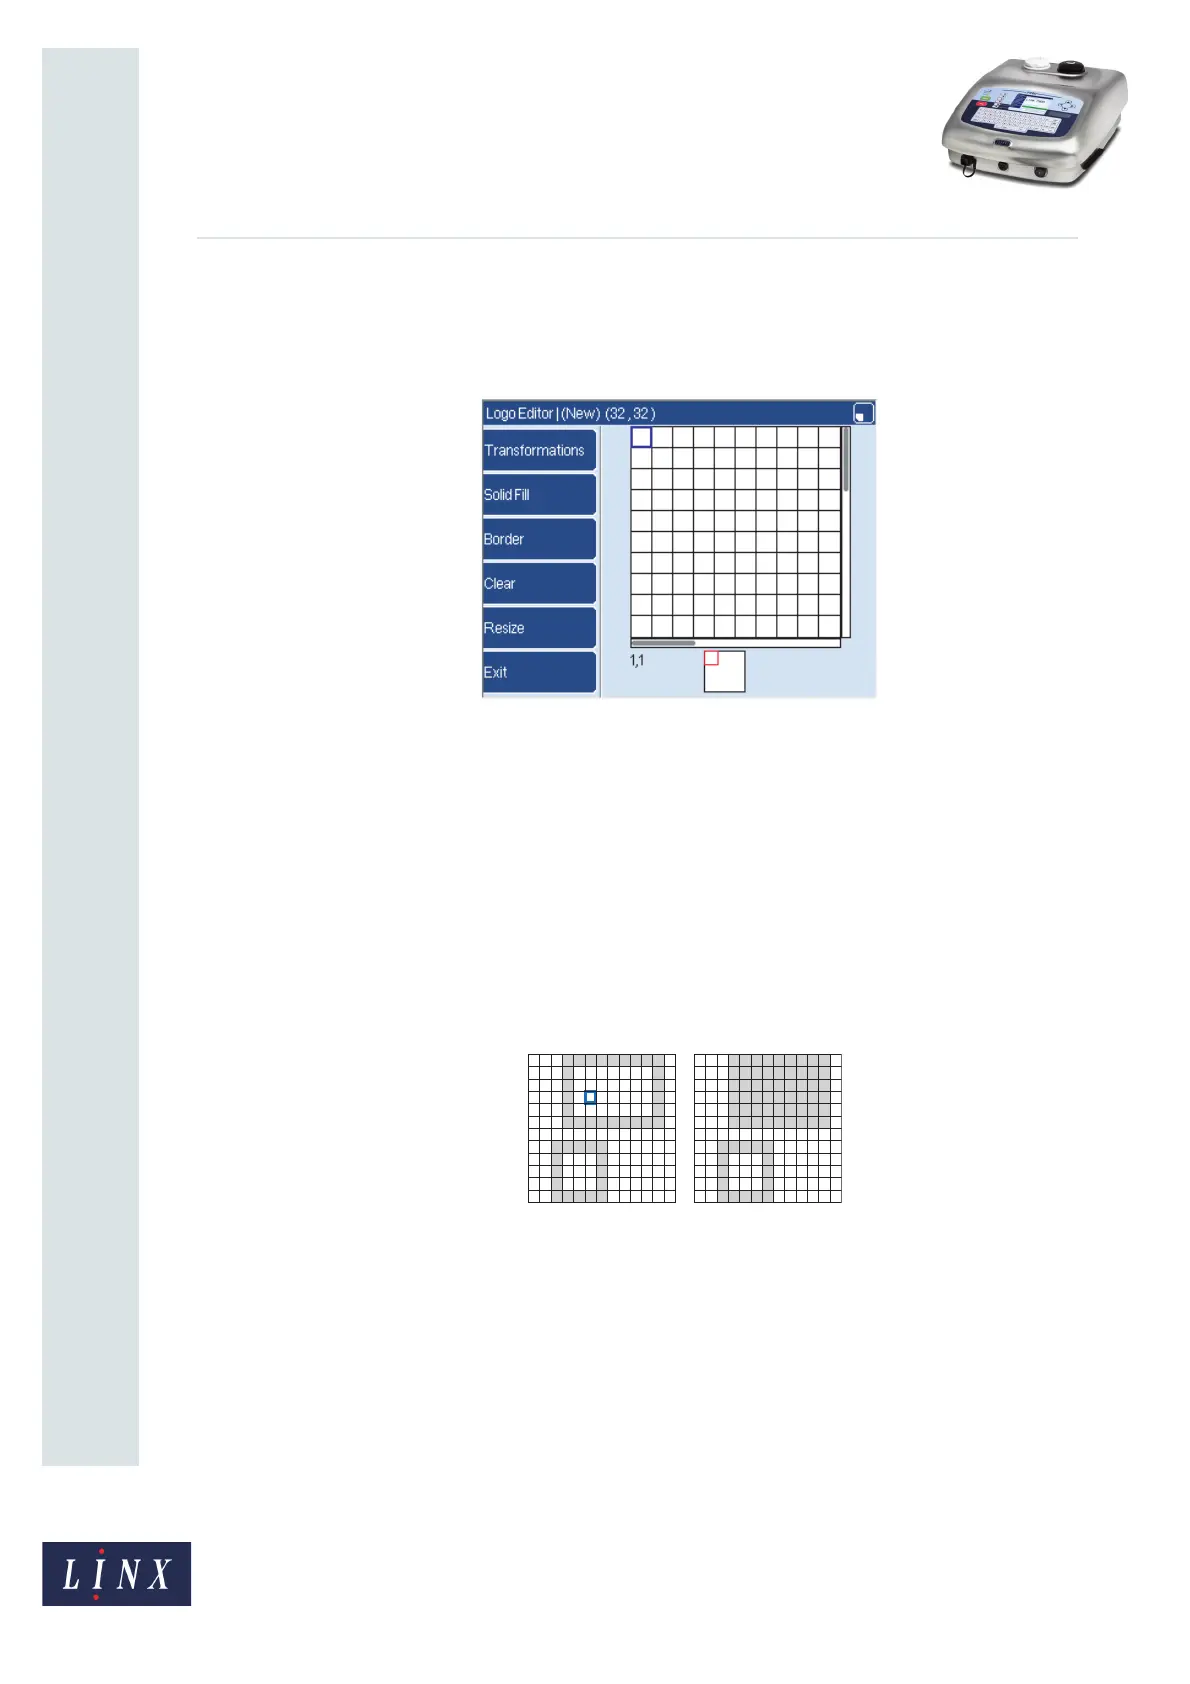
When you press the Options key in the Logo Editor page, the printer displays the following
page.
Figure 11. Options page
The keys in this page are as follows:
2.4.1 Transformations
Press this key to see more menu options (see ‘Transformation options’ on page 10).
2.4.2 Solid Fill
The function of this key is shown in Figure 12. The logo (a) contains a large box and a small
box. To change one of the boxes into a solid block of black squares, first move the cursor into
the box as shown. When you press the Solid Fill key, the box is filled (b). The small box is
not filled because the cursor was not in that box.
Figure 12. Solid Fill
NOTE: If the cursor is not in any box, the boxes do not change but the printer fills the
remaining squares in the logo.
2.4.3 Border
This key creates a line of black squares along all four edges of the logo.
2.4.4 Clear
This key resets the logo to a blank grid of white squares.
69269

 Loading...