Page 10 of 12 TP1B001–1 English
Jun 2013
12
How To Use Dynamic Message
Orientation
Linx 5900
3.1 Set up dynamic message orientation
Refer to Figure 9 and correct the direction signal from the traversing arm to the
SECONDARY TRIGGER/SHAFT ENCODER input (B) on the rear panel of the printer.
Figure 9. Secondary trigger/shaft encoder input
NOTE: Normally, the input A is needed for the primary trigger device. If a shaft encoder is
used, the secondary trigger and shaft encoder must share the input B.
To use dynamic message orientation, you must define the event that is to trigger the change
in orientation. This can be a High Level or Low Level trigger. Refer to How To Change the
System Setup for more information about print triggers.
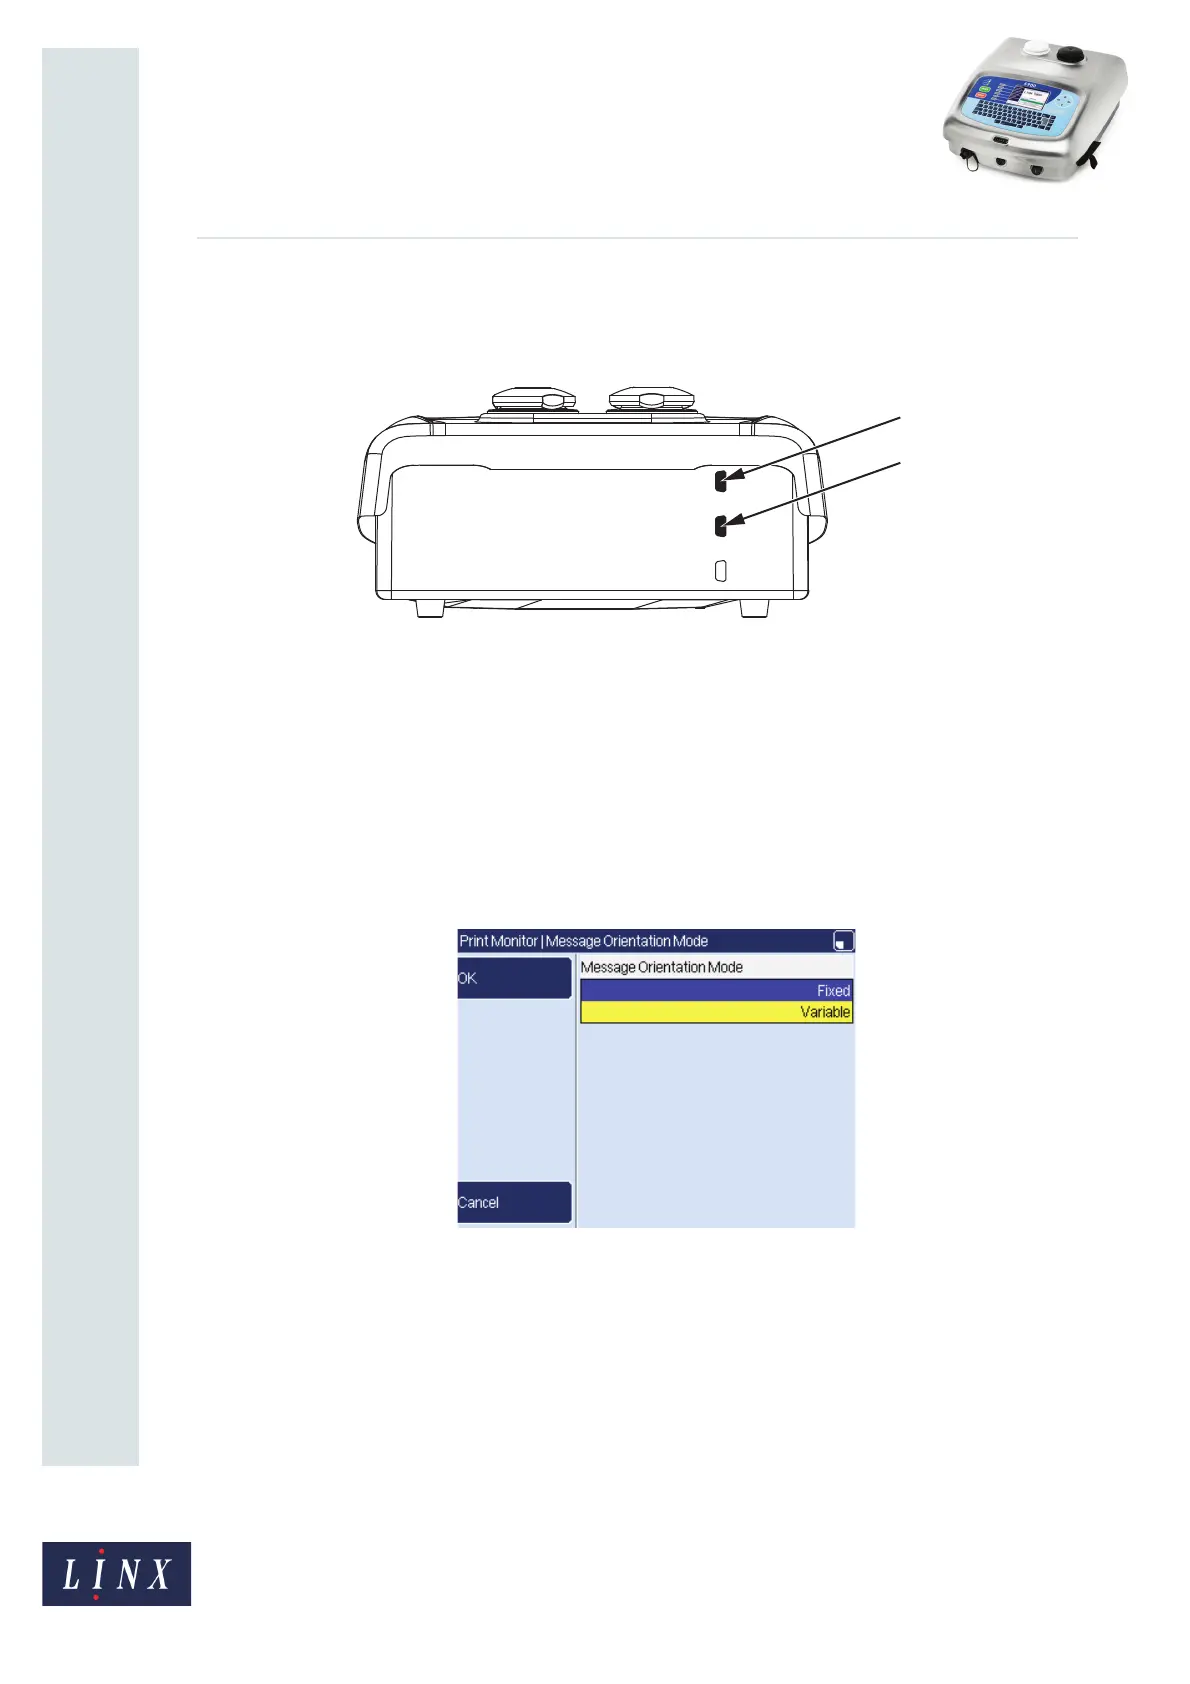
Navigate to the Print Settings page (Print Monitor page > Print Settings).
Select the Message Orientation Mode option to display the Message Orientation Mode
page.
Figure 10. Message Orientation Mode page
You can set the message orientation mode to either Fixed or Variable. Variable mode enables
you to configure the 5900 Dairy Coder printer software for traversing operations.
59007
 Loading...