Page 4 of 13 FA69349–2 English
Jun 2013
13
How To Create a Logo
Linx 7900
2.2 Logo Editor page
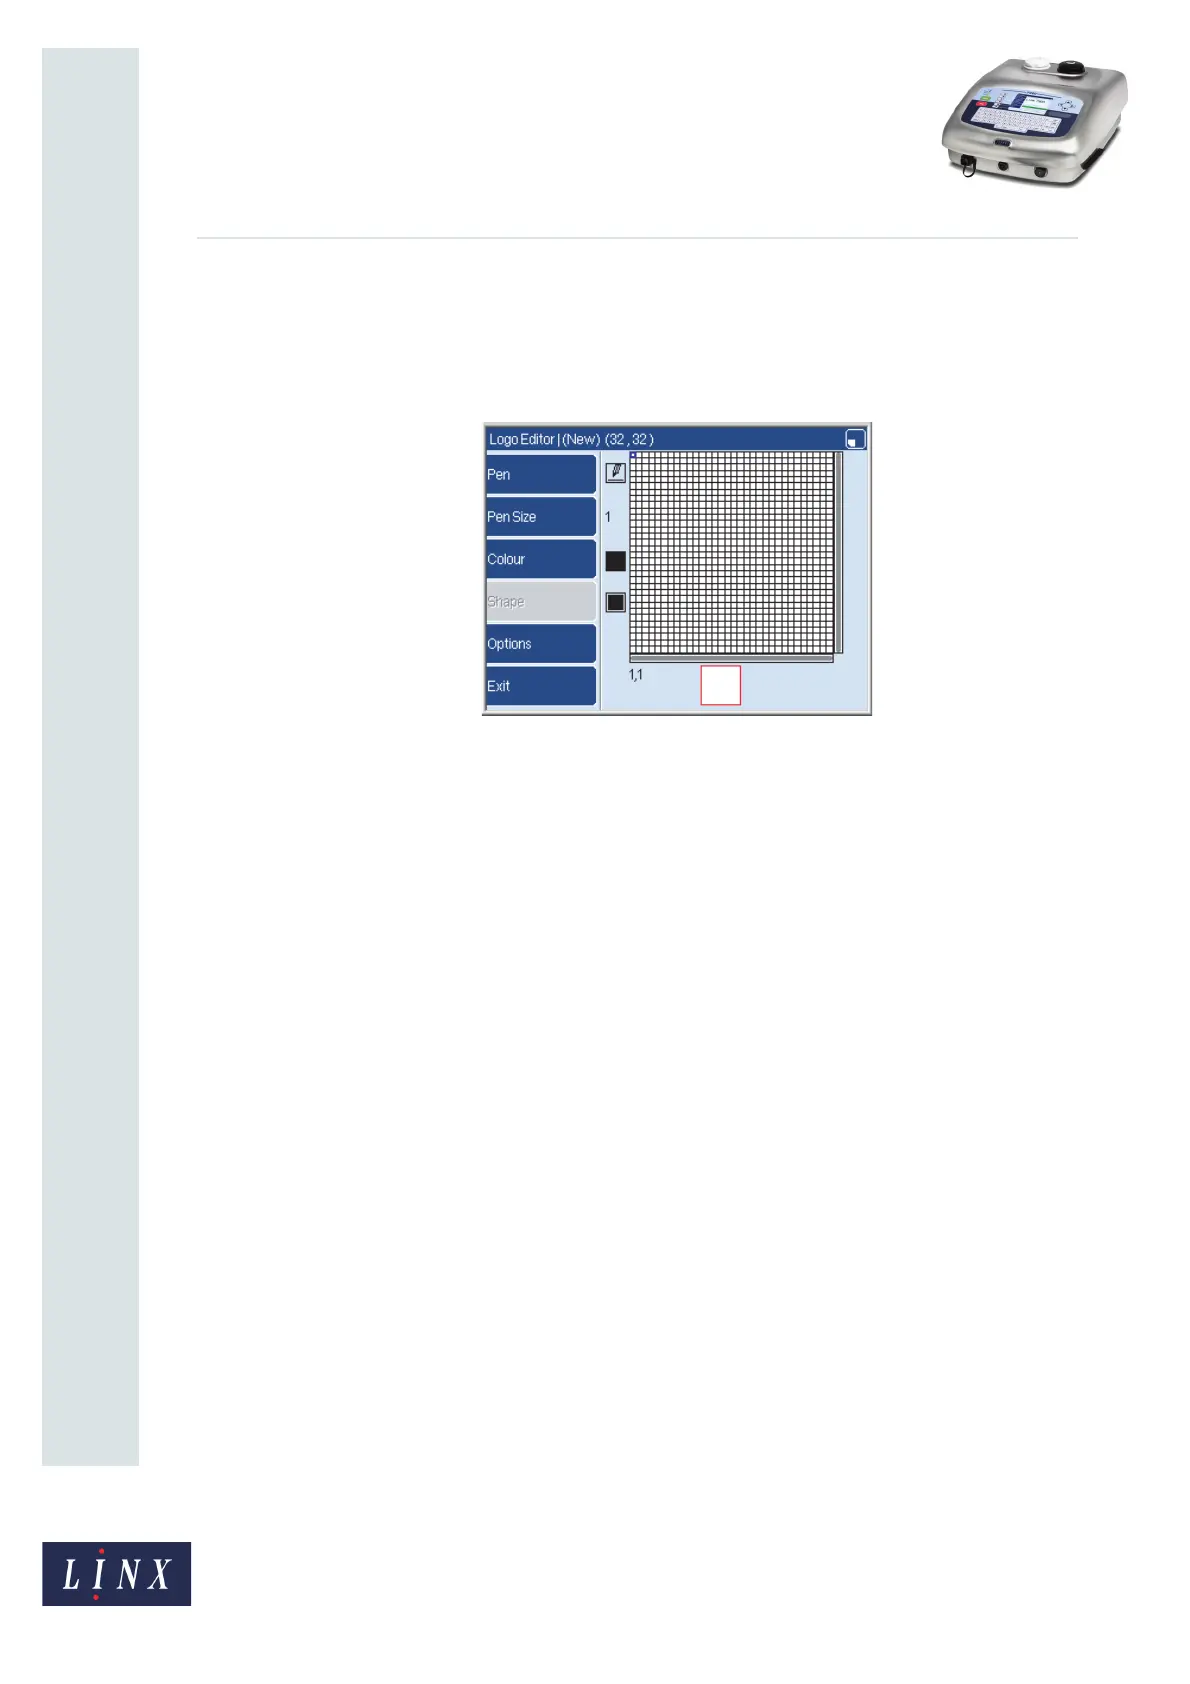
When you create a new logo, the Logo Editor page displays a blank grid of squares. The
default grid has 32 squares on each side. You can change the default size of the grid. See
How To Configure the Message Editor and Logo Editor.
Figure 3. Logo Editor page
The blue square at the top left of the grid is the ‘cursor’. The cursor operates like a pen that
you use to draw a picture on the grid. You can use the arrow keys to move the cursor in any
direction.
The title at the top of the Logo Editor page shows you that the default width is 32 pixels and
the height is 32 pixels.
2.2.1 Magnification
The default magnification displays 32 rows and 32 columns of pixels on the grid. To change
the magnification, do the following:
• Press the [alt] key and the Down arrow key together to decrease the magnification and
see one more row and column.
• Press the [alt] key and the Up arrow key together to increase the magnification.
 Loading...