Page 12 of 13 FA69349–2 English
Jun 2013
13
How To Create a Logo
Linx 7900
2.6 Resize options
You can change the height and width of your logo. The maximum height is 34 and the
maximum width is 256. The minimum height or width is 1. To change the logo dimensions,
press the Resize key to display the following page.
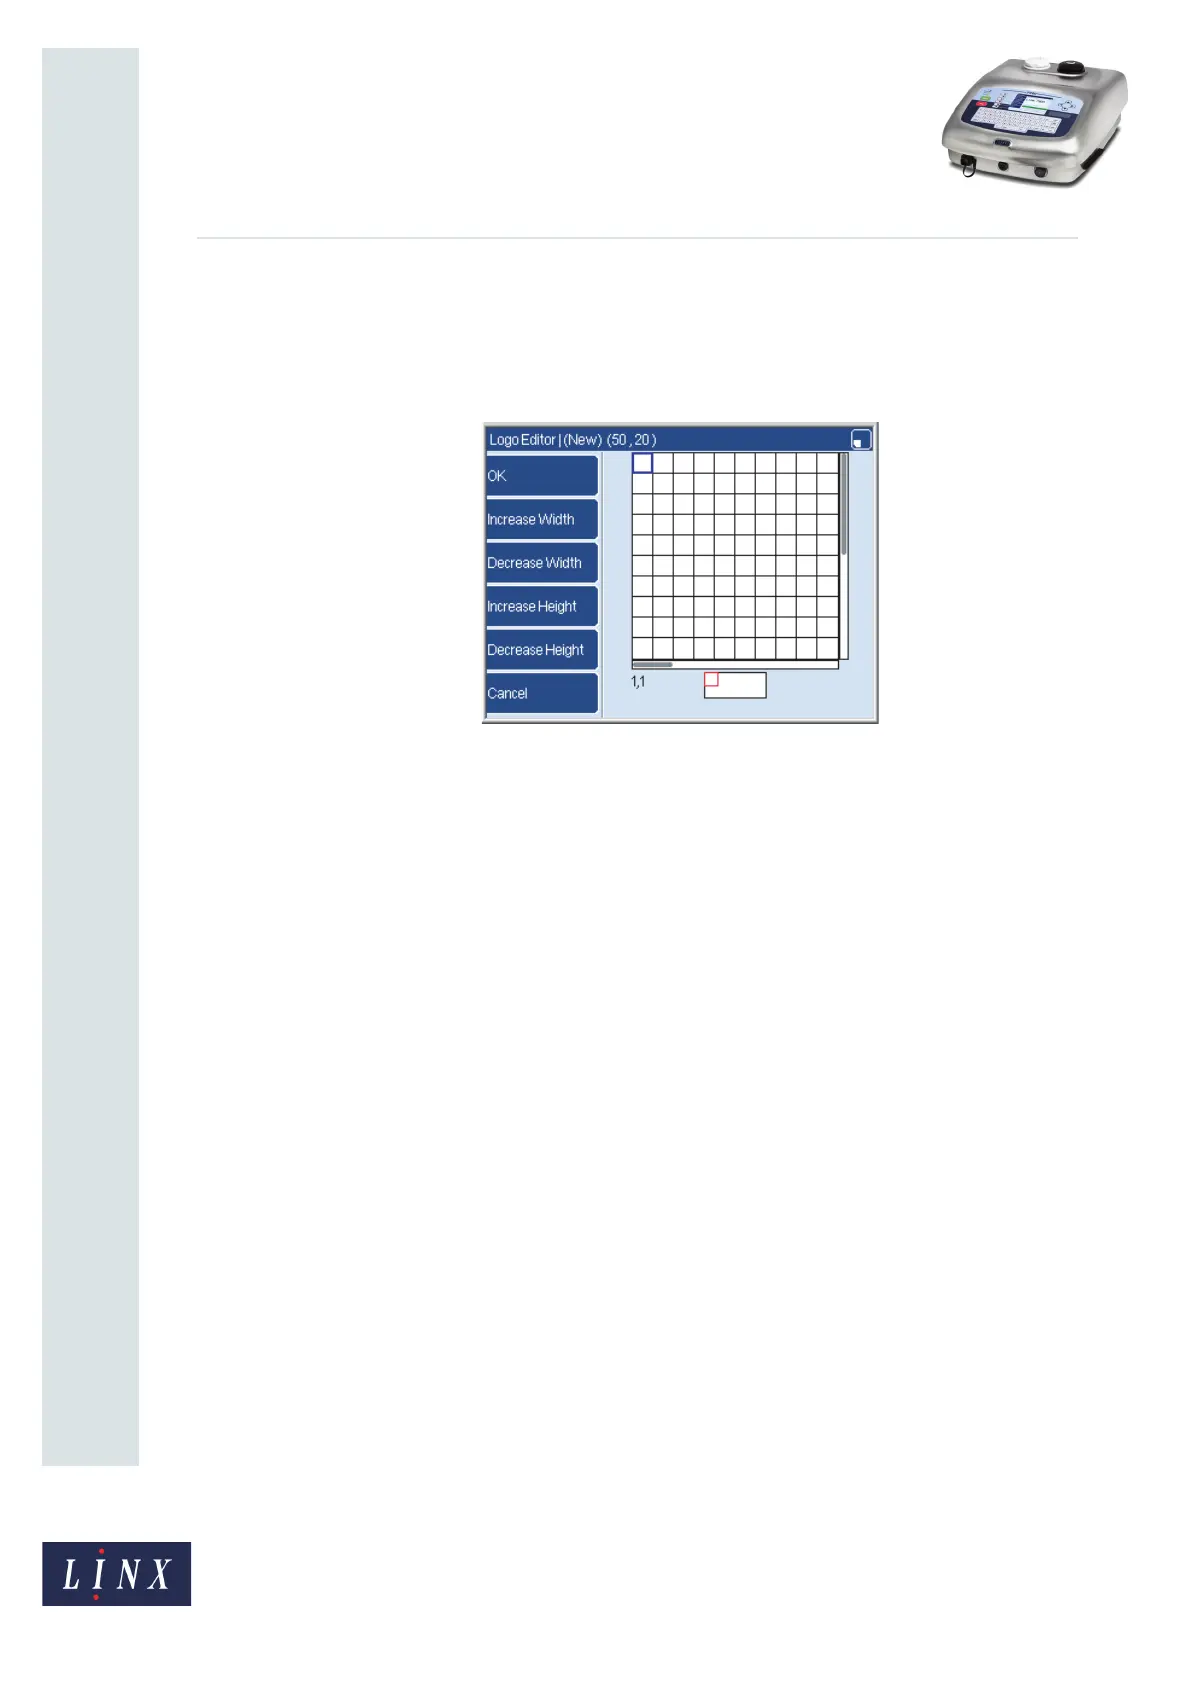
Figure 17. Resize page
The total width of the logo in Figure 17 is 50 pixels and the height is 20 pixels. You can see
that when the size changes, the preview box changes and the scroll bar lengths change.
The options on this page are as follows.
2.6.1 OK
When you leave this page, press this key to save any changes that you made. (To discard the
changes, press the Cancel key.)
2.6.2 Increase Width
When you press this key, the total width of the logo increases by 1.
NOTE: If you need a large change, remember that you can also change the default width
before you begin to use the Logo Editor.)
2.6.3 Decrease Width
When you press this key, the total width of the logo decreases by 1. (See also the note
above.)
2.6.4 Increase Height
When you press this key, the total height of the logo increases by 1.
2.6.5 Decrease Height
When you press this key, the total height of the logo decreases by 1.
69275

 Loading...