Page 27 of 29 TP1B013–1 English
Sep 2014
29
How To Use QuickSwitch Plus
Product Selection
Linx 7900
5.1.2 Configure the first product selection
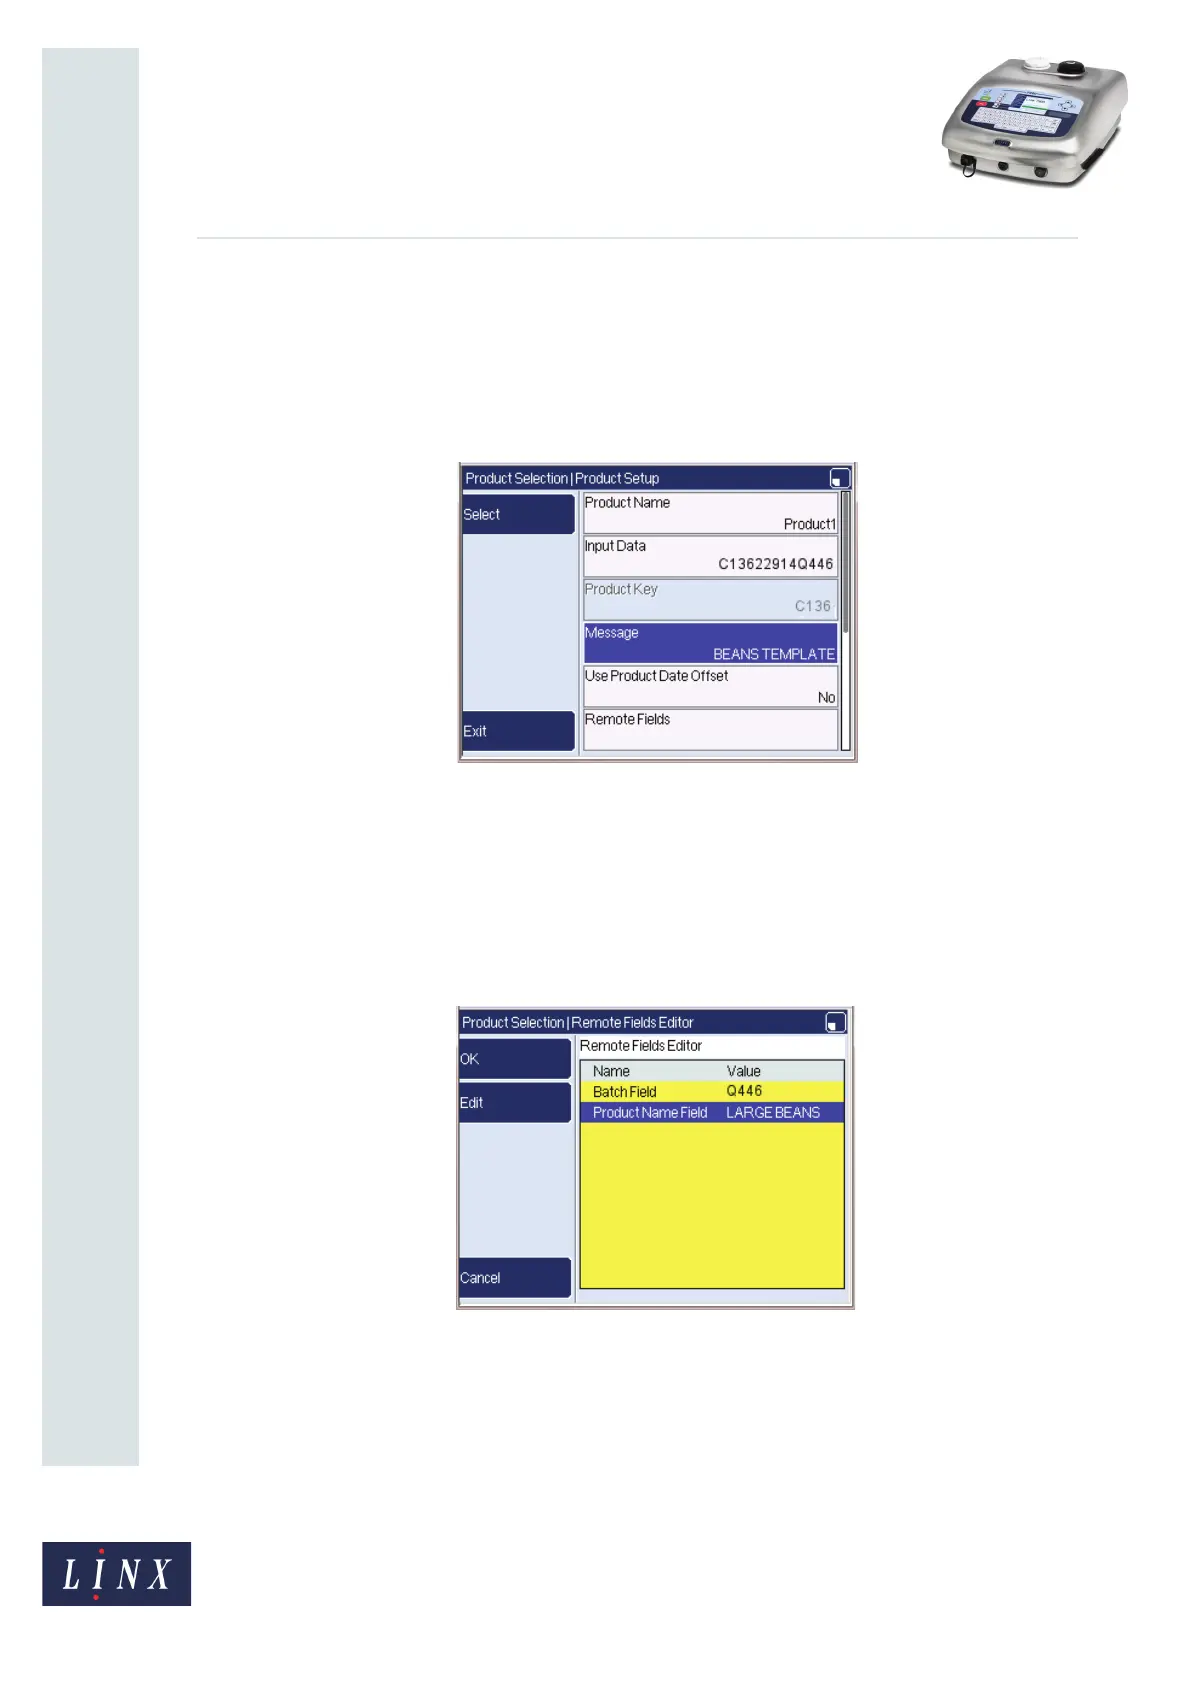
You can now create a new product selection to associate with the ‘BEANS TEMPLATE’
message. Follow the instructions in ‘Create a product selection’ on page 11 to scan a
barcode associated with the required product. This can be the product itself, or another
source (for example, a job sheet or product catalogue). The Product Setup page is
displayed.
Figure 37. Product Setup page: BEANS TEMPLATE message
Because the ‘BEANS TEMPLATE’ message is the currently selected message, most of the
product selection parameters are already set, because they were defined when the message
was created. To complete the product selection, you can set a date offset and configure the
remote fields in the message (see ‘Date and time offsets’ on page 16 and ‘Remote fields’ on
page 17). For the ‘PRODUCT’ remote field, you can set a static value of ‘LARGE BEANS’.
The ‘BATCH NUMBER’ remote field uses the data (‘Q446’) from characters 10 to 13 of the
input data from the scanned barcode, as shown in Figure 38.
Figure 38. Remote Fields Editor page: Batch Field and Product Name Field
The product selection parameters are now set, and you can save the product selection with
a memorable name (for example, ‘LARGE BEANS’), and then scan the barcode to test that
the product selection operates correctly.
79140
 Loading...