9-46 Structure and Assembly/Disassembly
9.3.24 Machine Assembly
The disassembly tool: cross-headed screwdriver (M3, M4), anti-electrostatic glove
9.3.24.1 TR64 PCBA
1. See 9.3.16, 9.3.17 for details.
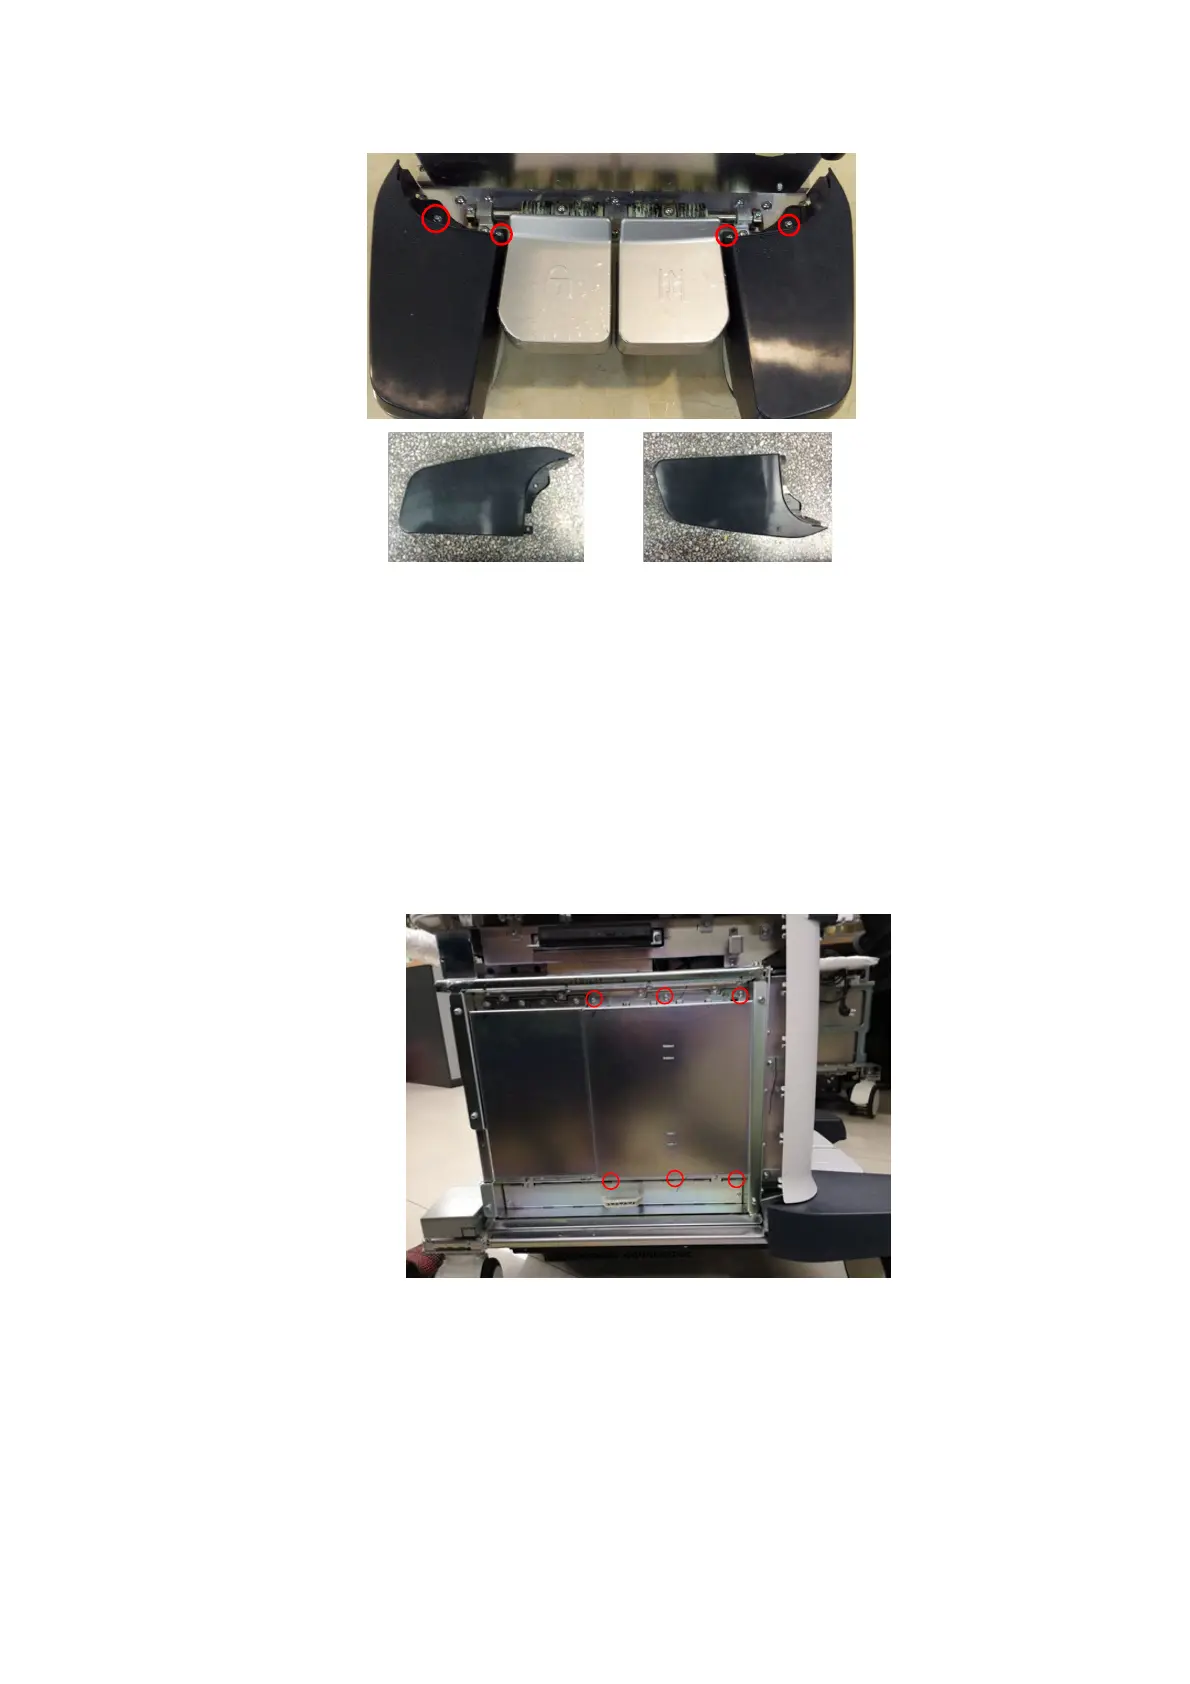
2. Unscrew 6 M4 X 12 cross panhead screws with cross-headed screwdriver (M3, M4) to remove
the shield cover of the machine.
3. Wear the anti-electrostatic glove. After opening the clips for 3 TR boards, TR 64 board PCBA
can be removed if it has been out of slot. (If TR 64 board still has CW assembly, the method for
installing/disassembling CW assembly can be found at step 2 in 9.3.24.2 CW Assembly).
eft pedal
ight pedal
 Loading...


