Structure and Assembly/Disassembly 9-39
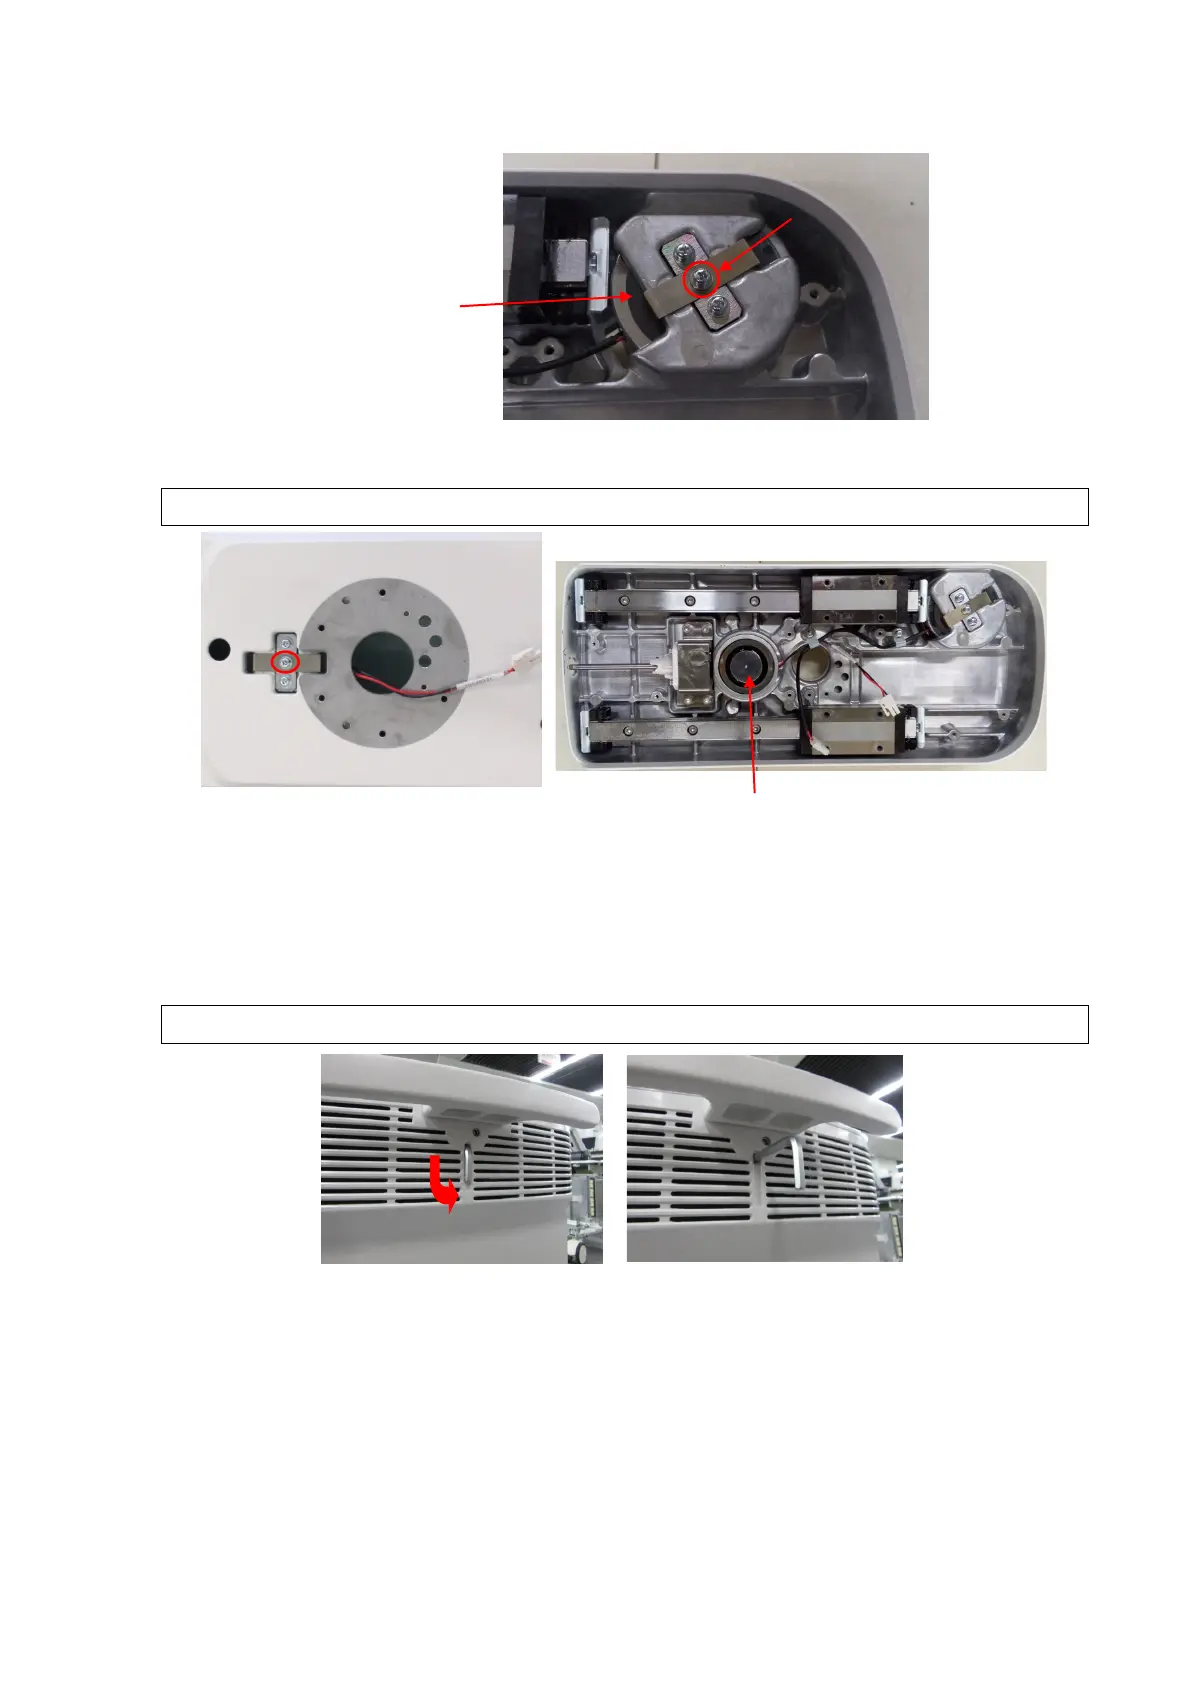
5. Unscrew 1 M4 X 12 cross panhead screw with the screwdriver (M3, M4) to remove the 75 kgf
magnetic navigation plate.
The plate spring should face the magnet when installing the electrical magnet.
9.3.16 Main Unit Rear Cover Assembly
The disassembly tool: cross-headed screwdriver (M3, M4).
1. Push the inner hexagon spanner towards the arrow’s direction to pull it out.
Do not pull out the inner hexagon spanner directly because of the strength.
2. Unscrew 2 screw pads B and 2 screw pads C from the main unit back cover. Unscrew 4 M4 X
12 cross panhead screws from the back cover of the main unit with the screwdriver (M3, M4) to
remove the back cover gently (FRU).
Electromagnet 75 kgf
120kgf
 Loading...


