Installing Options 10-7
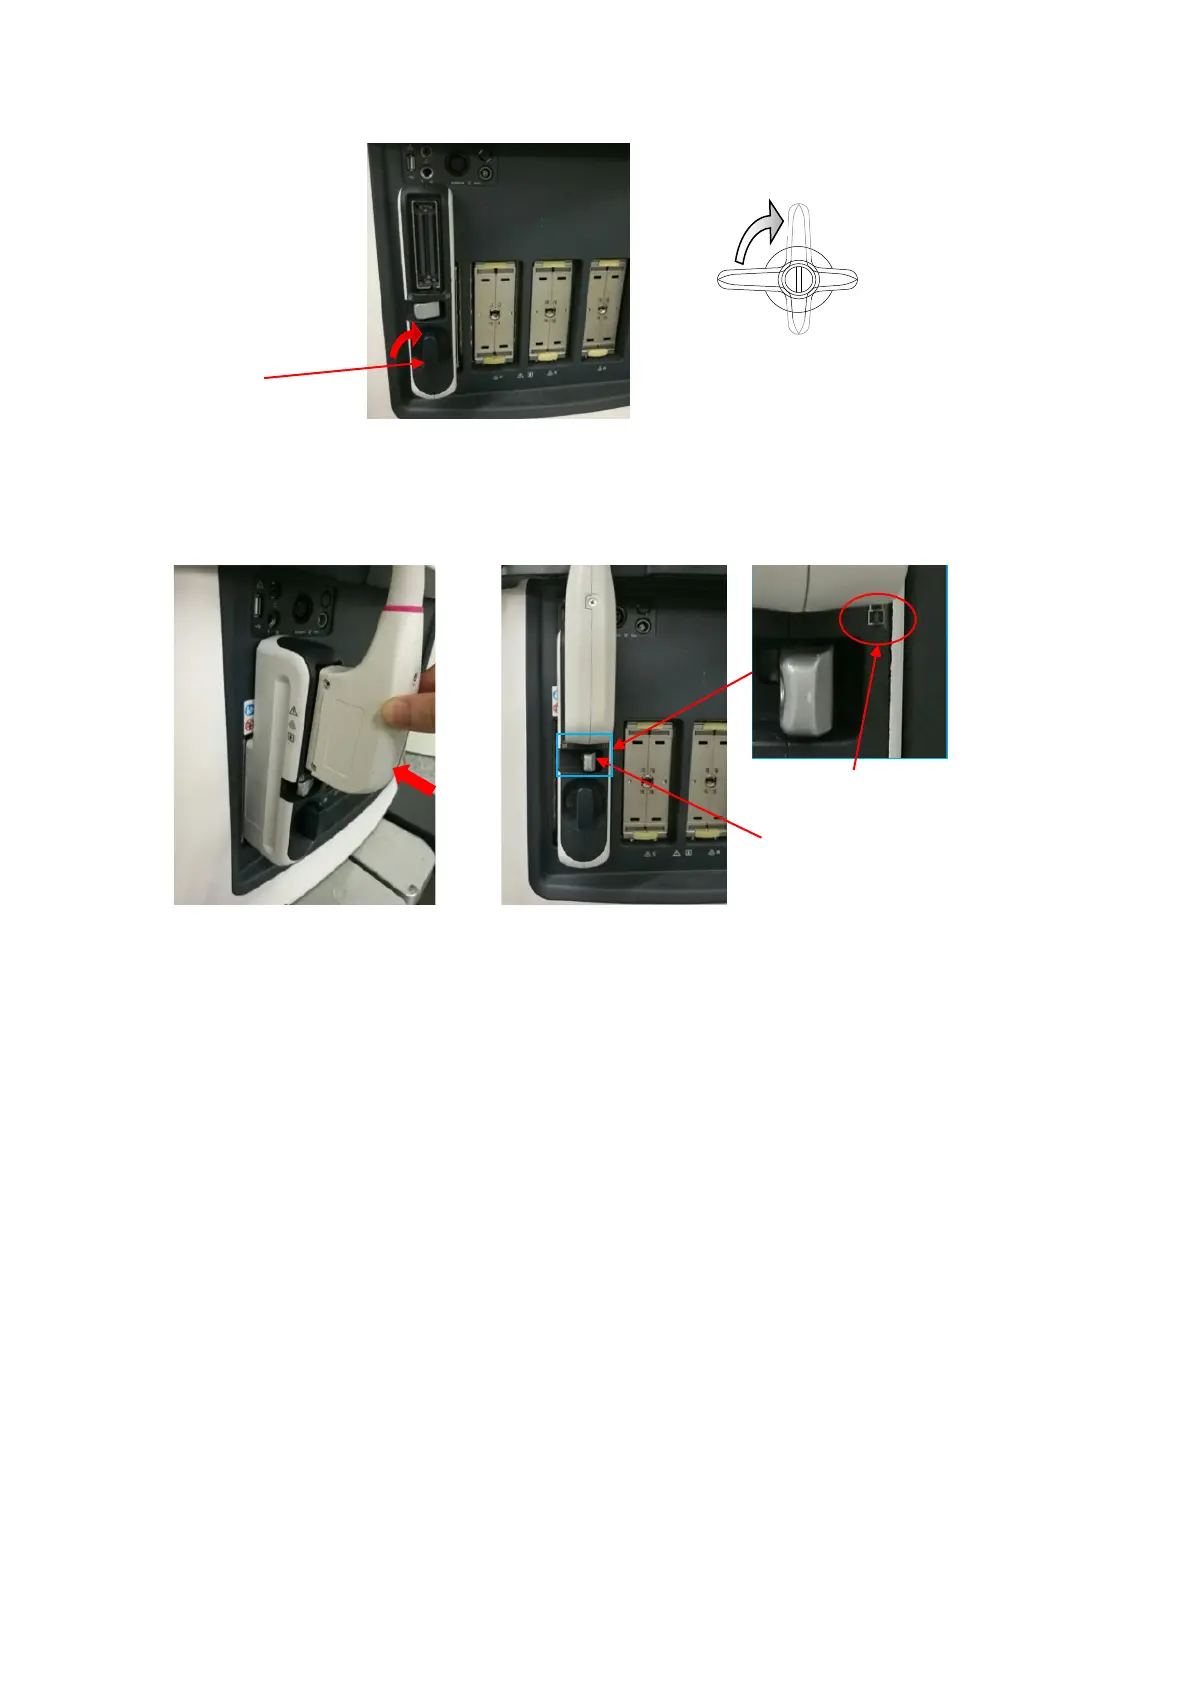
3. Stick the probe connector to probe socket of the probe adapter and keep the cable upward, and then
move the lever to locking position in order to lock the probe, achieving the installation of probe adapter
and probe.
10.2.3 Pencil Probe Signal Cable Assembly
The disassembly tool: cross-headed screwdriver (M3, M4), sharp nose pliers.
1. See 9.3.16 Back Cover of the Main Unit, 9.3.17 Left Side-panel of the Main Unit, 9.3.18
Right Side-panel of the Main Unit, 9.3.19 Front Cover of the Main Unit, 9.3.20 Turbine
Cover, 9.3.21
Turbine Cover Assembly, 9.3.22 Front Upper Cover of the Main Unit/Front
Upper Cover Assembly of the Main Unit for details.
2. Unscrew five cross panhead screws M4X12 on ECG board and front output panel through
cross-headed screwdriver (M3, M4). After that, open front output panel and remove ECG
board as well as pencil probe knockout cover on ECG board.
Probe locking
position
lever
Probe adapter
locking lever
 Loading...


