130 Disassembly and Reassembly TM9100 Service Manual
© Tait Electronics Limited August 2005
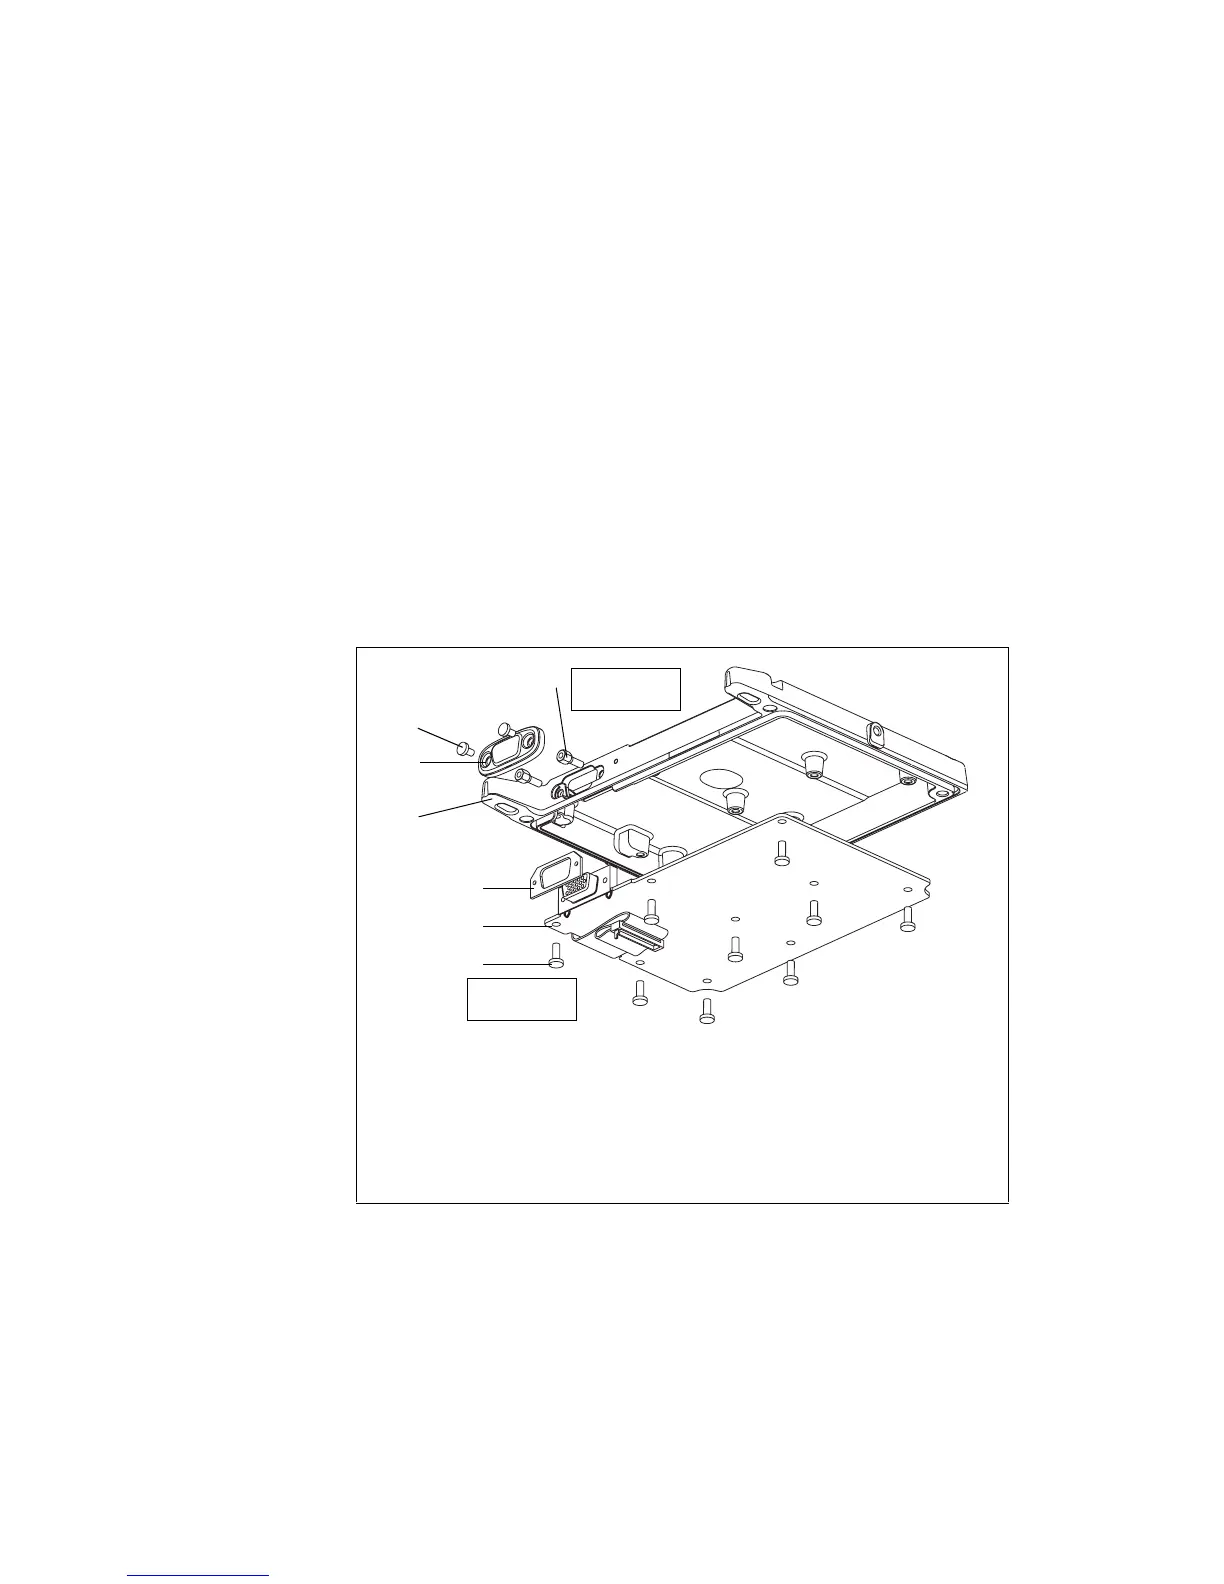
Removing an
Options Board
(Optional)
The radio may be fitted with an options board in the lid assembly, which
may or may not have an external options connector fitted in a provision in
the lid assembly.
The circled numbers in this section refer to the items in Figure 5.5.
1. If an external options connector is fitted:
■ Undo the two screws b and remove the protective rubber cap c
(if fitted).
■ Undo the two D-range screwlock fasteners d.
2. Undo up to nine screws
h and remove the options board G from the
lid assembly
E.
3. If an external options connector is fitted, a foam seal for the D-range
connector
f is fitted to the inside of the lid. Remove the foam seal
only if it is damaged.
Reassembly is carried out in reverse order of the disassembly.
Figure 5.5 Removing an options board
B
screw 4-40x3/15 (x2)
F
foam seal for D-range connector
C
protective rubber cap
G
options board (example)
D
D-range screwlock fastener 4-40 (x2)
H
screw M3x10, self-tapping (x9)
E
lid assembly
d
3614z_01
Torx T10
17lb·in (1.9N·m)
3/16 inch (5mm)
8lb·in (0.9N·m)
f
g
h
c
b
e
 Loading...


