466 Installing an Enhanced Remote Kit TM9100 Service Manual
© Tait Electronics Limited August 2005
4. Screw the U-bracket in the chosen mounting position using the self-
drilling screws washers.
Installing the Radio
Body in the
U-Bracket
1. Connect the antenna and power cables to the rear of the radio.
2. Position the radio body in the U-bracket so that the holes in the
U-bracket line up with the holes in the radio chassis.
3. Screw the radio into position using the four thumb screws.
23.1.8 Connecting the Remote Cable
Caution When drilling holes in the vehicle, check that drilling
at the selected points will not damage existing wiring,
petrol tanks, fuel lines, brake pipes or battery cables.
1. Drill any holes required for cables and install suitable grommets or
bushings in the holes.
2. Plug one end of the remote cable into the control-head interface.
3. Run the remote cable to the torso interface and plug it into the
RJ45 connector without a bung.
Installing the
Remote-Cable
Grommets
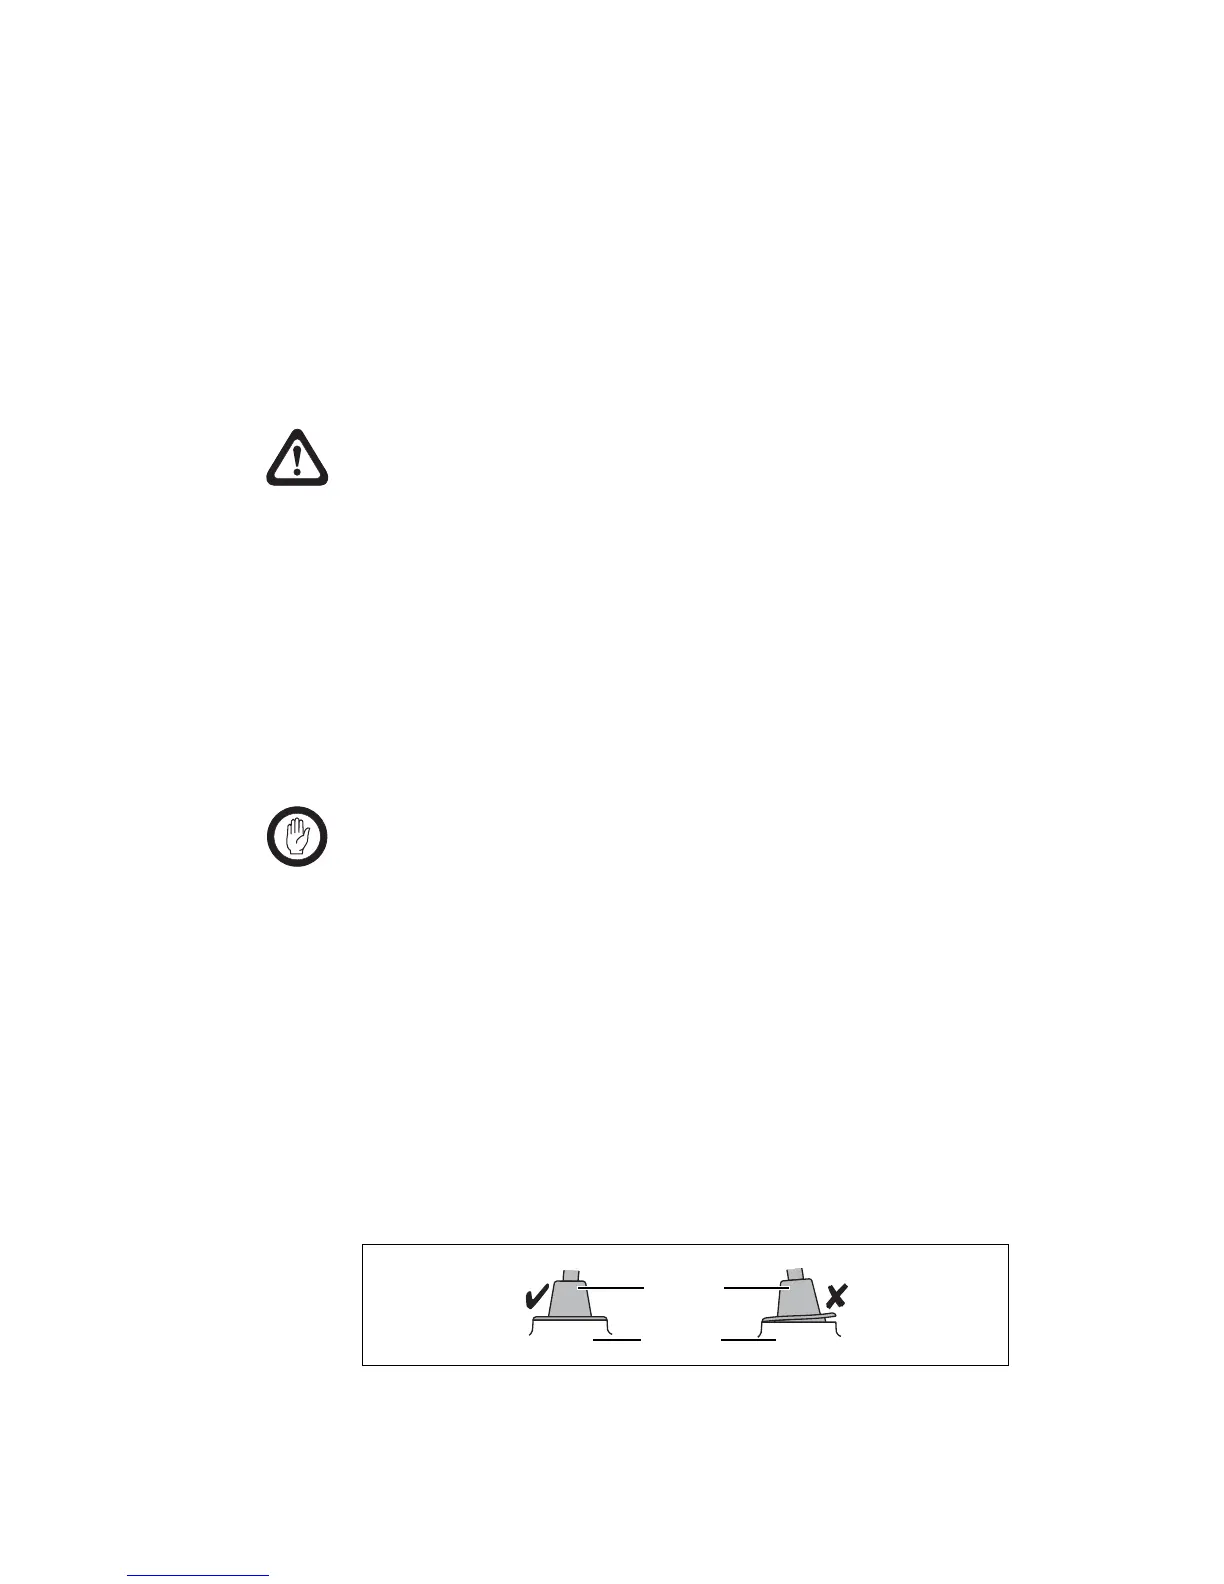
Install both the remote cable grommets, using the following procedure.
Important The remote cable grommets must be installed whenever the
remote cable is plugged into the RJ45 sockets. When
installed, the grommets have two functions:
■ to prevent damage to the RJ45 sockets when there is
movement of the remote cable, and
■
to ensure that the radio and remote control-head assembly
is sealed against water, dust and other environmental
hazards.
1. Slide the grommet along the remote cable and push two adjacent
corners of the grommet into the RJ45 socket cavity.
2. Squeeze the grommet and push the remaining corners into position.
3. Check that the grommet is seated correctly in the cavity.
Figure 23.2 Correct remote cable grommet seating
microphone
grommet
control head
 Loading...


