2000-OSM, F1 8-9
11. Separate the vaporizer assembly from the vaporizer chamber.
12. Remove the LSV to the workbench.
Disassembly on the Workbench
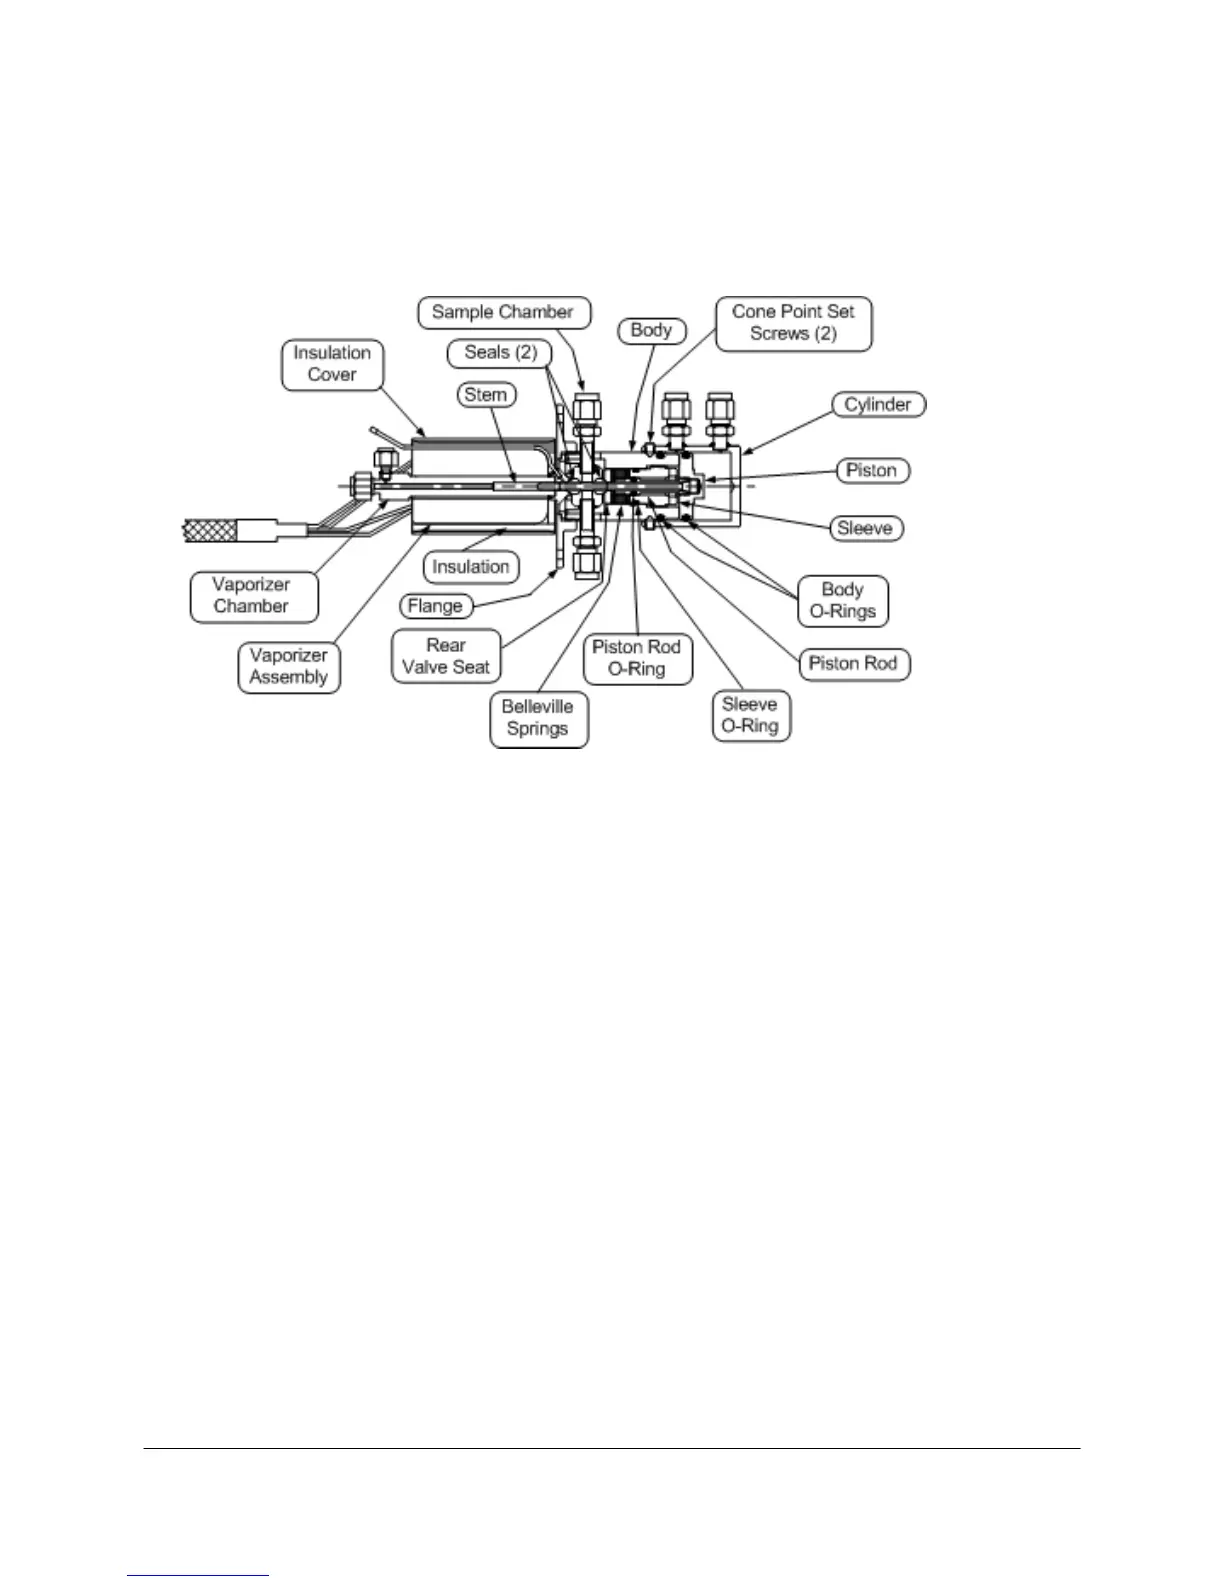
See Figure 8-6 for typical sample valve component location.
Figure 8-6. LIQUID SAMPLE VALVE COMPONENT LOCATION
1. Perform “Removing the LSV from the Analyzer.”
2. Move the LSV to the workbench.
3. Remove the two cone point set screws from the cylinder.
4. Slide the cylinder off the piston and body.
5. Mark on the body the location of the sample chamber.
6. Using a hex key wrench, rotate the sleeve counterclockwise until it is loose.
7. Unscrew the body from the flange and vaporizer chamber.
8. Remove the vaporizer chamber from the flange.
9. Slide the seal from the stem using the sample chamber.
10. Withdraw the piston and the piston rod from the sleeve.
11. This will free the seal from the stem.
12. Replace the seals.
13. Inspect the stem for visible imperfections. If imperfections are found, replace the stem.
14. Remove the rear valve seat from the body.