37-41
Cisco Security Appliance Command Line Configuration Guide
OL-10088-01
Chapter 37 Configuring WebVPN
WebVPN End User Setup
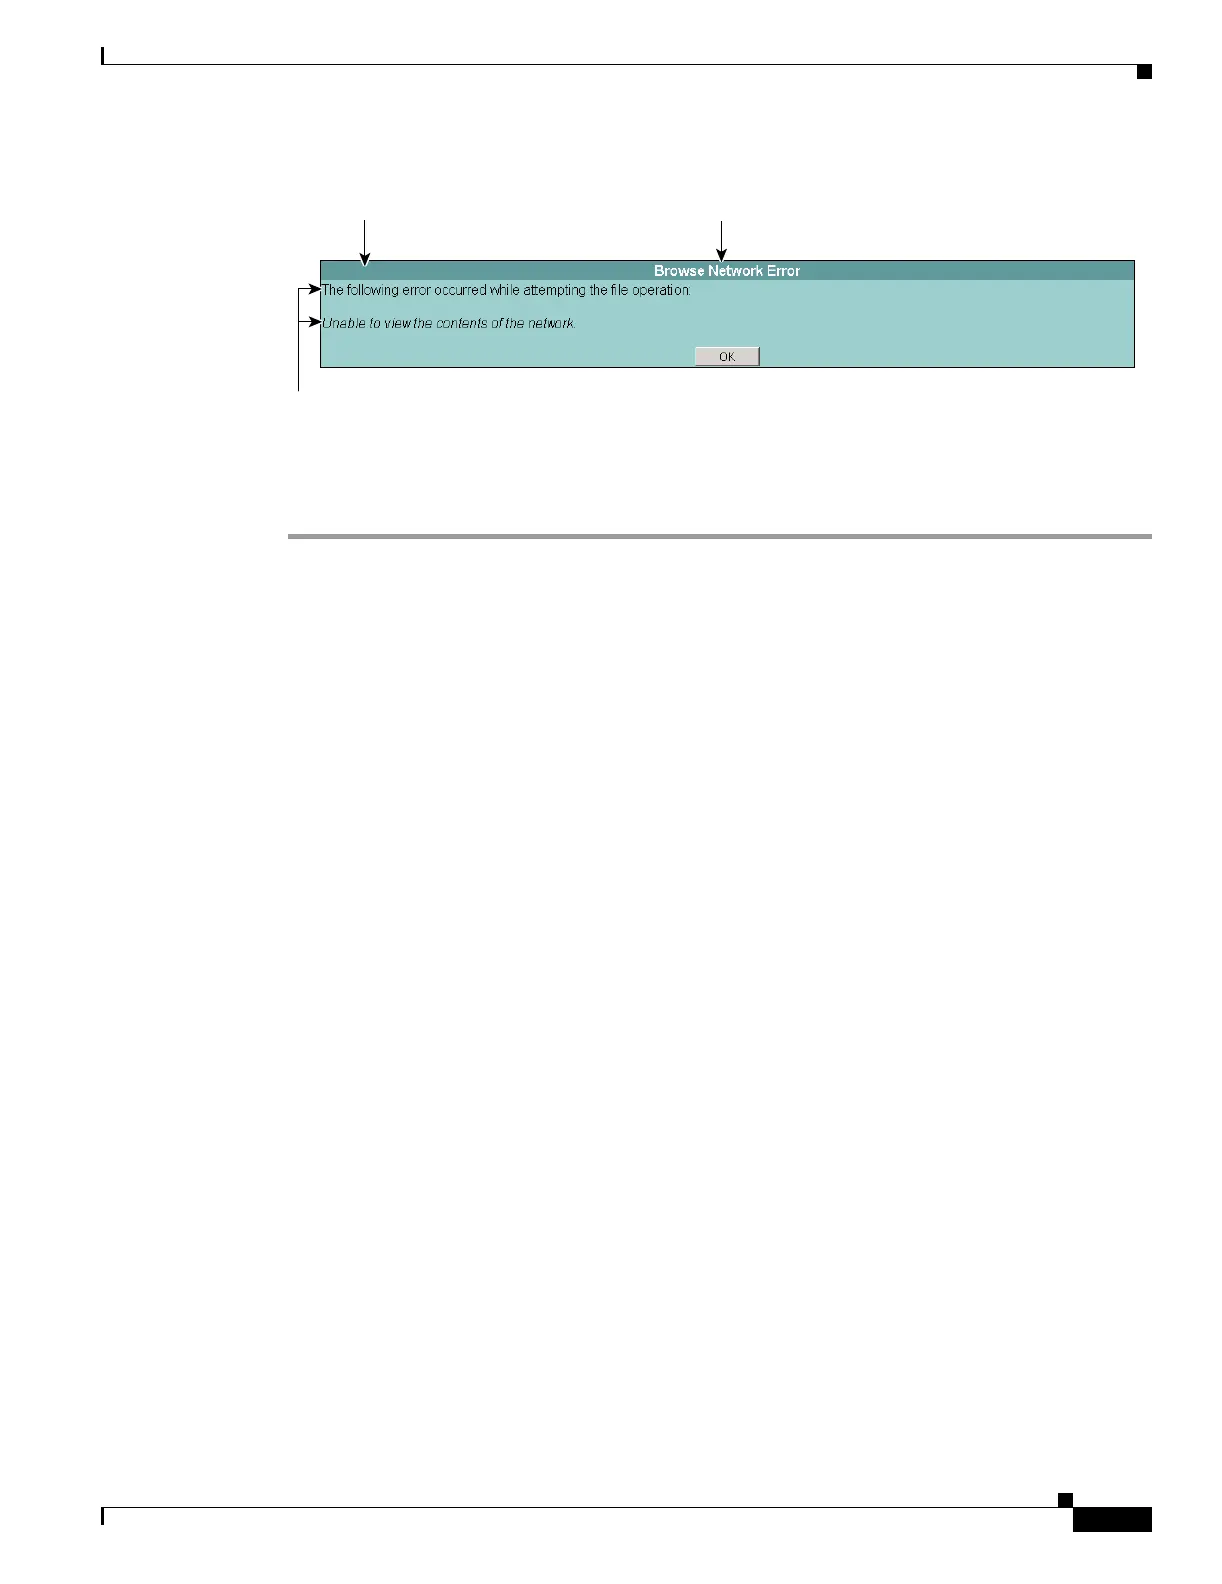
Figure 37-14 Dialog Message and Associated CLI Command
The following procedure customizes every element of the dialog message and includes examples of the
commands:
Step 1 Enter WebVPN customization mode using the customization command from webvpn mode:
hostname(config)# webvpn
hostname(config-webvpn)# customization cisco
hostname(config-webvpn-custom)#
Step 2 Customize the border of the dialog messages with the dialog border command:
[no] dialog border style value
hostname(config-webvpn-custom)# dialog border style color:blue
Step 3 Change the appearance of the title using the dialog title command:
[no] dialog title style value
hostname(config-webvpn-custom)# dialog title style font:bolder
Step 4 Change the appearance of the message using the dialog message command:
[no] dialog message style value
hostname(config-webvpn-custom)# dialog message style font:italic
Applying Customizations to Tunnel Groups, Groups and Users
After you create a customization, you can apply the customization to a tunnel group, a group, or a user,
with the customization command. The options displayed with this command are different depending on
the mode you are in.
For more information about configuring tunnel groups, group policies, and users, see Chapter 30,
“Configuring Tunnel Groups, Group Policies, and Users”.
Applying Customizations to Tunnel Groups
To apply a customization to a tunnel group, use the customization command from tunnel group webvpn
mode:
[no] customization name
name is the name of a customization to apply to the tunnel group.
To remove the command from the configuration, and remove a customization from the tunnel group, use
the no form of the command.
dialog title style
value
dialog border style
value
dialog message style
value
148963

 Loading...


