P/N 960-100189RA_Rev. A {EDP #148850} © 2009, Japan CashMachine Co., Limited
Calibration and Testing VEGA™ Series BankNote Validator Section 6
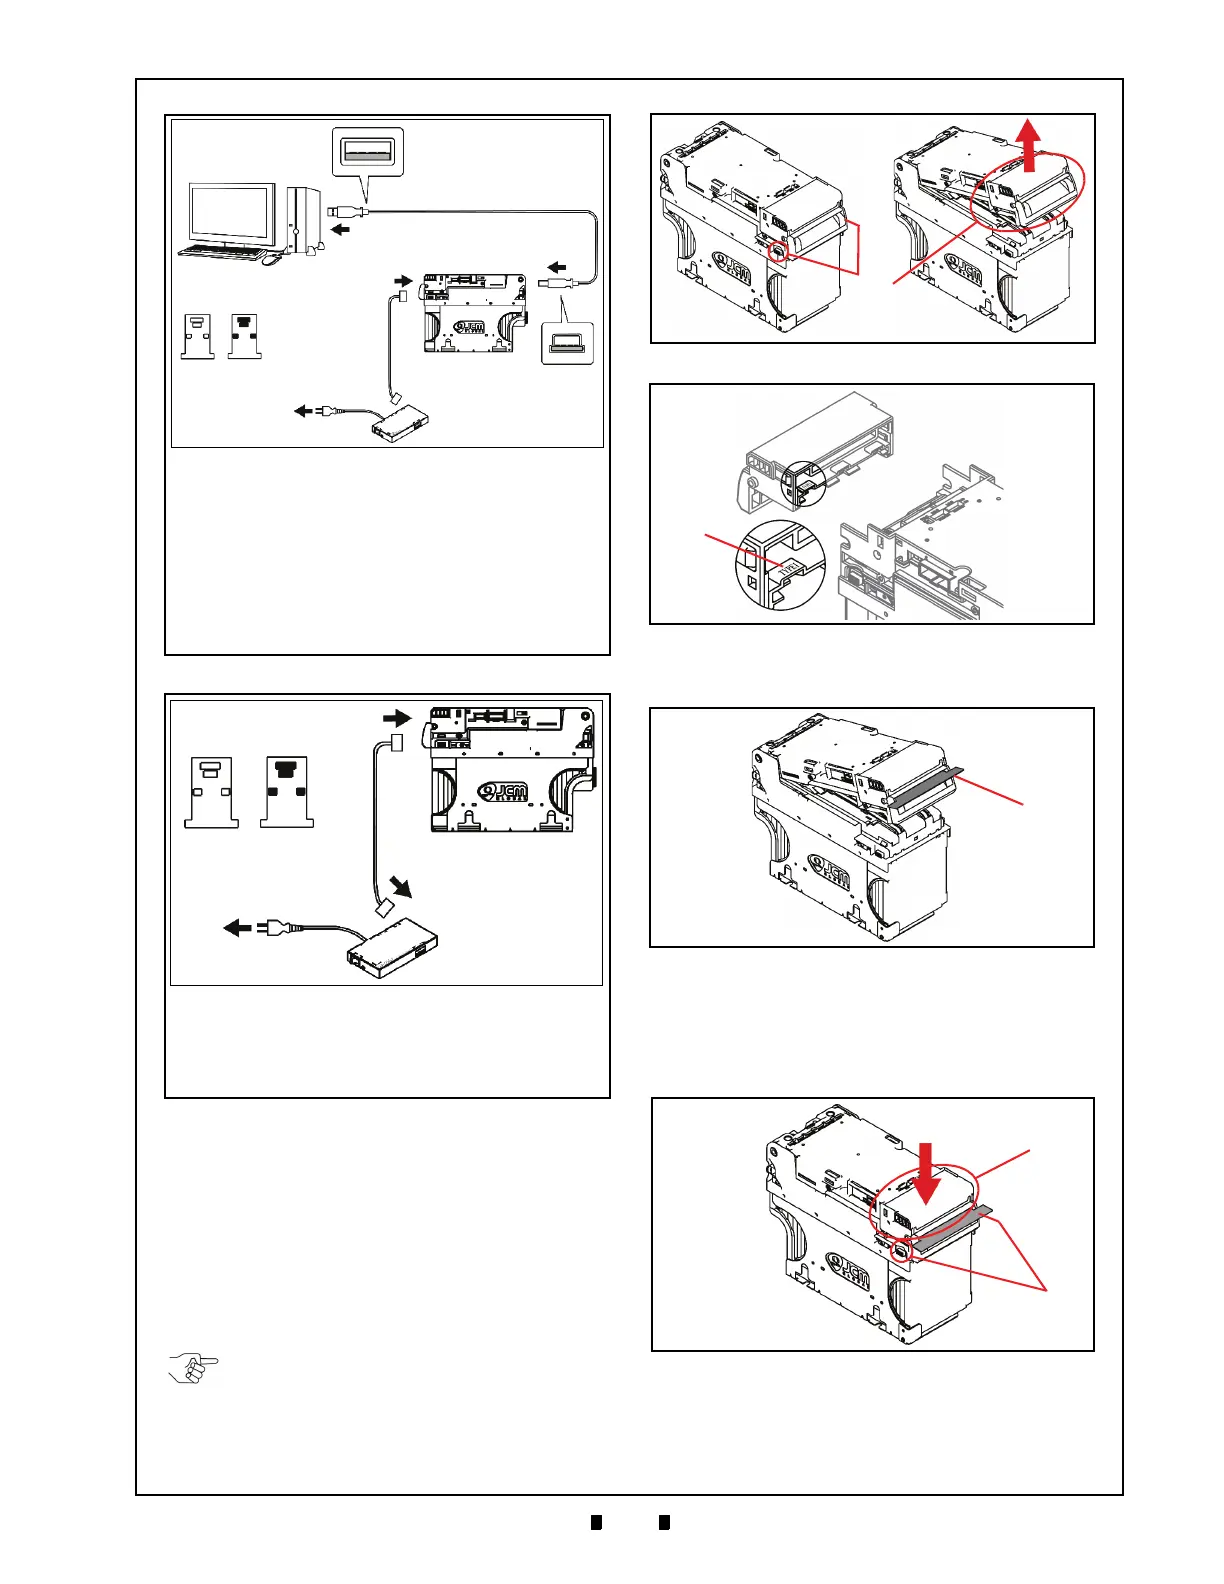
Reference Paper Usage
Calibration using the White and Black Reference
Paper requires the same procedure. Perform the
following steps to calibrate the VEGA Unit using
the individual calibration papers.
1. Press in on the Upper Transport Section’s left and
right side Open/Close Buttons (See Figure 6-17
a), and lift the Upper Section open (See Figure 6-
17 b).
2. Place the Reference Paper into the Banknote
Insertion Slot.
3. Close the Upper Transport Section by pressing
downward until it
click locks firmly in place
(See Figure 6-20 a), and ensure that the both side
Open/Close Buttons on the Upper Transport
Section are locked (See Figure 6-20 b).
This completes of the Reference Paper Placement
procedure.
Figure 6-15 PC Calibration Tools & Cabling
c-1
c-2
a
g
h
To PC USB Port
VEGA USB
Connector
Interface
Connector
To AC Power
b
f
d
c
o
e
a) PC (OS: Windows XP)
b) Adjustment Program (VEGA_Adjustment.exe)
c) USB Cable
c-1) USB A Terminal
c-2) USB Mini B Terminal
d) VEGA Unit
e) Harness
f) Power Supply (e.g., UAC, MIB232, etc.).
g) White Reference Paper (KS-318)
h) Black Reference Paper (KS-319).
Figure 6-16 Non-PC Calibration Tools & Cabling
a) VEGA Unit
b) Power Supply (e.g., UAC, MIB232, etc.)
c) Harness
d) White Reference Paper KS-318
e) Black Reference Paper KS-319.
Interface Connector
To AC Power
d
e
a
c
b
Receptacle
NOTE: To proceed calibration, the Bezel
type change is required to “TYPE 1”.
Ensure that the Bezel is “TYPE 1”
(See Figure 6-18) before the Reference
Paper insertion.
Figure 6-17 Opening VEGA For Paper Placement
Figure 6-18 Type Name Location
Figure 6-19 Placing Reference Paper
Figure 6-20 Locking Reference Paper In Place

 Loading...


