P/N 960-100189RA_Rev. A {EDP #148850} © 2009, Japan CashMachine Co., Limited
Calibration and Testing VEGA™ Series BankNote Validator Section 6
described in
Reference Paper Usage
on page 6-
5 of this Section.
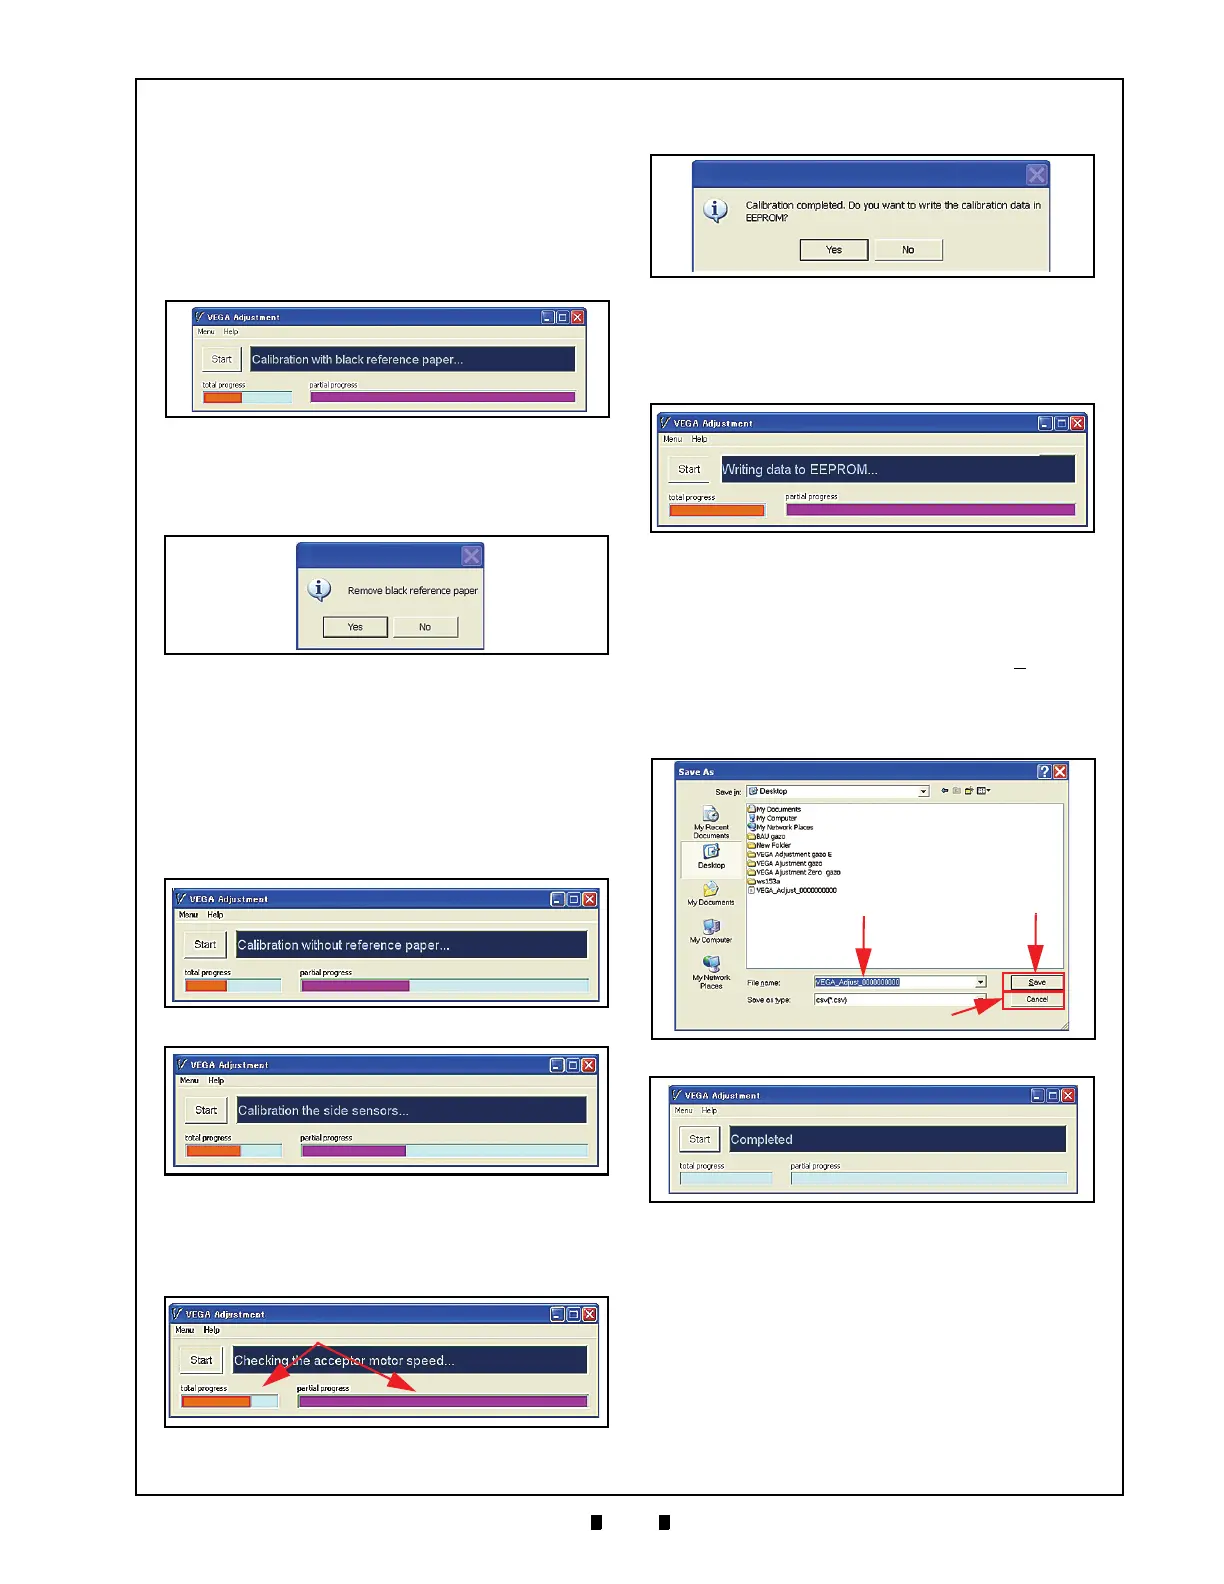
13. Set the Black Reference Paper in place (
See
Reference Paper Usage
on page 6-5 of this
Section).
14. When the black Reference Paper is set in place,
Mouse-click on the
“
Yes
” Screen Button to
begin the Black Reference Paper adjustment
procedure (See Figure 6-27).
15. Once the Black Reference Paper adjustment
procedure is complete, the Message Screen
shown
in Figure 6-28 will appear.
16. Remove the Black Reference Paper. To remove
the
black Reference Paper, following reverse
procedure for loading the paper. (
See Reference
Paper Usage
on page 6-5 of this Section).
17. Once the Black Reference Paper is removed,
Mouse-click on the
“
Yes
” Screen Button
(See Figure 6-29) to begin the Non-Paper adjust-
ment procedure.
18. Once the Non-paper adjustment procedure is
complete, the Motor Speed Te
st program will
automatically begin and test progress will appear
as shown by the two Figure 6-31a Barographs.
19. Once the Motor Speed Test is complete, the
message screen shown in Figure 6-32 will appear.
20. Mouse-click on the “
Yes
” Screen Button to begin
writing the calibration results into the VEGA
Unit’s EEPROM (See Figure 6-33).
21. When the Adjustment Data results are com-
pletely written into EEPROM, the screen shown
previo
usly in Figure 6-34 will be used to save the
data onto the PC. Mouse-click on the “
Save
”
Screen Button (See Figure 6-34 a) to retain the
data results, or Mouse-click on the “
Cancel
”
Screen Button (See Figure 6-34 b) to end the
adjustment procedure without saving the data.
This complete the Calibration Adjustemnt Pro-
cedures.
VEGA_A
DJUSTEMENT
_Z
ERO
.
EXE
P
ROGRAM
U
SE
To use the
VEGA_Adjustment_Zero.exe
Program,
proceed as follows:
1. Turn the VEGA Unit’s power ON.
2. Set DIP Switch Block No. 1, Switches #1, #2, #3
& #5
ON (See Figure 6-36).
Figure 6-27 Black Reference Paper Calibration
Progress Screen
Figure 6-28 Black Reference Paper Removal
Request Screen
Figure 6-29 Non-Paper Calibration Screen 1
Figure 6-30 Non-Paper Calibration Screen 2
Figure 6-31 Motor Speed Test
Figure 6-32 Adjustment Complete; Request
Writing Data To Memory Screen
Figure 6-33 Writing EEPROM Data Progress
Screen
Figure 6-34 The Save As” PC Screen
Figure 6-35 VEGA Adjustment Complete Screen

 Loading...


