P/N 960-100189RA_Rev. A {EDP #148850} © 2009, Japan CashMachine Co., Limited
Section 6 VEGA™ Series BankNote Validator Calibration and Testing
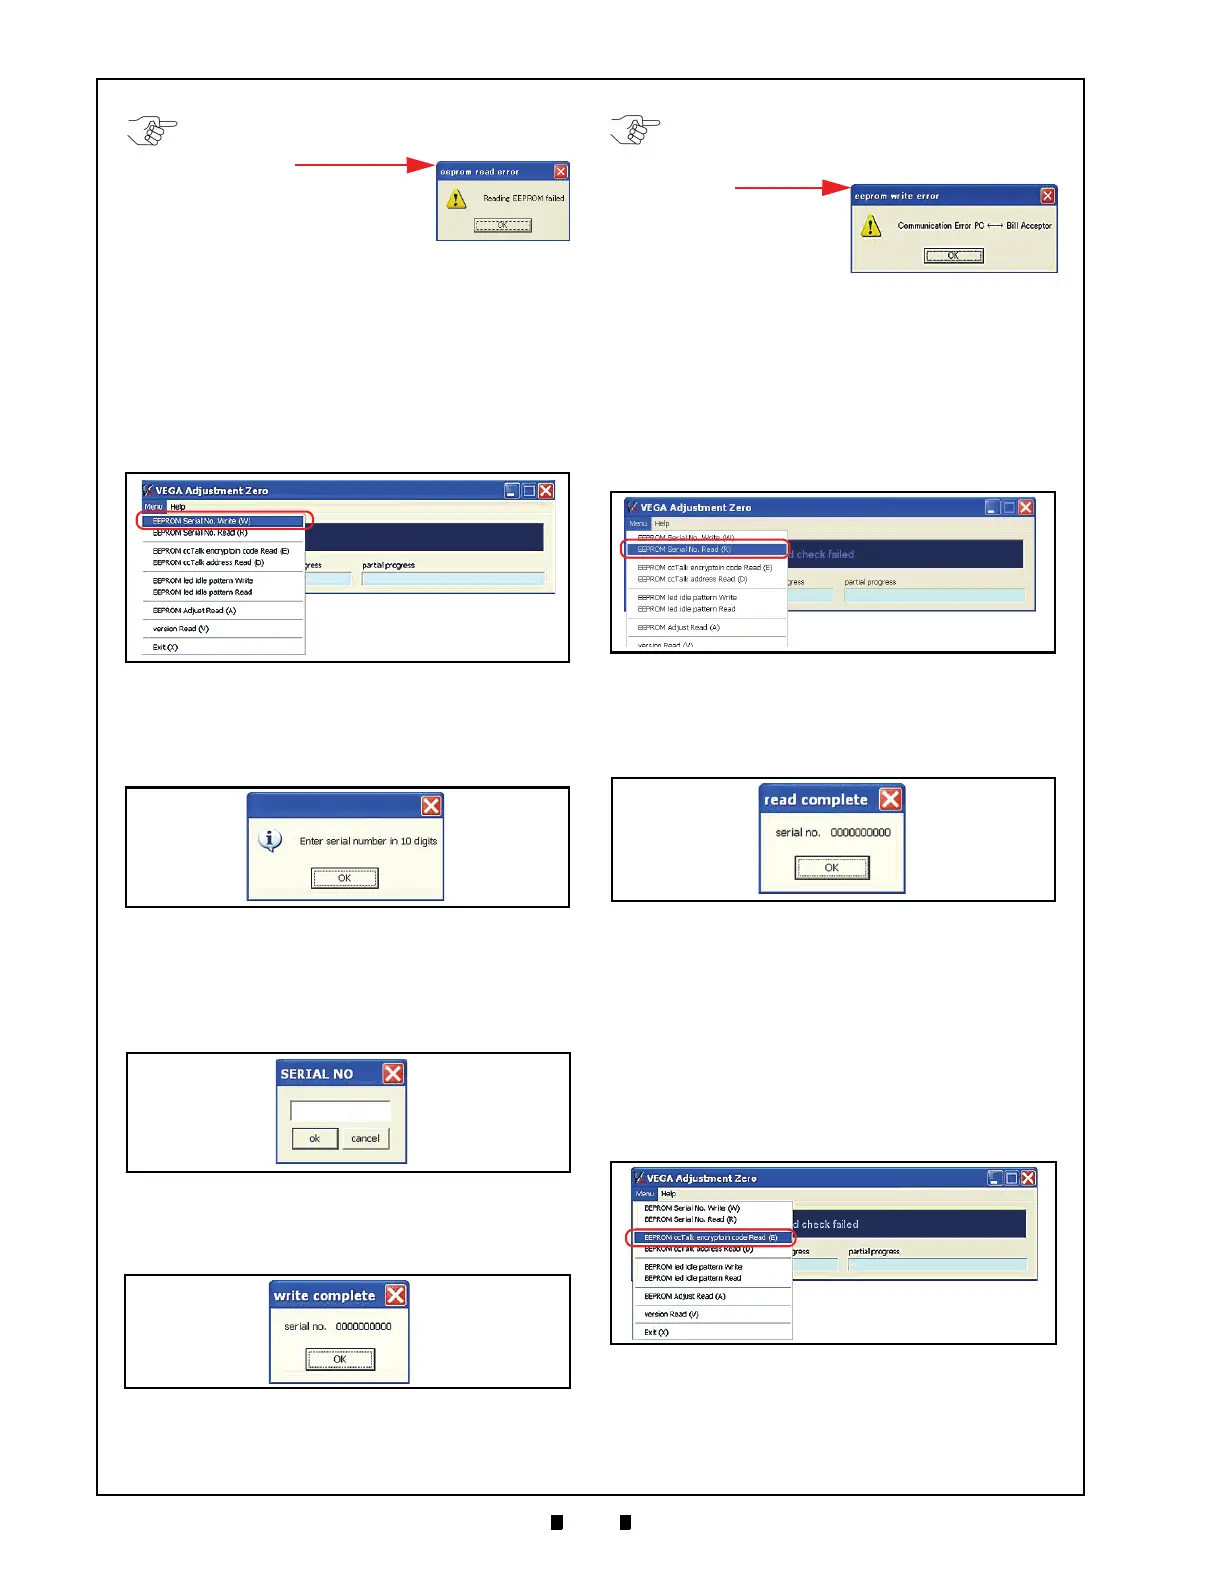
Writing a Serial Number
Perform following steps to write a Serial Number
into EEPROM.
1. Mouse-click and hold-down on the “
VEGA_
Adjustment
” Tool Bar “
Menu
” selection, then
2. slide-down select “
EEPROM Serial No. Write
(W)
” from the Pull-Down Menu selections
(See Figure 6-63).
3. The Dialog Screen message shown in Figure 6-
64 will appear. When it does, Mouse-click on its
Serial Number Input Request “
OK
” Dialog
Screen Button.
4. The
SERIAL NO
input Dialog Screen shown in
Figure 6-65 will then appear. Type-in the new
VEGA Serial Number as a
One-byte Character;
then Mouse-click on its “
ok
” Screen Button
(See Figure 6-65).
5. When the Serial Number
is completely written
into VEGA Memory, the Dialog Screen message
shown in Figure 6-66 will appear.
Reading a Serial Number
Perform following steps to read a Serial Number:
1. Mouse-click and hold-down on the “
VEGA_
Adjustment
” Tool Bar “
Menu
” selection, then
2. Slide-down select “
EEPROM Serial No. Read
(R)
” from the Pull-Down Menu selections
(See Figure 6-67).
3. The VEGA Unit will send the Serial Number to
the PC
and then the “
read complete
” Serial
Number Dialog Screen shown in Figure 6-68 will
appear.
Reading ccTalk Encryption Code
Perform following steps to read the ccTalk
Encryption Code.
1. Mouse-click and hold-down on the “
VEGA_
Adjustment
” Tool Bar “
Menu
” selection, then
2. Slide-down select “
EEPROM ccTalk encryption
code Read (E)
” from the Pull-Down Menu
selections (See Figure 6-69).
3. The VEGA Unit will send the ccTalk Encryption
Code
to the PC, and then the “
read complete
”
Encryption Code Dialog Screen shown in Figure
6-70 will appear.
NOTE: If reading EEPROM data fails, the
“eeprom read error” Dialog Screen at right
will appear.
Ensure that the USB Cable
is connected and/or the
desired COM Port is
correctly assigned.
Figure 6-63 Menu Bar Pull-Down Selections 1
Figure 6-64 Serial No. Input Request Screen
Figure 6-65 Serial No. Text Input Field Screen
Figure 6-66 Writing Serial No. Complete Screen
NOTE: If a communication error occurs
between the VEGA and PC while writing the
Serial Number the Dialog Screen at right will
appear.
Ensure that the
USB Cable is
connected and/or
the desired COM
Port is correctly assigned.
Figure 6-67 Menu Bar Pull-Down Selections 2
Figure 6-68 Serial No. Read Complete Dialog
Screen
Figure 6-69 Menu Bar Pull-Down Selections 3

 Loading...


