258 Chapter 30: Inputs
PRO6 Live Audio System
Owner’s Manual
Inputs on the GUI
On the two GUI default screens — Overview and Meters — the GUI displays 12 and
four input fast strips, respectively. These correspond to the input bays on the control
surface.
When an input fast strip is selected the GUI’s channel strip displays the channel’s input
channel overview. From this display, you can access processing areas by clicking
within specific sections, while avoiding any controls.
For information on how the GUI displays the input channels, see “GUI” on page 20. For
details of how to operate the GUI, see Chapter 6 “Working With The PRO6 Control
Centre”.
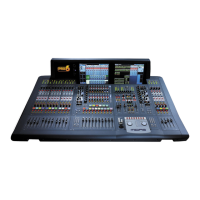
GUI input fast strips
The input fast strips on the GUI (a typical example is shown right) give
an overview of their equivalent versions on the control surface. These
show the gain, bus controls, pan control knob and fader.
The gain trim section changes its appearance to suit the type of control
that has been ‘swapped’ to it (see “Using gain swap” on page 266).
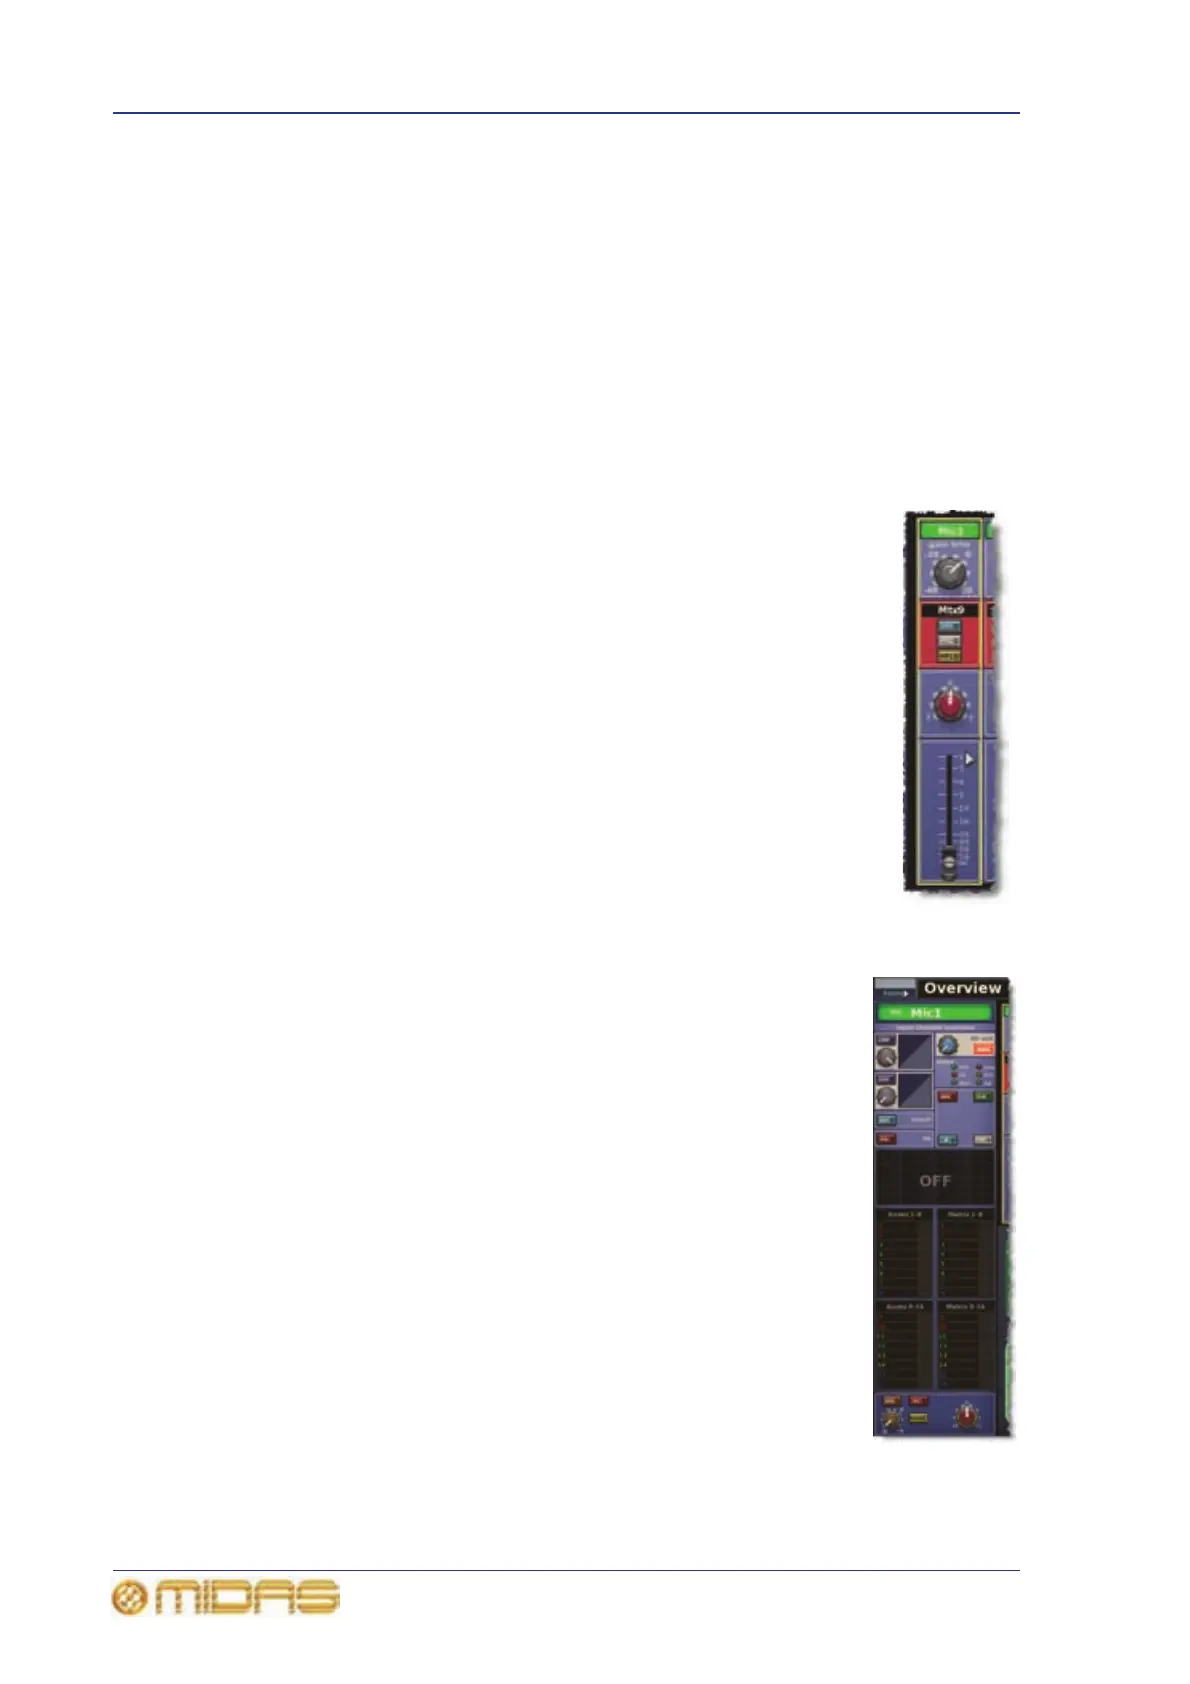
GUI channel strips (inputs)
When an input channel is selected, its overview appears in the
channel strip. This is called the “input channel overview” (shown
right), and provides limited controls and status information. Clicking
a non-control area within a specific section will open that section’s
processing area, which contains a comprehensive set of controls.
The following processing areas are available, which are shown in
Figure 32 “Processing areas available from the input channel
overview display” on page 259:
• Configuration (direct out, safes and gain trim - channel ID,
channel source, filters, linking, swap, delay and processing order)
• Compressor
•Gate
•EQ
•Inserts
•Mix buses
• Masters (faders, solo, panning etc.)
For details of how to navigate the GUI channel strip, see “About GUI
navigation” on page 49.
 Loading...

