3. Extend the jack by turning the jack
crank handle or lever clockwise.
4. Take your hand away from the jack as
soon as the jack is under load and con-
tinue turning the jack crank handle or
lever with one hand.
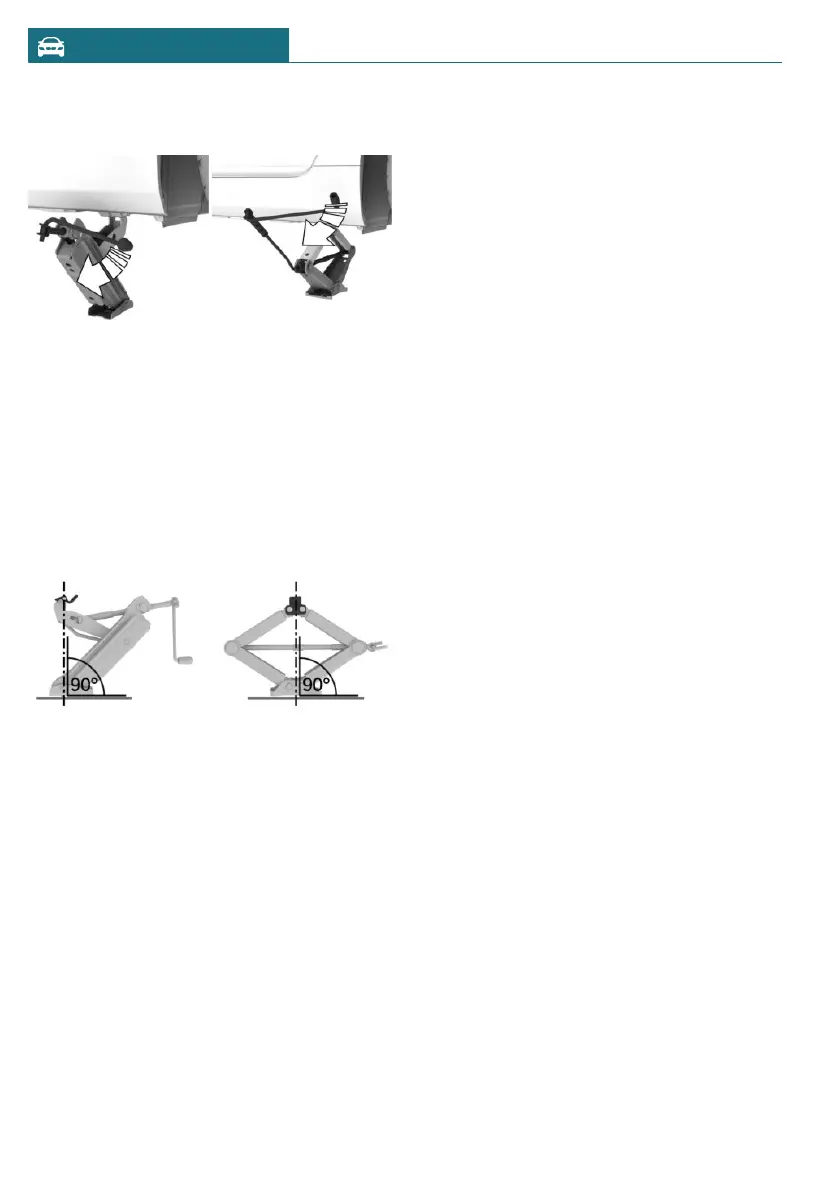
5. Make sure that the car jack foot extends
vertically and is at a right angle beneath
the jacking point.
6. Crank the vehicle up until the vehi-
cle jack has the entire surface on the
ground and the relevant wheel is maxi-
mum 1.2 inches/3 cm above ground.
Mounting a wheel
Mount one emergency wheel only, as re-
quired.
To change a wheel, proceed as follows:
1. Unscrew the lug bolts.
2. Remove the wheel.
3. Put the new wheel or emergency wheel
on and screw in at least two lug bolts in
a crosswise pattern until hand-tight.
When non-original light-alloy wheels of
the vehicle manufacturer are mounted,
the accompanying lug bolts may have to
be used as well.
4. Hand-tighten the remaining lug bolts
and tighten all lug bolts well in a cross-
wise pattern.
5. Turn the jack crank handle counter-
clockwise to retract the jack and lower
the vehicle.
6. Remove the jack and stow it securely.
After the wheel change
After changing the wheel, do the following:
1. Tighten the lug bolts crosswise. The
tightening torque is 101 lbs ft/140 Nm.
2. Stow the faulty wheel in the cargo area,
if necessary.
3. Check the tire pressure at the next op-
portunity and correct as necessary.
4. Re-initialize the Flat Tire Monitor or re-
set the Tire Pressure Monitor.
5. Check to make sure the lug bolts are
tight with a calibrated torque wrench.
6. Drive to the nearest authorized service
center or another qualified service cen-
ter or repair shop, then have the dam-
aged tire replaced.
Seite 314
MOBILITY Wheels and tires
314
Online Edition for Part no. 01405B37A59 - II/24

 Loading...