1E-4 Engine Lubrication System:
5) Stop the engine and remove the oil pressure gauge
and attachment.
6) Reinstall the main oil gallery plug and tighten it to the
specified torque.
CAUTION
!
Use a new gasket to prevent oil leakage.
Tightening torque
Main oil gallery plug: 16 N·m (1.6 kgf-m, 11.5 lb-
ft)
7) Check the engine oil level. Refer to “Engine Oil and
Filter Change in Section 0B (Page0B-9)”.
Repair Instructions
Engine Oil and Filter Replacement
B705H11506022
Refer to “Engine Oil and Filter Change in Section 0B
(Page0B-9)”.
Oil Sump Filter Removal and Installation
B705H11506008
Removal
1) Dismount the engine. Refer to “Engine Assembly
Removal and Installation in Section 1D (Page1D-6)”.
2) Separate the crankcase. Refer to “Engine Bottom
Side Disassembly in Section 1D (Page1D-37)”.
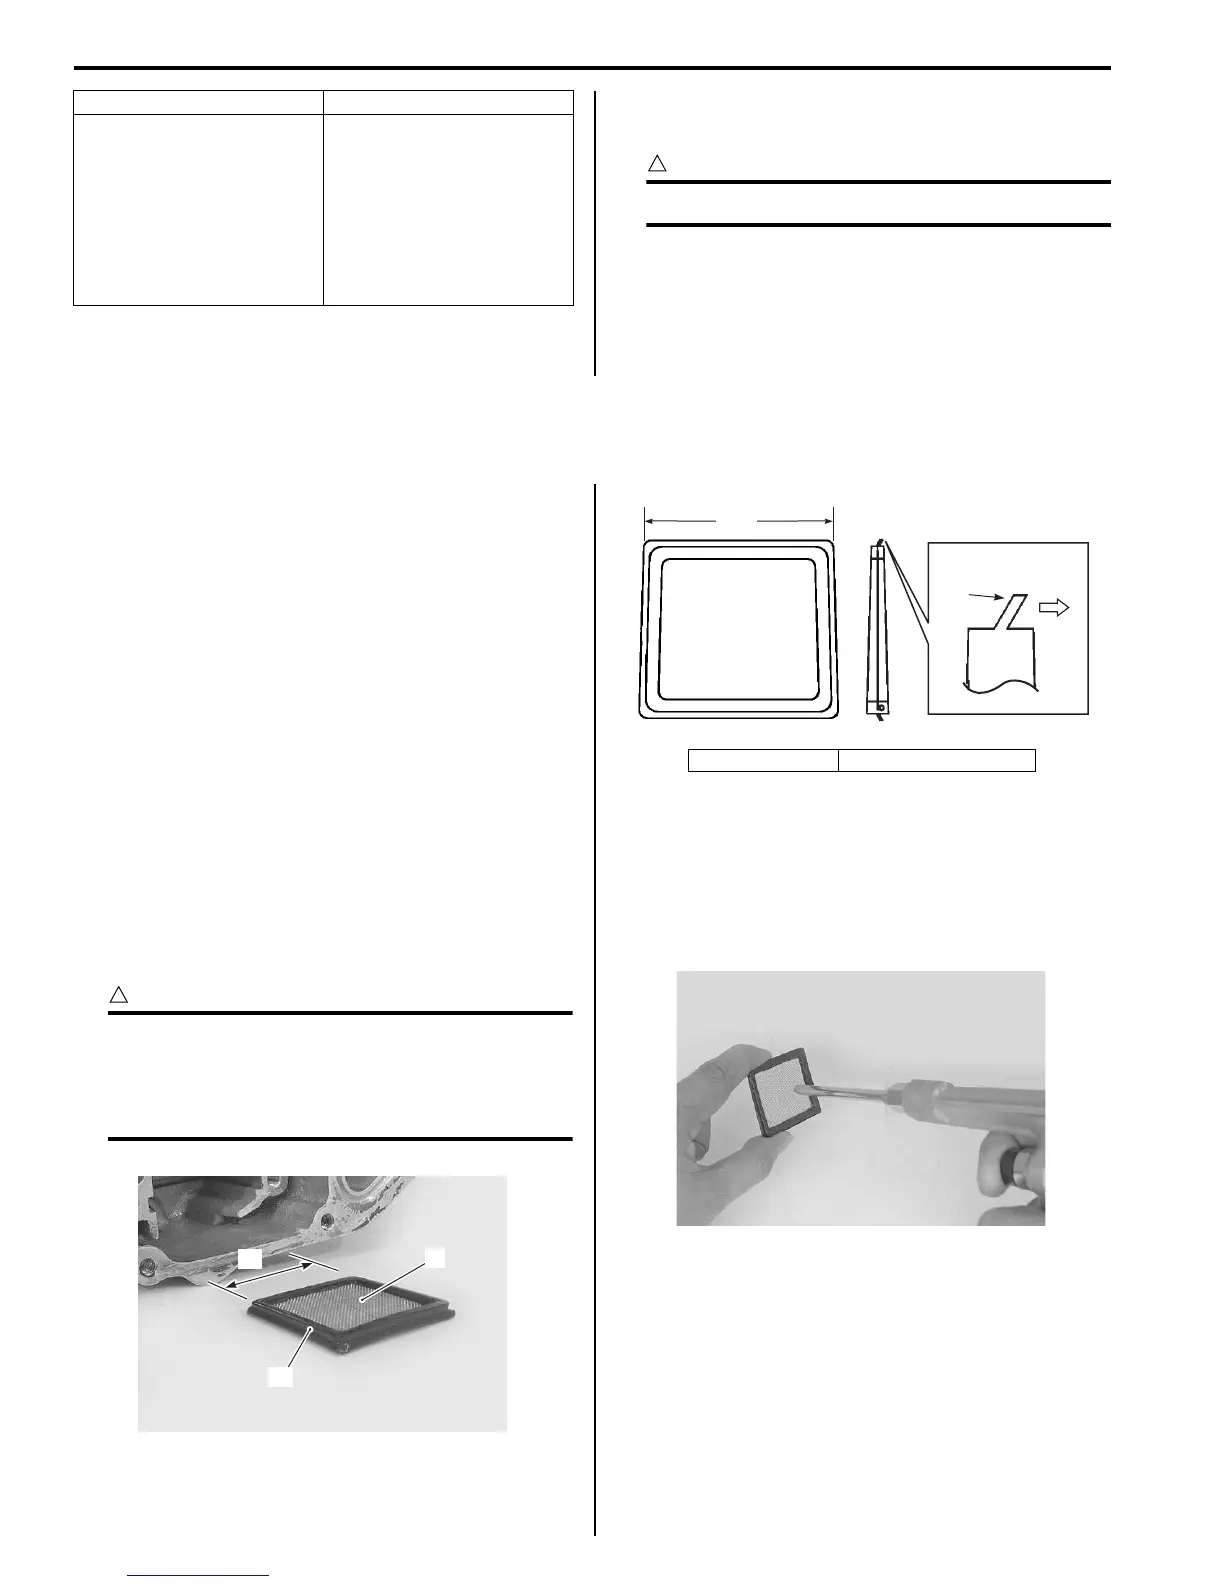
3) Remove the oil sump filter from the left crankcase.
Refer to “Engine Bottom Side Disassembly in
Section 1D (Page1D-37)”.
Installation
Install the oil sump filter in the reverse order of removal.
Pay attention to the following points:
• Install the oil sump filter (1).
CAUTION
!
• The lip “A” of the oil sump filter should be
positioned downward.
• The shorter side “B” of the oil sump filter
should be positioned inside.
Oil Sump Filter Cleaning
B705H11506009
Clean the oil sump filter in the following procedures:
1) Remove the oil sump filter. Refer to “Oil Sump Filter
Removal and Installation (Page1E-4)”.
2) Clean the oil sump filter using compressed air.
3) Install the oil sump filter. Refer to “Oil Sump Filter
Removal and Installation (Page1E-4)”
High oil pressure Low oil pressure
• Engine oil viscosity is too
high
• Clogged oil passage
• Combination of the
above items
• Clogged oil filter
• Oil leakage from the oil
passage
• Damaged O-ring
• Defective oil pump
• Combination of the
above items
1
“A”
“B”
I705H1150003-01
“A”: Lip “B”: Shorter side
“A”
“B”
Downside
I705H1150004-01
I705H1150005-01
 Loading...