6. Replacing Parts
6-1-5. Adjusting the tension of Platen Belt and Reduction Belt
Prepare the Sonic belt tension meter (Unitta # U-507).
Weight Width Span Tension
Belt tension meter
Reference Value
g/mm (W) x m (L) mm mm N
Platen Belt 752
Reduction Belt
2.5 9
188
40 - 50
<Note>
Make sure that the Connector between the Platen Motor and the Main PCB should be disconnected. (Refer to
“6-1-3. Assembling / Disassembling of the Platen”.)
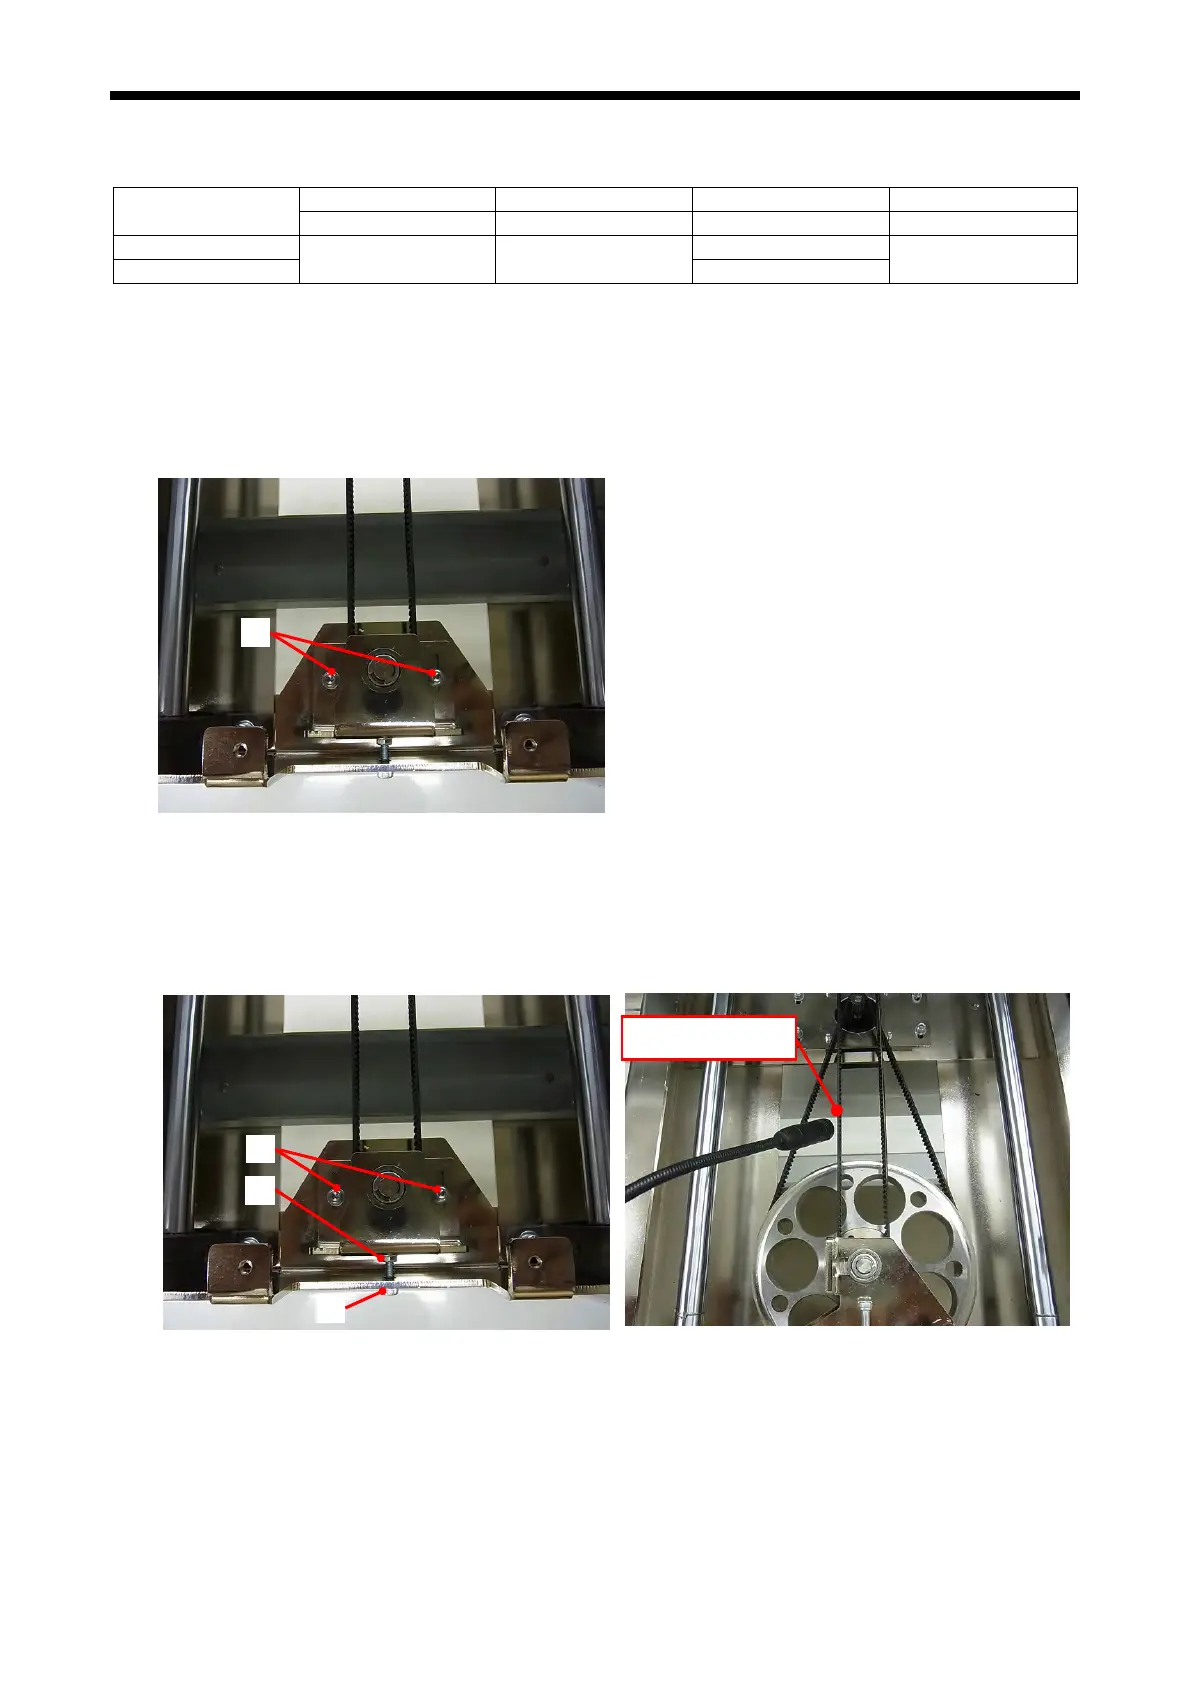
Platen Belt
1. Loosen two Bolt Sockets (1).
(1)
2. Loo
sen the Nut 2 M4 (2) and adjust the Bolt Socket (3) by checking the tension with the belt tension
meter.
<Note> Move the Platen Arm at the rearmost position and check the tension at the left side of the Belt, by
flipping it with your finger.
・The tension increases by turning the Bolt Socket clockwise.
・The tension decreases by turning the Bolt Socket counter-clockwise.
Flipping point
GT-3 Series
133
3. Scre
w the Nut 2 M4 (2) and the two Bolt Sockets (1), load and unload the Platen by hand to make it move
smooth, and then check the tension again.
<Note> Repeat the steps 1 to 3 if the tension is out of the reference value.
4. Connect the connector from the Platen Motor to the Main PCB.
(2)
(1)
(3)

 Loading...