6. Replacing Parts
6-1-30. Waste Ink Tubes
Required Tool
Phillips screwdriver
Disassembling
1. Remove the Maintenance Unit. (Refer to “6-1-16. Assembling / Disassembling of the Maintenance Unit”.)
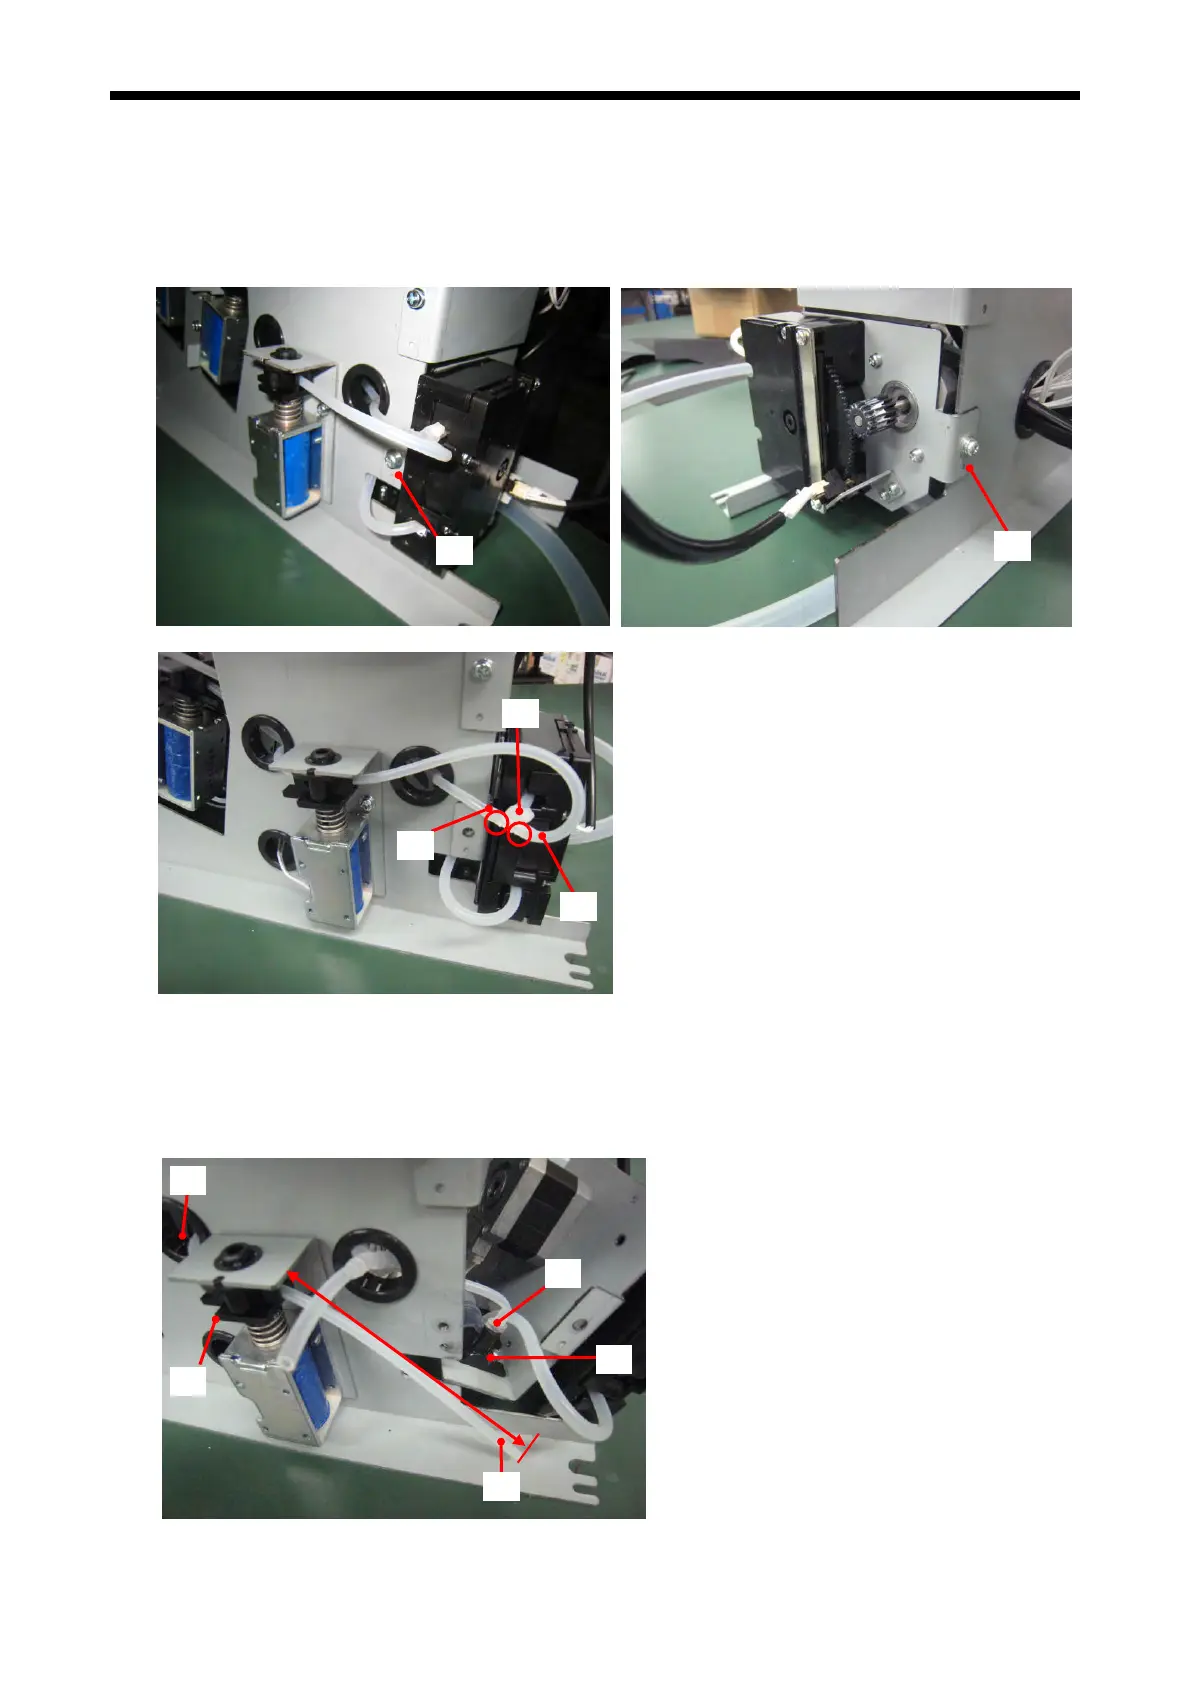
2. Remove the two screws (1) that fix the Pump Holder from the both sides.
3. Remove the Joint Tube (3) and the Capping Tube (4) from the T-shaped Tube Joint (2).
Tube Replacement for the open side
(1)
(1)
(4)
(3)
(2)
4.
Pull out the Cappin
g Tube (4) from the Tube Joint (6) in the Waste Ink Joint (5), and pull out the Plunger
Head (7) by pushing down. Pass through the new Capping Tube through the Bush (8) by pushing down
the Plunger Head (7) and connect the Tube Joint (6). The length of the Capping Tube should be 110 ± 5
mm from the edge of the Solenoid to the Pump side.
(4)
(8)
(7)
(6)
(5)
GT-3 Series
206
 Loading...