GT-3 Series
6. Replacing Parts
307
6-1-43. Felts on Cartridge Base
Required Tool
Phillips screwdriver Plus
Stubby screwdriver Plus (7 cm or shorter)
Plustic gloves
Paper or cloth with less dust
Replace the Felts when you give some operation to the Cartridge Base and find they are very dirty.
<Note>
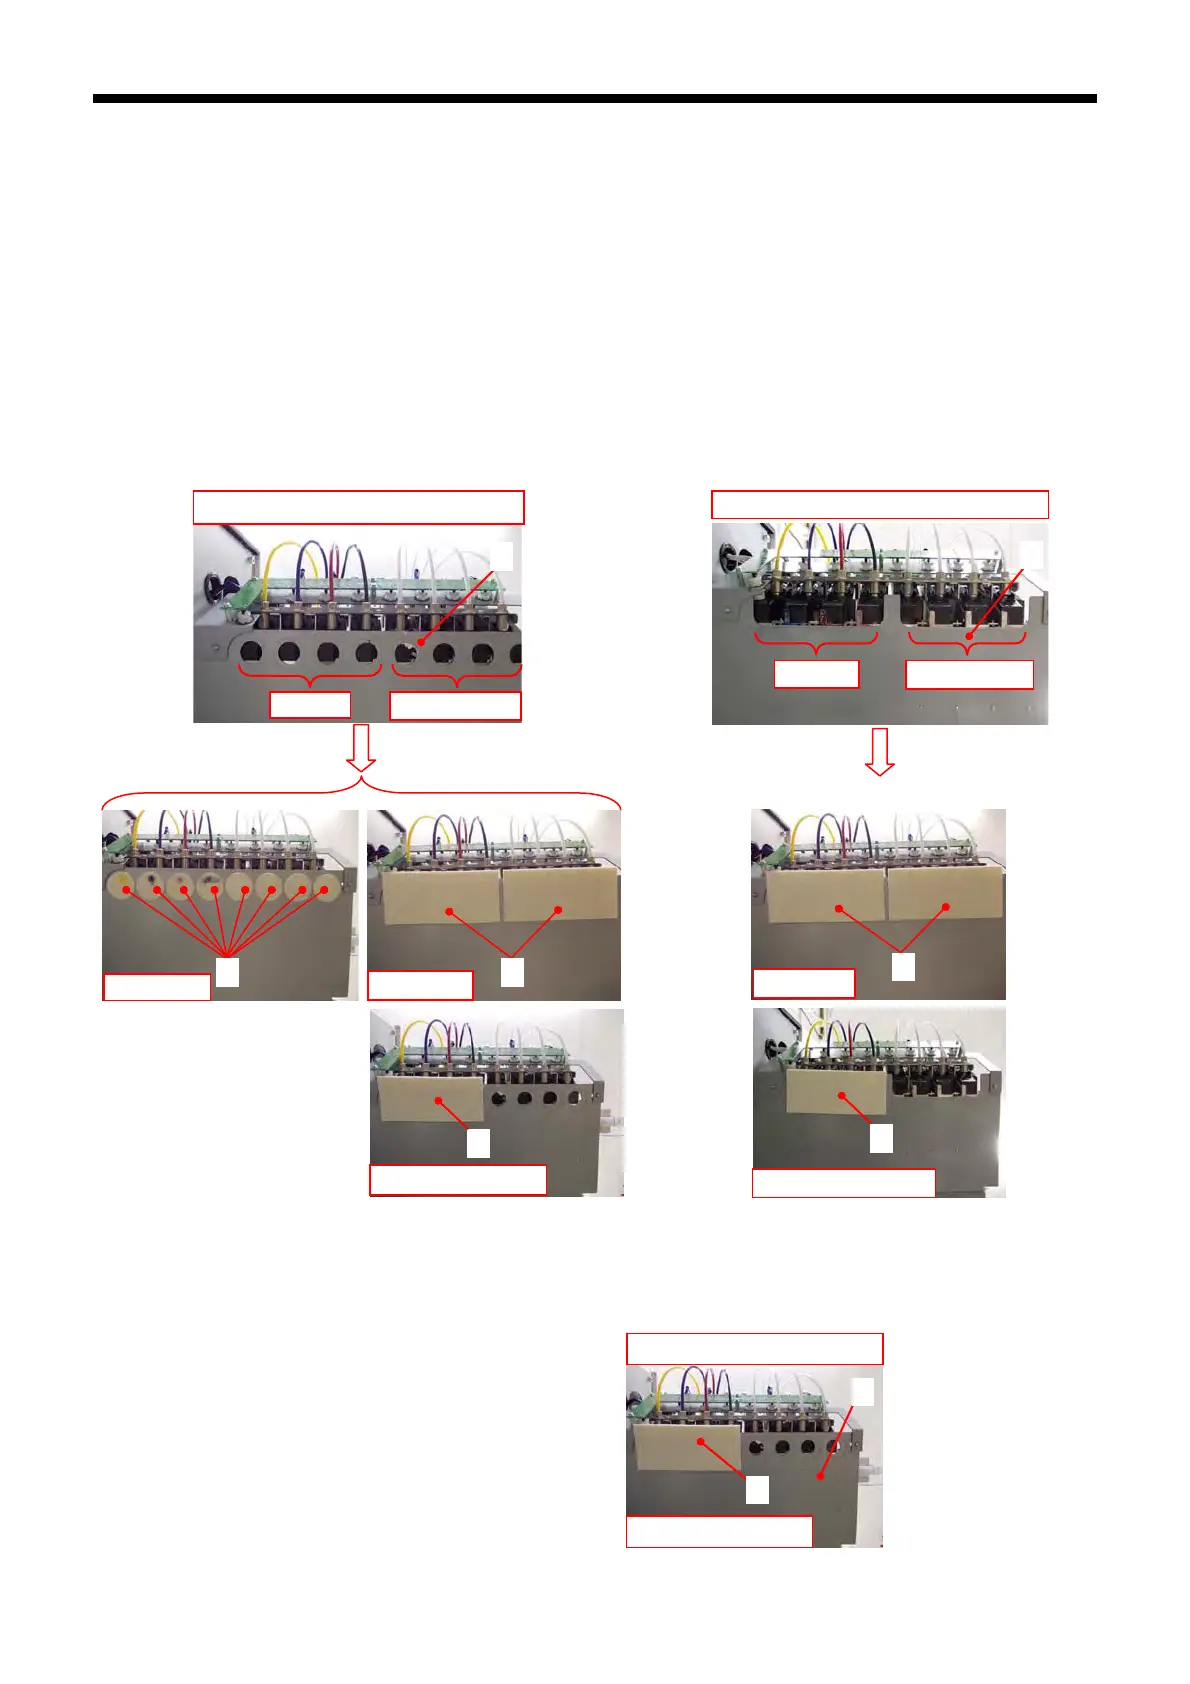
There are two types of Cartridge Base (1), with round holes / U grooves, two types of Felts (2), round and
square),and there are three ways to apply those felts in pattern 1 to 3.
Cartridge Base (Round holes)
Cartridge Base (U grooves)
(1)
(1)
Y, C, M, K W4,W3,W2,W1
W4,W3,W2,W1
Y, C, M, K
(2)
(2) (2)
Pattern 3
Pattern 2
Pattern 1
The
supply part Felt (2) is square.
・Apply two Felts on GT-381 and GT-361; one for Color side, the other for White side.
・Apply one Felts on GT-341 for Color side.
Pattern 1 for GT-341:
Remove all the eight round Felts (2) with dirty ink.
Apply the new square Felt (2) as shown in the right photo.
Pattern 3 for GT-341
(2)
(2)
Pattern 2 for GT-341
Cartridge Base (round holes)
(1)
(2)
Pattern 1 forGT-341

 Loading...