6. Replacing Parts
6-1-11. Leveling of the Platen Top Plate
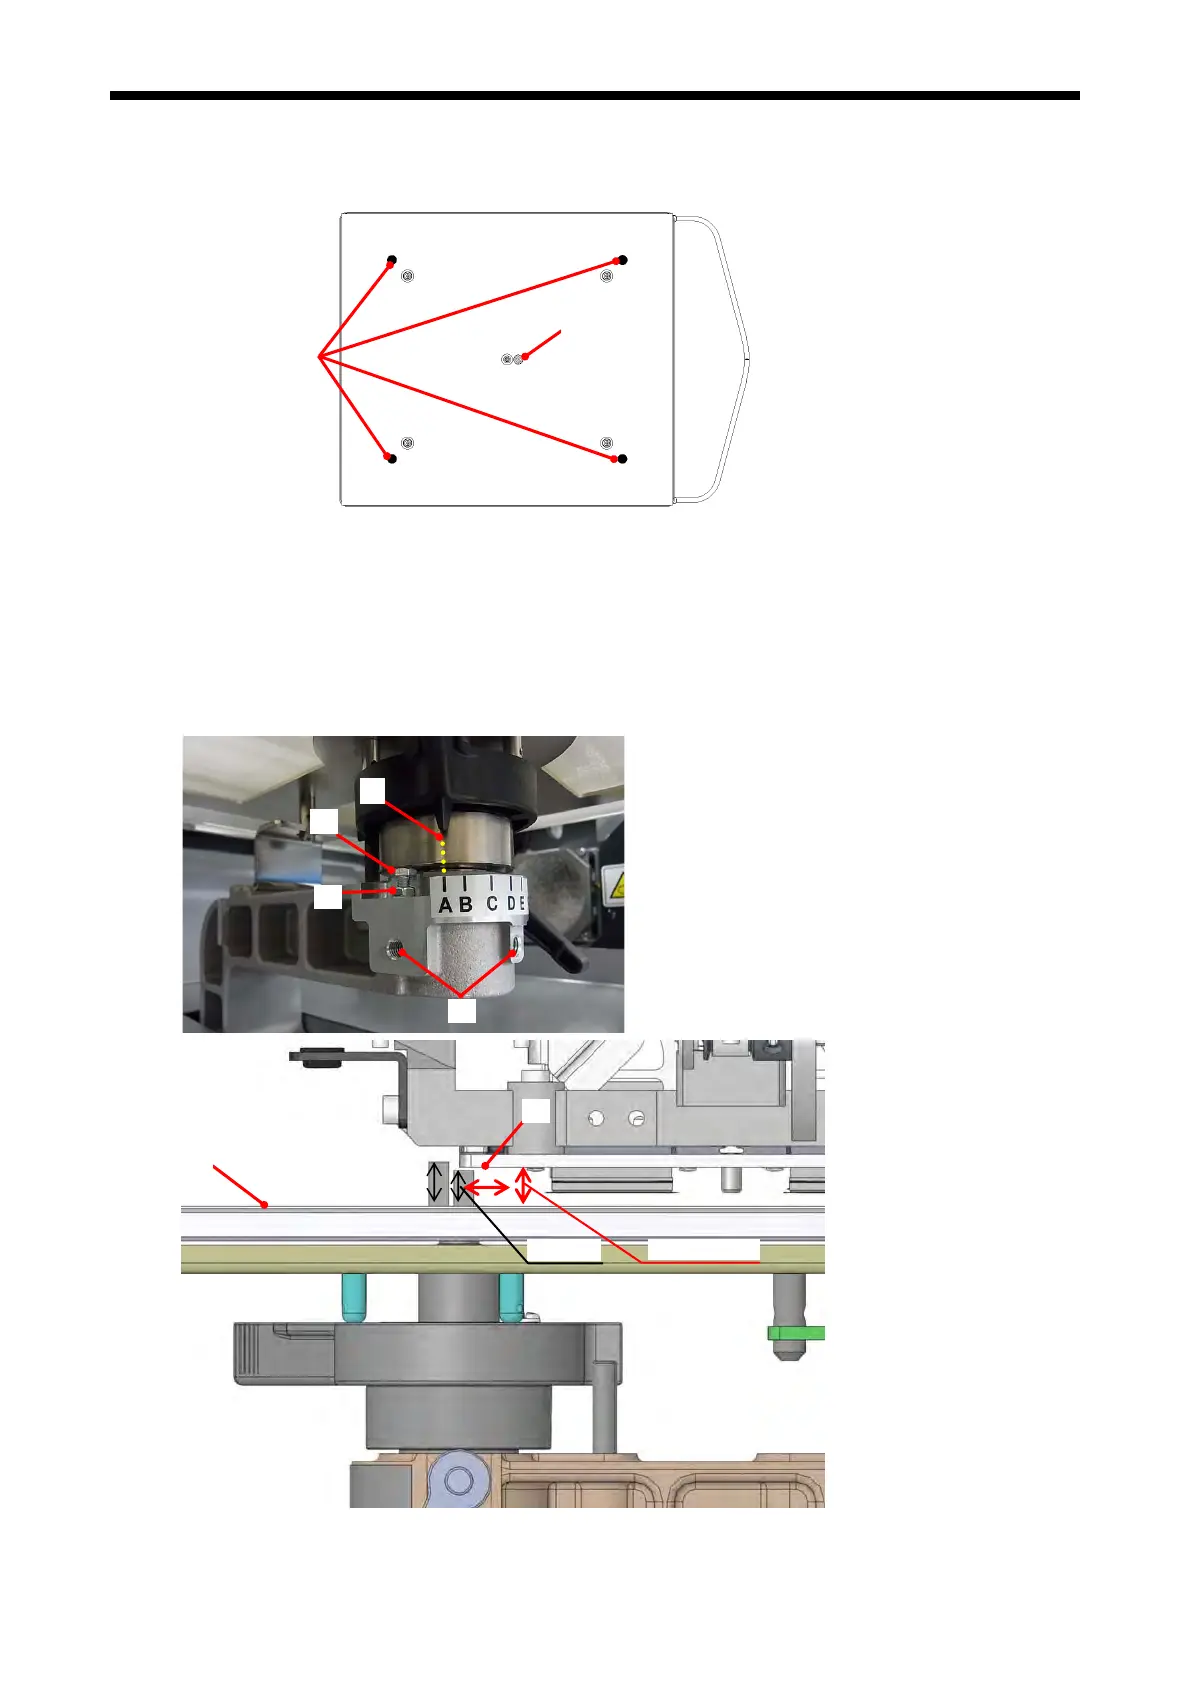
Using the Block Gauge the level of the four (B)s should be 0.5 or less with the center (A) as the standard.
Required Tools
GT-3 Series
150
・Block G
auge
・Flathead screwdriver
1. Turn ON the printer.
2. Go to the Advanced Menu.
(A)
(B)
3. Select [ Outp
ut Check ] > [ Cap Test ] > [ Cap Down ] and press OK Button.
The Caps on the Maintenance Unit move down. Turn OFF the printer.
4. Lift up the Cover UB until it is locked by the Stopper.
5. Adjust the height at the position of the Platen by loosing the two Set Screw Sockets (FT) M6X6 (1) and
the Nut 2 M4, and adjusting the height of the Bolt M4X12 (3).
<Note> Confirm the height from the bottom of the Head Holder Assy (C) to the surface of the Platen Top Plate
(D) should be 9.8 ± 0.2 mm when the Height Adjustment Lever (4) is at the A position.
(4)
(3)
(2)
(1)
10 mm
9.6 mm
(C)
(D)
9.8 ± 0.2
 Loading...