6. Replacing Parts
6-2-10. Power Unit
Disassembling
1. Remove the AC Cord and remove the Cover DR (right side). (Refer to “6-1-2. Assembling/Disassembling
of the Covers”.)
2. Remove the Ferrite Core from the Cord Clamp. (Refer to “6-2-7. Main PCB Assy)
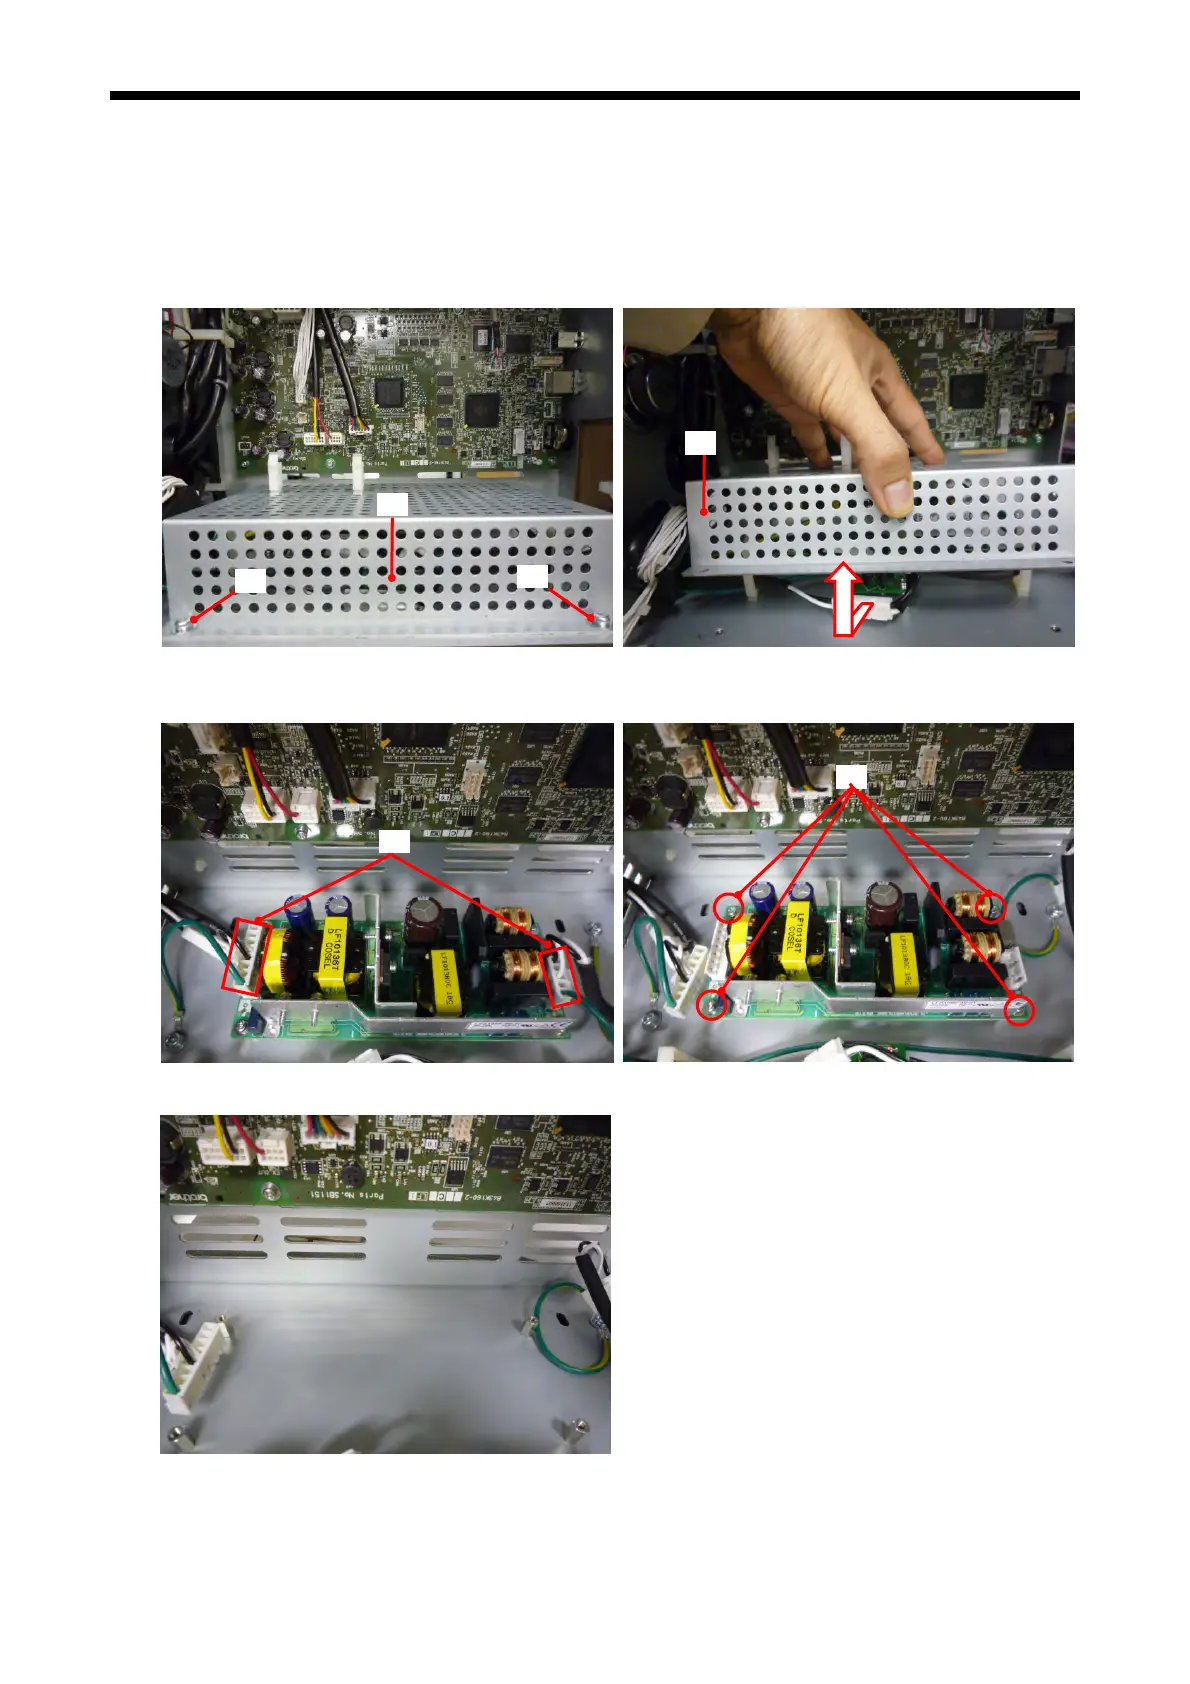
3. Remove the two screws (2) that fix the Power Cover (1)
Pull out the Power Cover (1) to your side and lift it to remove.
(1)
(1)
(2)
(2)
4.
Remove the t
wo connectors (3) that connect to the Power Unit. Remove the four screws (4) that fix the
Power Unit.
(4)
(3)
5. Remov
e the Power Unit.
6. Follow the
reverse steps in reassembling.
GT-3 Series
323
 Loading...