6. Replacing Parts
6-2-18. Carriage PCB Assy
Adjust the firmware with GT-3 Service Tool, after you replace to the new Encoder PCB Assy. (Refer to “3-3.
GT-3 Service Tool”.) Refer to the page “How to connect/disconnect the FFC Connector” in this session (next
page) when you handle FFC Connectors.
Required Tools
・ Thermistor
Disassembling
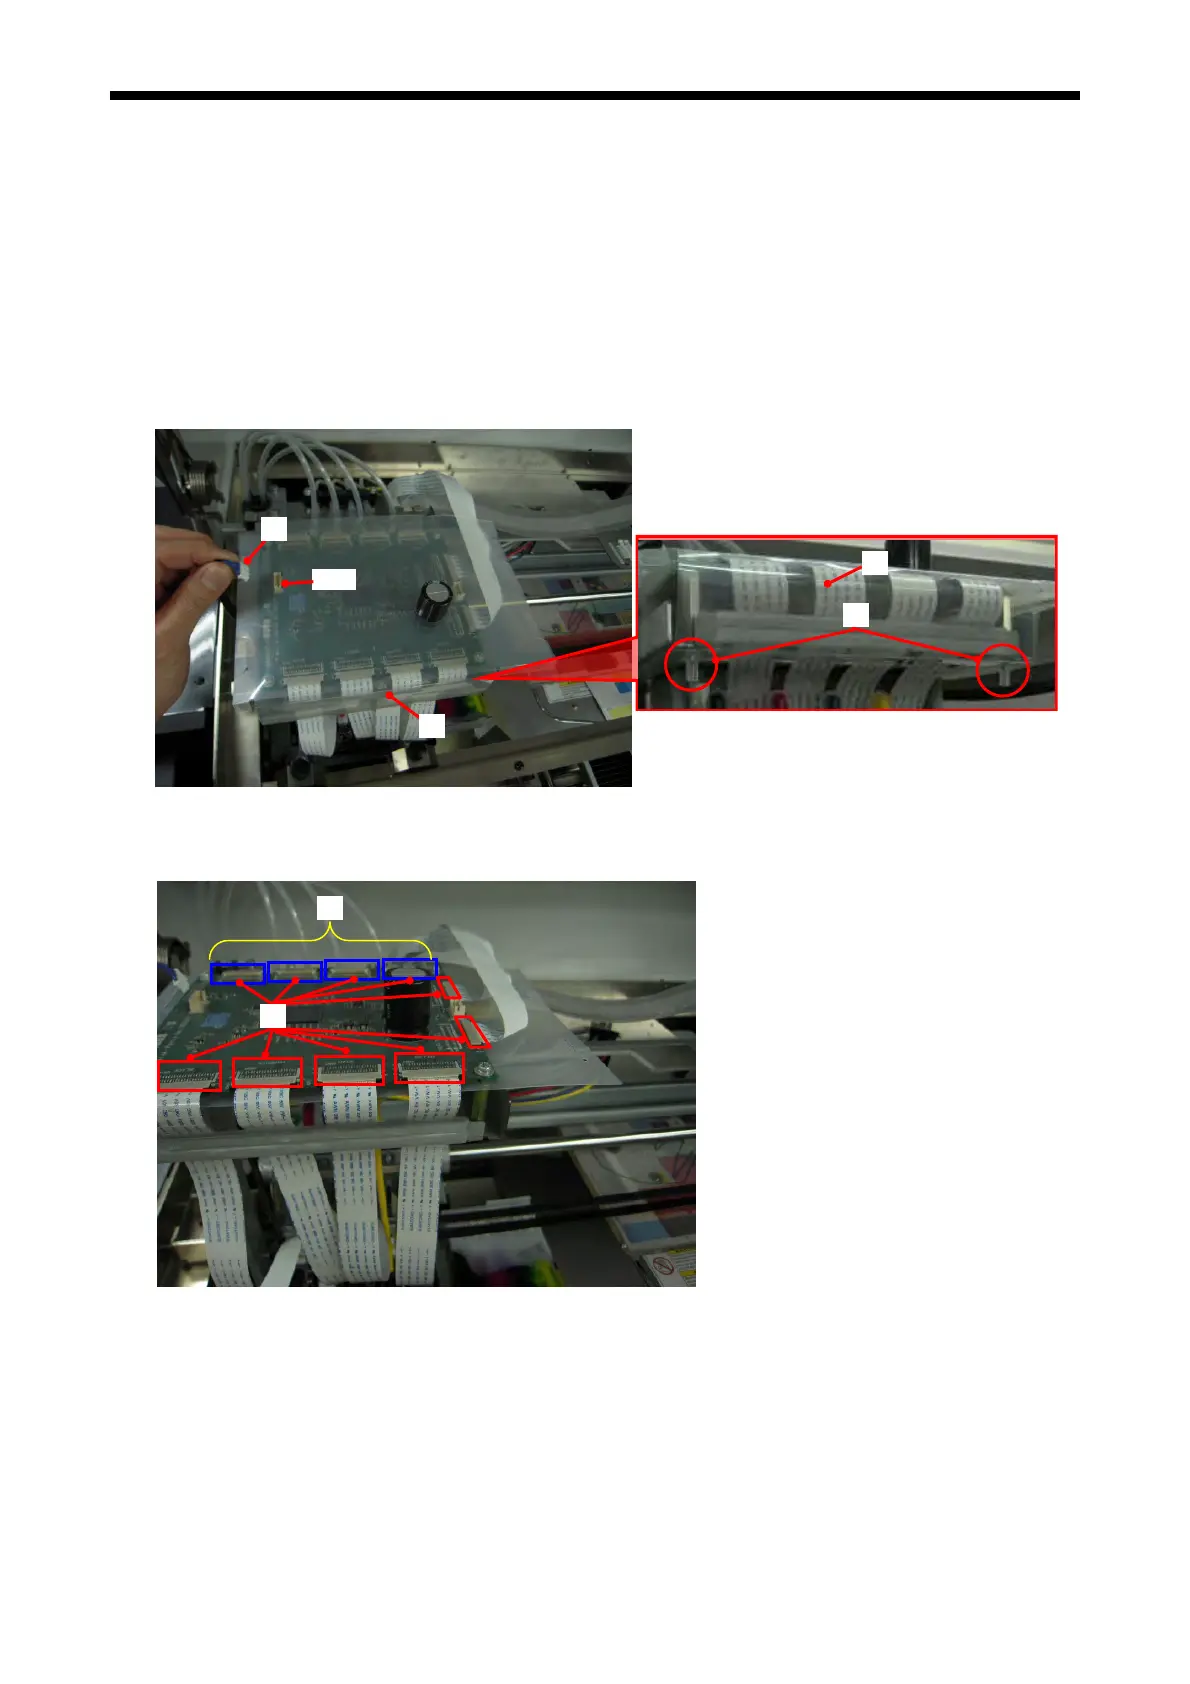
1. Remove the AC Cord and open the Cover UB.
2. Disconnect the Harness: Encoder (1) from the Connector (CN5) (1) on the Carriage PCB.
Remove the two Fixing Tubes (2) and remove the Carriage PCB Upper Cover (3)
GT-3 Series
337
3. Disco
nnect all the FFCs (4) that connect to the Carriage PCB.
<Note>The FFCs (5) in blue frame are not available, depending on the models.
CN5
(3)
(1)
(3)
(2)
(5)
(4)
 Loading...