Connecting the Cables
2-28
Installing the Printer
2
Connecting to a Computer
This section describes how to connect the printer to a computer and network.
This printer is equipped with a LAN connector and USB connector.
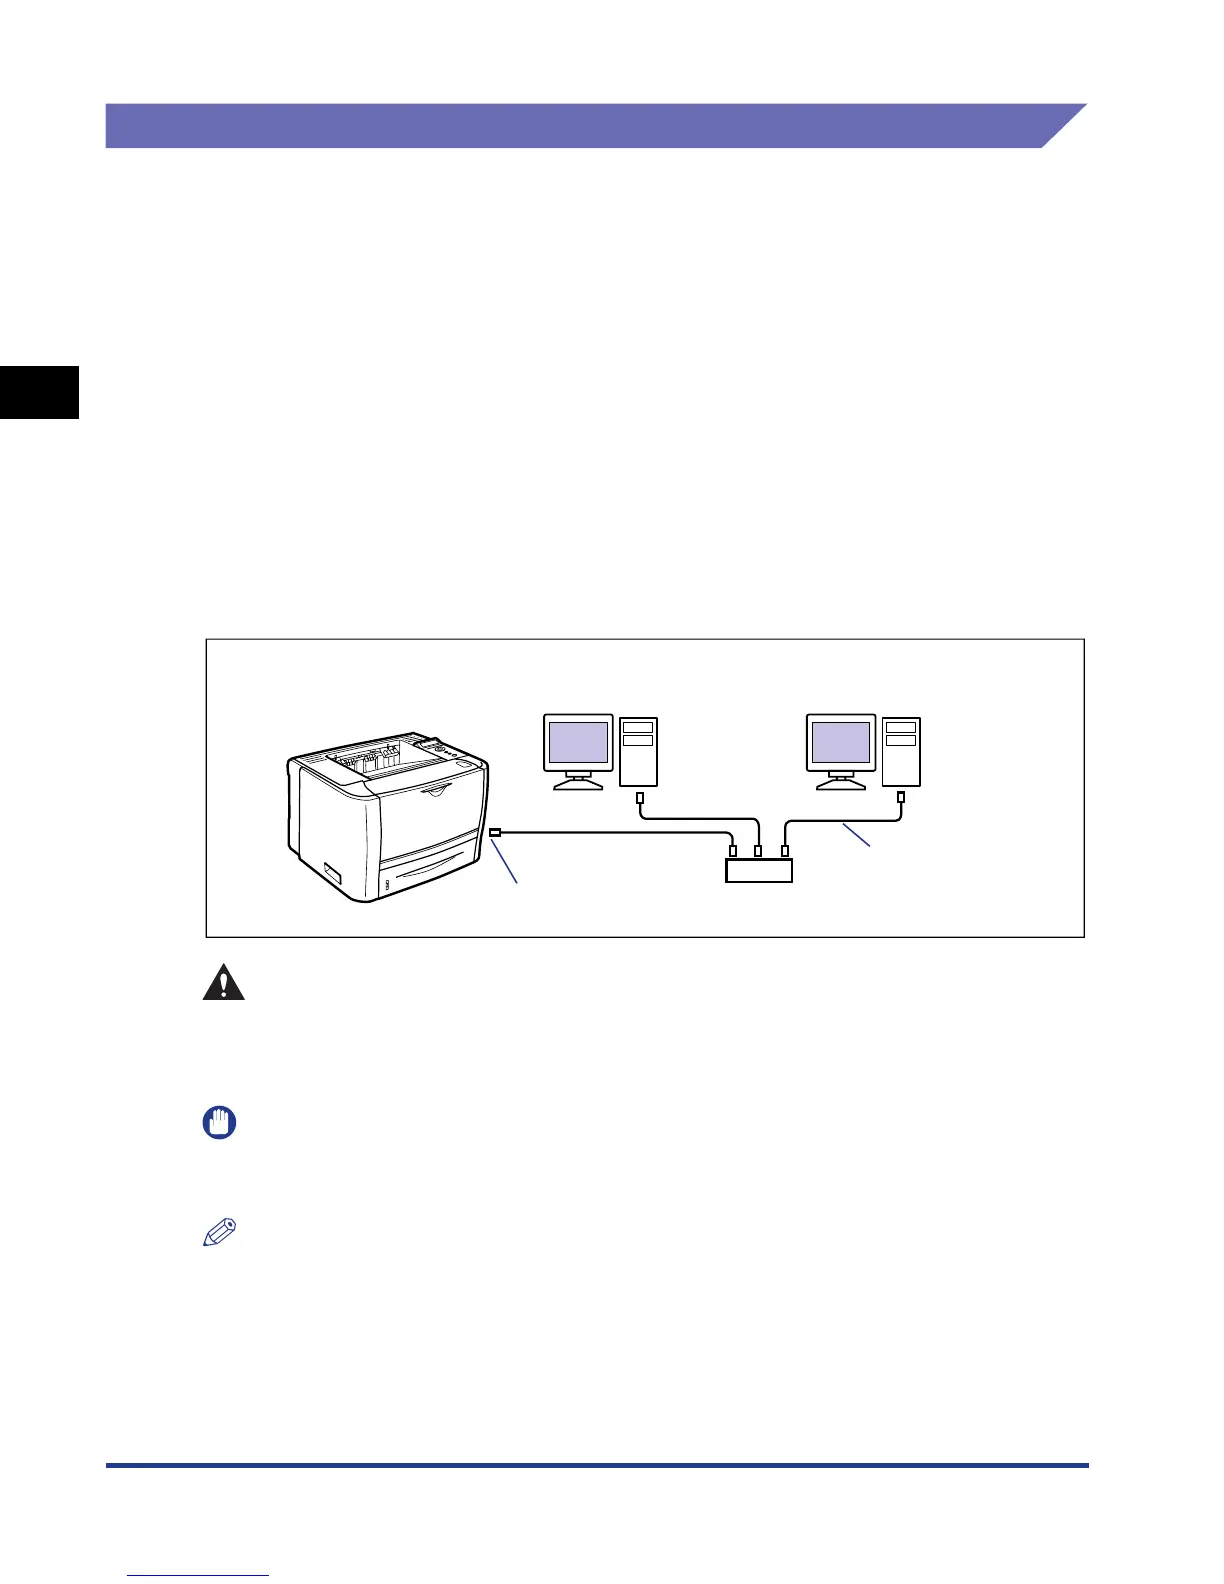
Using a LAN Cable
By connecting the printer to a network such as Ethernet to be shared on the
network, you can use the printer from a computer on the network. You can use
UNIX, Windows, Mac OS, and other operating systems.
This printer includes a print server that supports 10BASE-T/100BASE-TX and is
compatible with the TCP/IP, AppleTalk (EtherTalk), and SMB protocols.
Connect the LAN connector on this printer and a hub port with a Category 5 twisted
pair cable. Have cables or a hub ready as needed. For compatible cables and hubs,
contact your local authorized Canon dealer.
CAUTION
Before connecting the network cable to the printer, be sure to turn the printer
OFF, and then unplug the power plug from the AC power outlet. Failure to
observe these steps may result in an electrical shock.
IMPORTANT
If more than one devices are connected to an AppleTalk network, turn on each device at
an interval of ten seconds or longer.
NOTE
•
This printer recognizes the type of Ethernet (100BASE-TX or 10BASE-T) automatically.
•
If both 100BASE-TX devices and 10BASE-T devices are on the same network, a device
such as a switching hub that supports both 100BASE-TX and 10BASE-T is required. For
more details, contact your local authorized Canon dealer.
•
If you connected this printer to a network, check the MAC address of the print server with
Configuration Page Print, and then configure the network operating system (UNIX, etc.)
and print server. For more details, see "Network Guide".
LAN Connector
Hub
Computer with
100BASE-TX Connector
Computer with
10BASE-T Connector
Ethernet Cable
 Loading...