24. Remove the alignment tool.
25. If operating in a saltwater environment, apply Perfect Seal to the threads and nuts of the engine mounting hardware to help
protect against corrosion. This will allow for easier loosening in the future, if readjustment becomes necessary.
Tube Ref No. Description Where Used Part No.
19
Perfect Seal Engine mounting hardware threads and nuts 92-34227Q02
NOTICE
Hot spots in exhaust hoses can damage hoses and cause leaks. Ensure that discharge water from the exhaust elbow flows
without restriction through all hoses and fittings.
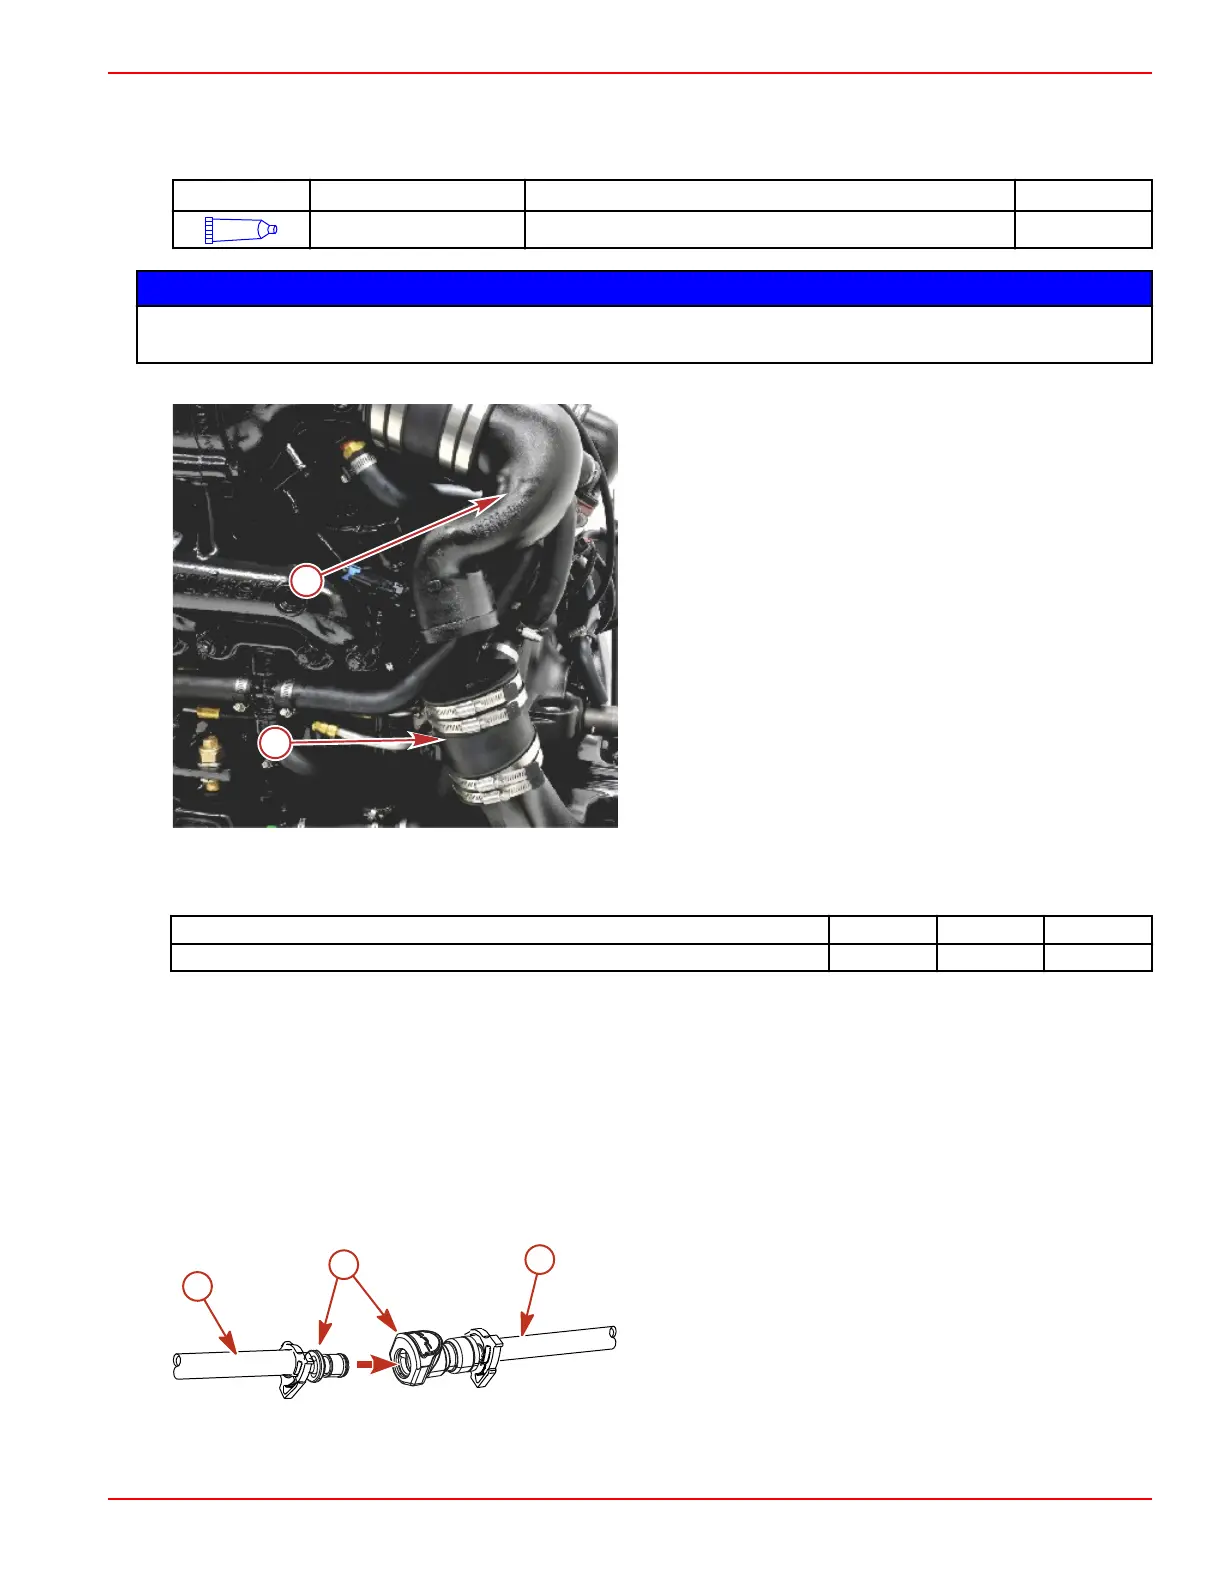
26. Align the exhaust tubes.
Typical
a - Exhaust tube
b - Intermediate exhaust elbow
IMPORTANT: Exhaust hoses and tubes must be secured at each connection with at least two hose clamps.
27. Securely tighten all exhaust hose or exhaust tube clamps.
Description
Nm lb‑in. lb‑ft
Tridon® hose clamp (exhaust tube) 4–4.7 35.4–41.6 –
Connecting the Fluid Systems
Gear Lube Monitor Connection
IMPORTANT: Route hoses to determine the minimum length of hose needed and trim off the excess to avoid low spots in the
system. Avoid kinks, and route the hose in a straight path to avoid low spots (traps) in the system.
1. Position the gear lube monitor quick connect at the rear of the engine.
2. Position the gear lube monitor quick connect at the transom.
IMPORTANT: The hose must not come in contact with the steering system components, engine coupler, U‑joint shaft, or
driveshaft.
3. Fasten the quick connect.
a -
Gear lube monitor hose assembly from transom
b - Gear lube monitor hose assembly from gear lube monitor
c - Quick‑connect fitting
Bravo Seawater Inlet Fitting Connection
NOTE: The retainer clip must be in the closed position prior to installation.
7800
b
c
a
Installation
90-8M0099748 eng DECEMBER 2015 © 2016 Mercury Marine Page 2B-9
 Loading...