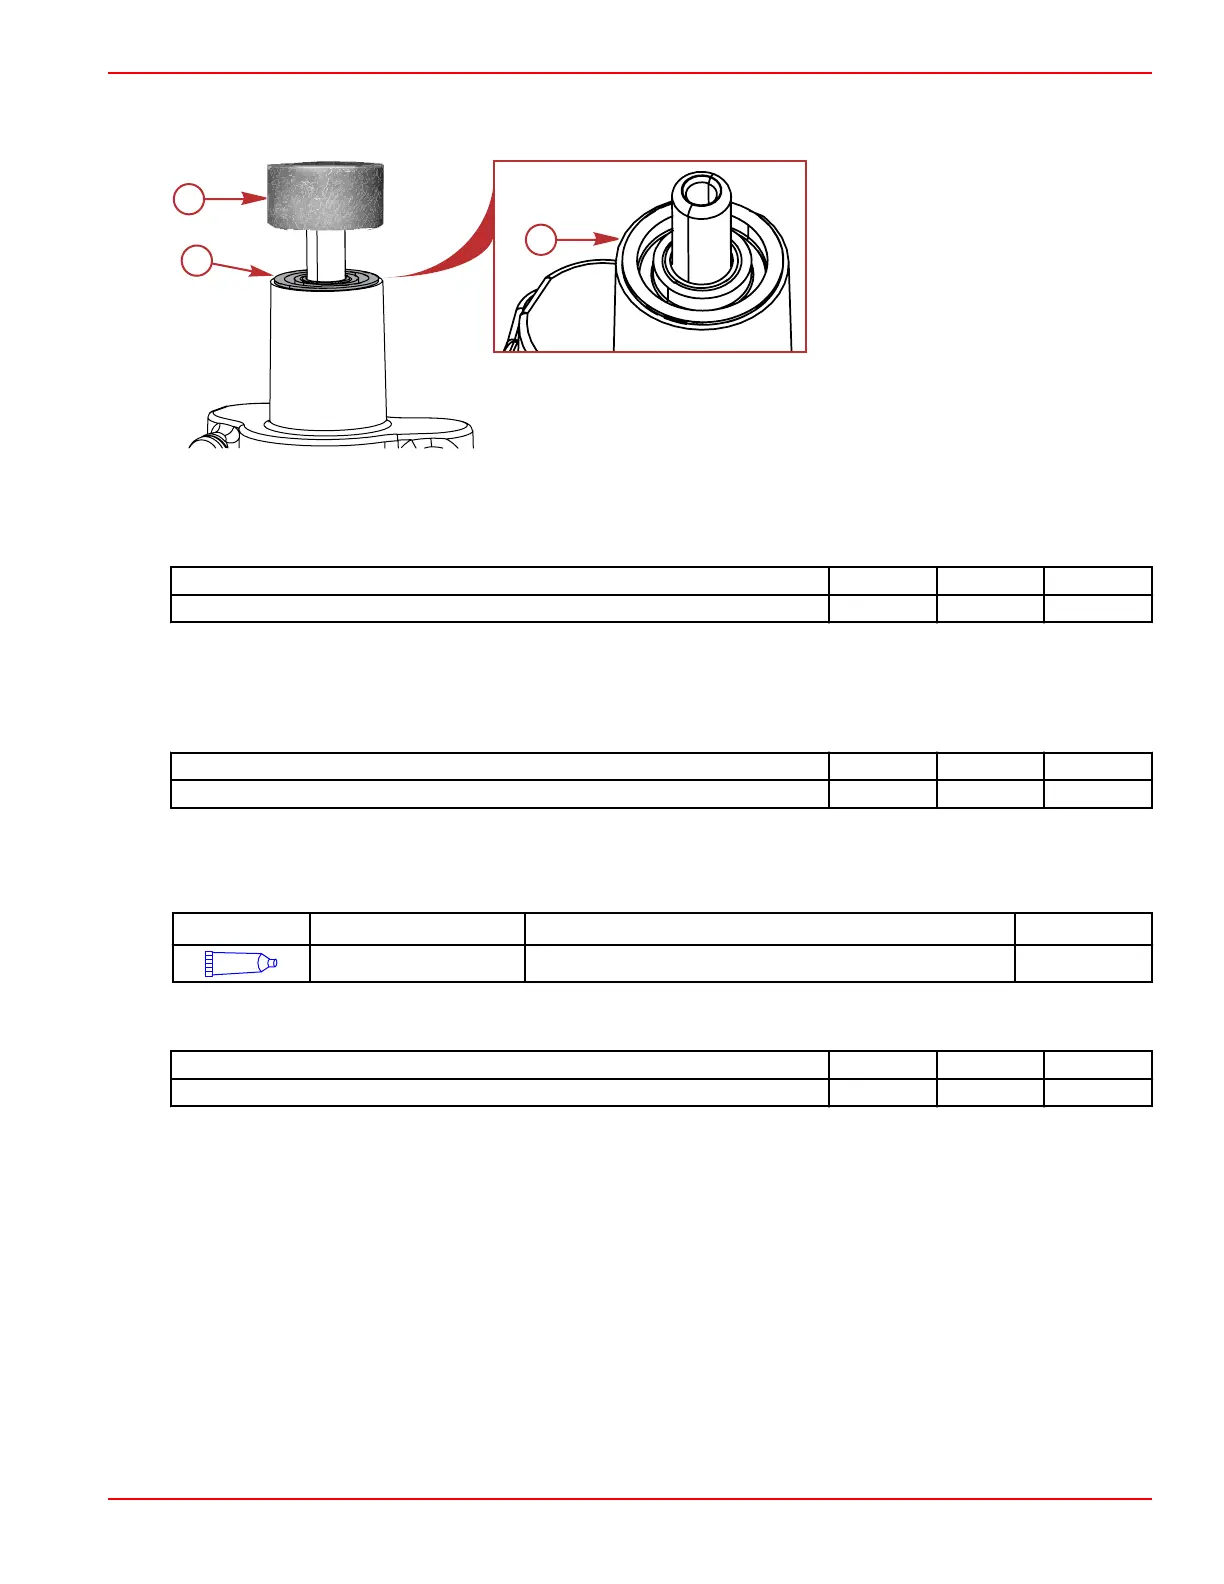
9. Use a suitable mandrel that will press the lip seal without contacting the bearing shaft. Press the lip seal into place. Wipe
away excess adhesive.
a - Hollow mandrel on press
b - Lip seal
c - Lip seal seated
IMPORTANT: Support the bearing shaft while pressing the hub onto the shaft, to prevent overloading the bearings.
10. Ensure that the bearing shaft is adequately supported. Using a suitable tool, press the hub onto the end of the bearing
shaft until it is 5.5 mm ± 0.4 mm (0.217 in. ± 0.016 in.) from the front face of the shaft.
11. Attach the pulley to the hub with four screws. Tighten the screws to the specified torque.
Description
Nm lb‑in. lb‑ft
Pulley screw 24 – 17.7
Installing the Impeller, Wear Plate, and Impeller Housing Assembly
1. Install the impeller onto the bearing shaft.
2. Align and attach the housing seal with integrated rear wear plate to the impeller housing with two hex head cap screws.
Tighten the screws to the specified torque.
Description
Nm lb‑in. lb‑ft
Hex head cap screw 10 88.5 –
3. Install the blue drain plugs in the impeller housing, if removed.
4. Align and install the impeller housing assembly onto the seawater pump cover.
5. Apply Loctite 242 Threadlocker to the threads of the seawater pump cover screws.
Tube Ref No.
Description Where Used Part No.
66
Loctite 242 Threadlocker Seawater pump cover screw threads 92-809821
6. Install the four seawater pump cover screws and tighten them to the specified torque.
NOTE: The three long screws reach into the seawater pump bracket.
Description
Nm lb‑in. lb‑ft
Seawater pump cover screws 24 – 17.7
IMPORTANT: If a belt is to be reused, it should be installed in the same direction of rotation as before.
7. Install the serpentine drive belt.
Water Circulating Pump
Removal
1. Allow the engine to cool.
2. Drain the seawater or closed‑cooling section of the engine.
3. Remove the hose attached to the water circulating pump.
4. With the drive belt installed to prevent rotation, loosen the water circulating pump pulley screws.
IMPORTANT: If a belt is to be reused, it must be installed in the same direction of rotation as before.
5. Mark the direction of belt rotation and remove the serpentine drive belt.
6. Remove the water circulating pump pulley screws and pulley.
7. Remove the water circulating pump fasteners (three screws and one stud) and the water circulating pump.
All Models
90-8M0099748 eng DECEMBER 2015 © 2016 Mercury Marine Page 6A-9
 Loading...