3. Fill the heat exchanger with coolant until the air is purged from the thermostat housing.
Tube Ref No. Description Where Used Part No.
122
Extended Life Antifreeze/
Coolant
Closed-cooling system 92-877770K1
4. When the air is purged, close the vent on top of the thermostat housing.
5. Continue to fill the heat exchanger with coolant until it is full to the bottom of the filler neck.
IMPORTANT: When installing the pressure cap, be sure to tighten it until it seats on the filler neck.
6. Install the pressure cap onto the heat exchanger.
7. Add coolant to the recovery bottle to bring the level to the "FULL" line.
NOTICE
Without sufficient cooling water, the engine, the water pump, and other components will overheat and suffer damage. Provide
a sufficient supply of water to the water inlets during operation.
8. Start the engine, and check for leaks while monitoring the temperature and coolant recovery bottle level.
9. Bring the engine to operating temperature. Allow the engine to run for five minutes at operating temperature.
10. Turn the engine off and let it cool.
11. Remove the fill cap from the coolant recovery bottle.
12. Fill the recovery bottle to the "FULL" line.
13. Install the fill cap onto the coolant recovery bottle.
Heat Exchanger Assembly
Testing—Internal Leaks
An internal leak will allow coolant to enter into the seawater circuit when the closed‑cooling circuit is pressurized.
1. Remove a seawater hose from the exchanger. Do not drain the exchanger.
2. Pressurize the closed‑cooling circuit to 110‑138 kPa (16‑20 psi) with a radiator tester.
3. If seawater begins to flow from the seawater hose fitting of the heat exchanger, there is a leak.
Blockage
IMPORTANT: Seawater flows through the tubes in the exchanger. Coolant/antifreeze flows around the tubes.
1. Remove the end caps and inspect for any blockage in the seawater circuit, such as broken impeller blades or weeds.
2. Remove the closed‑cooling circuit hoses and inspect the tubes just inside the nipples. Because the complete exchanger
cannot be inspected, the heat exchanger should be replaced if blockage is suspected.
Heat Exchanger Removal
NOTE: The heat exchanger does not have to be removed for cleaning.
1. Allow the engine to cool.
2. Drain the seawater from the engine.
3. Drain the coolant from the engine.
4. Remove the MerCathode controller, if equipped.
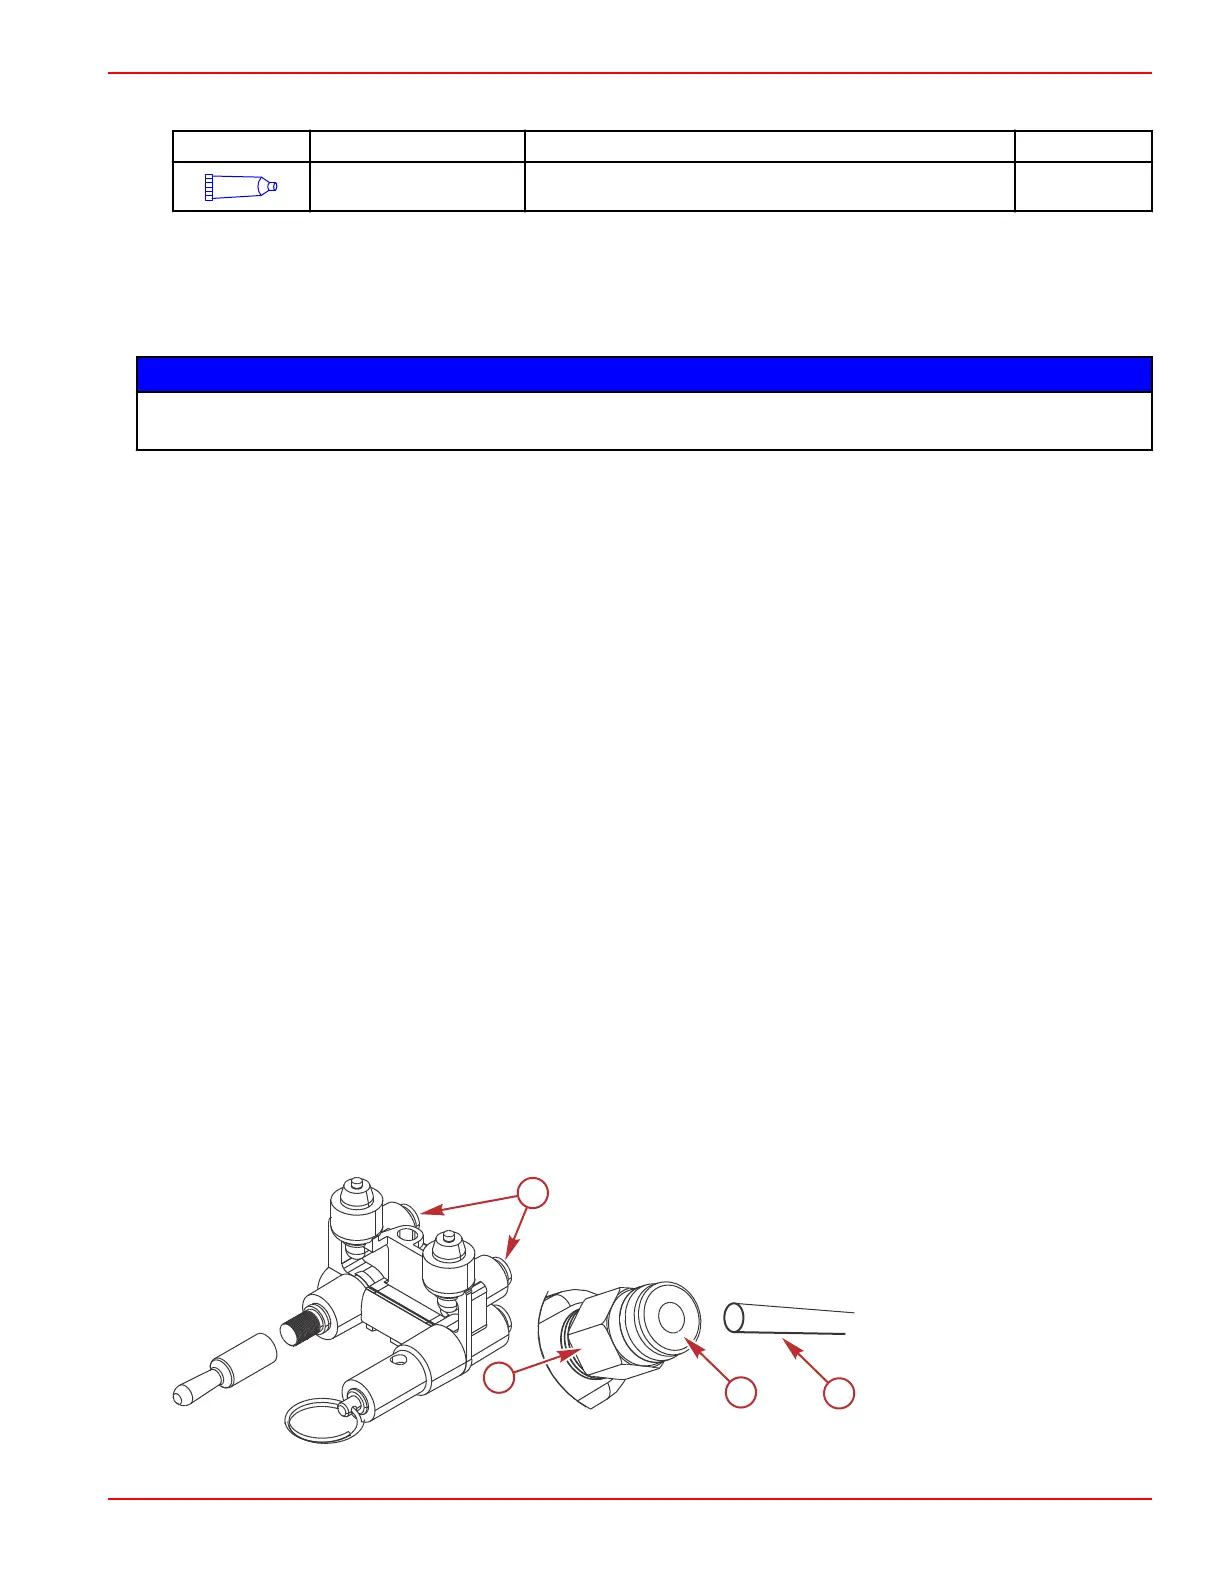
5. Remove each air line from the air manifold by pressing on the fitting and pulling the line out.
a -
Release location
b - Air line fitting
c - Air line
6. Remove the hoses from the heat exchanger.
Models with Closed Cooling
90-8M0099748 eng DECEMBER 2015 © 2016 Mercury Marine Page 6C-17
 Loading...


