Bravo Shift Cable Installation and Adjustment
Bravo Models Shift Cable Installation
IMPORTANT: When installing shift cables, ensure that cables are routed in such a way as to avoid sharp bends and/or contact
with moving parts. Do not fasten any items to shift cables.
IMPORTANT: Sterndrive propeller rotation is determined by the shift cable installation in the remote control.
•
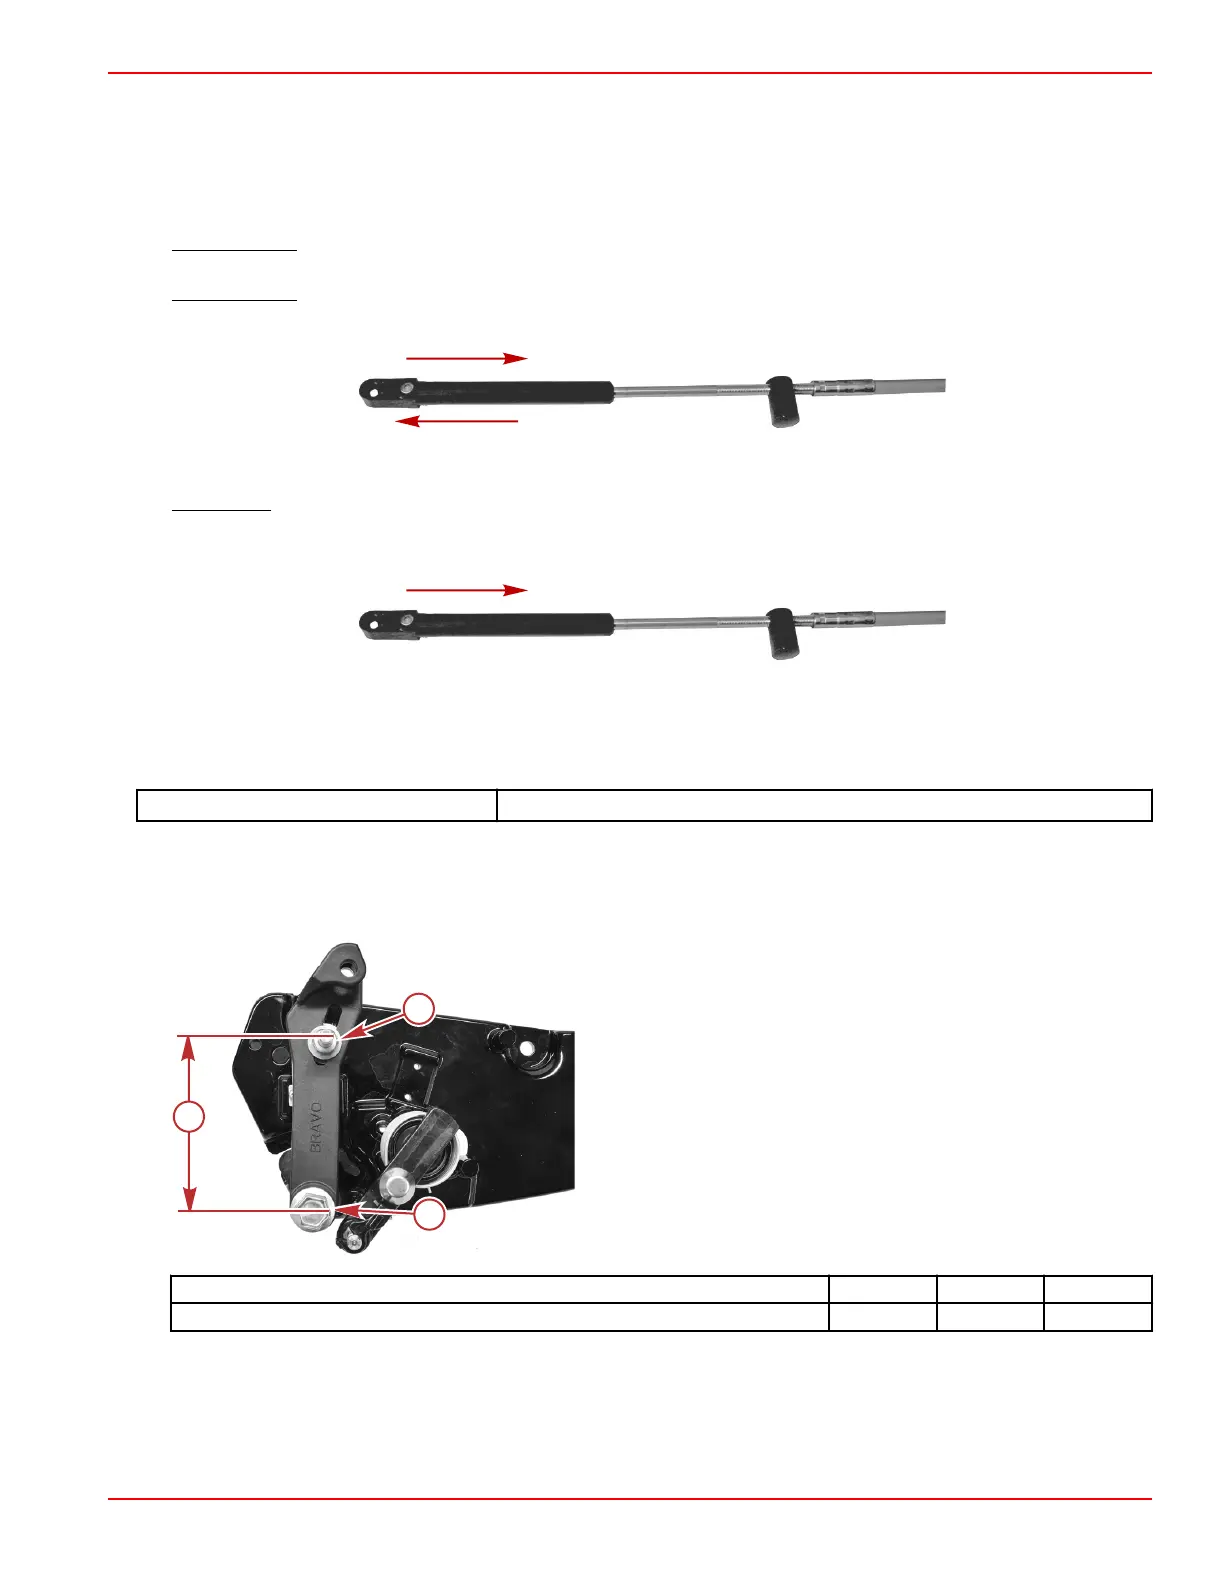
Bravo One/Two ‑ If the shift cable end guide moves in direction A when the remote control lever is placed into forward,
remote control is set up for right‑hand (RH) propeller rotation.
• Bravo One/Two ‑ If the shift cable end guide moves in direction B when the remote control lever is placed in forward, the
remote control is set up for left‑hand (LH) propeller rotation.
Arrow indicates direction of motion
•
Bravo Three ‑ The front propeller on the sterndrive is always left‑hand rotation and the rear propeller is always right‑hand
rotation. The shift cable end guide must move in direction A when the remote control lever is placed into forward gear
position.
Bravo Models Remote Control Shift Cable Adjustment
NOTE: The shift cable adjustment tool (91‑12427T) should be used to adjust the remote control shift cable, with or without the
sterndrive installed.
Shift Cable Adjustment Tool
91‑12427T
1. Remove the adjustment tool.
2. Measure the distance from the center of the shift arm pin to the center of the pivot bolt. This distance must be exactly
76 mm (3.0 in.). If the dimension is not correct, loosen the shift arm pin nut and move the pin to the specified
measurement. Tighten the nut to the specified torque.
a - 76 mm (3.0 in.)
b - Shift arm pin nut
c - Pivot bolt
Description Nm lb‑in. lb‑ft
Shift arm pin nut 10 88.5 –
3. Install a washer onto the shift arm pin.
4. Install the intermediate shift cable.
NOTE: The transom assembly intermediate shift cable is factory set and does not require adjustments.
Installation
90-8M0099748 eng DECEMBER 2015 © 2016 Mercury Marine Page 2B-13
 Loading...