Tube Ref No. Description Where Used Part No.
25
Liquid Neoprene Electrical connections 92- 25711 3
5. Install the battery cable boot, if equipped.
6. Connect the positive (+) battery cable to the positive (+) battery terminal and tighten the cable clamp.
7. Connect the negative (–) battery cable to the negative (–) battery terminal and tighten the clamp.
Starting System Tests
Low power‑supply voltage and water contamination are the primary causes of most starter motor failures. Low power‑supply
voltage causes excessive heat to build up in the starter motor. It can also cause starter motor solenoid contact problems.
IMPORTANT: Perform these tests before removing the starter from the engine.
Use a digital multimeter to conduct the tests. Analog meters can be damaged by voltage spikes generated in the starter motor
windings.
Low Voltage Tests
If the engine does not crank, or cranks slowly, use a digital multimeter to verify that at least 9.5 volts are available to the starter
motor.
1. Ensure that the battery is fully charged.
NOTE: The voltage measured at the posts of a fully charged battery will typically read around 12.7 volts.
2. Disable the ignition to prevent the engine from starting.
3. Remove the fuse from the fuel pump circuit to prevent fuel from flooding the cylinders, which could result in mechanical
damage or damage to the catalyst.
4. Set the multimeter to VDC and connect the positive (+) meter lead directly to the starter's positive (+) battery terminal.
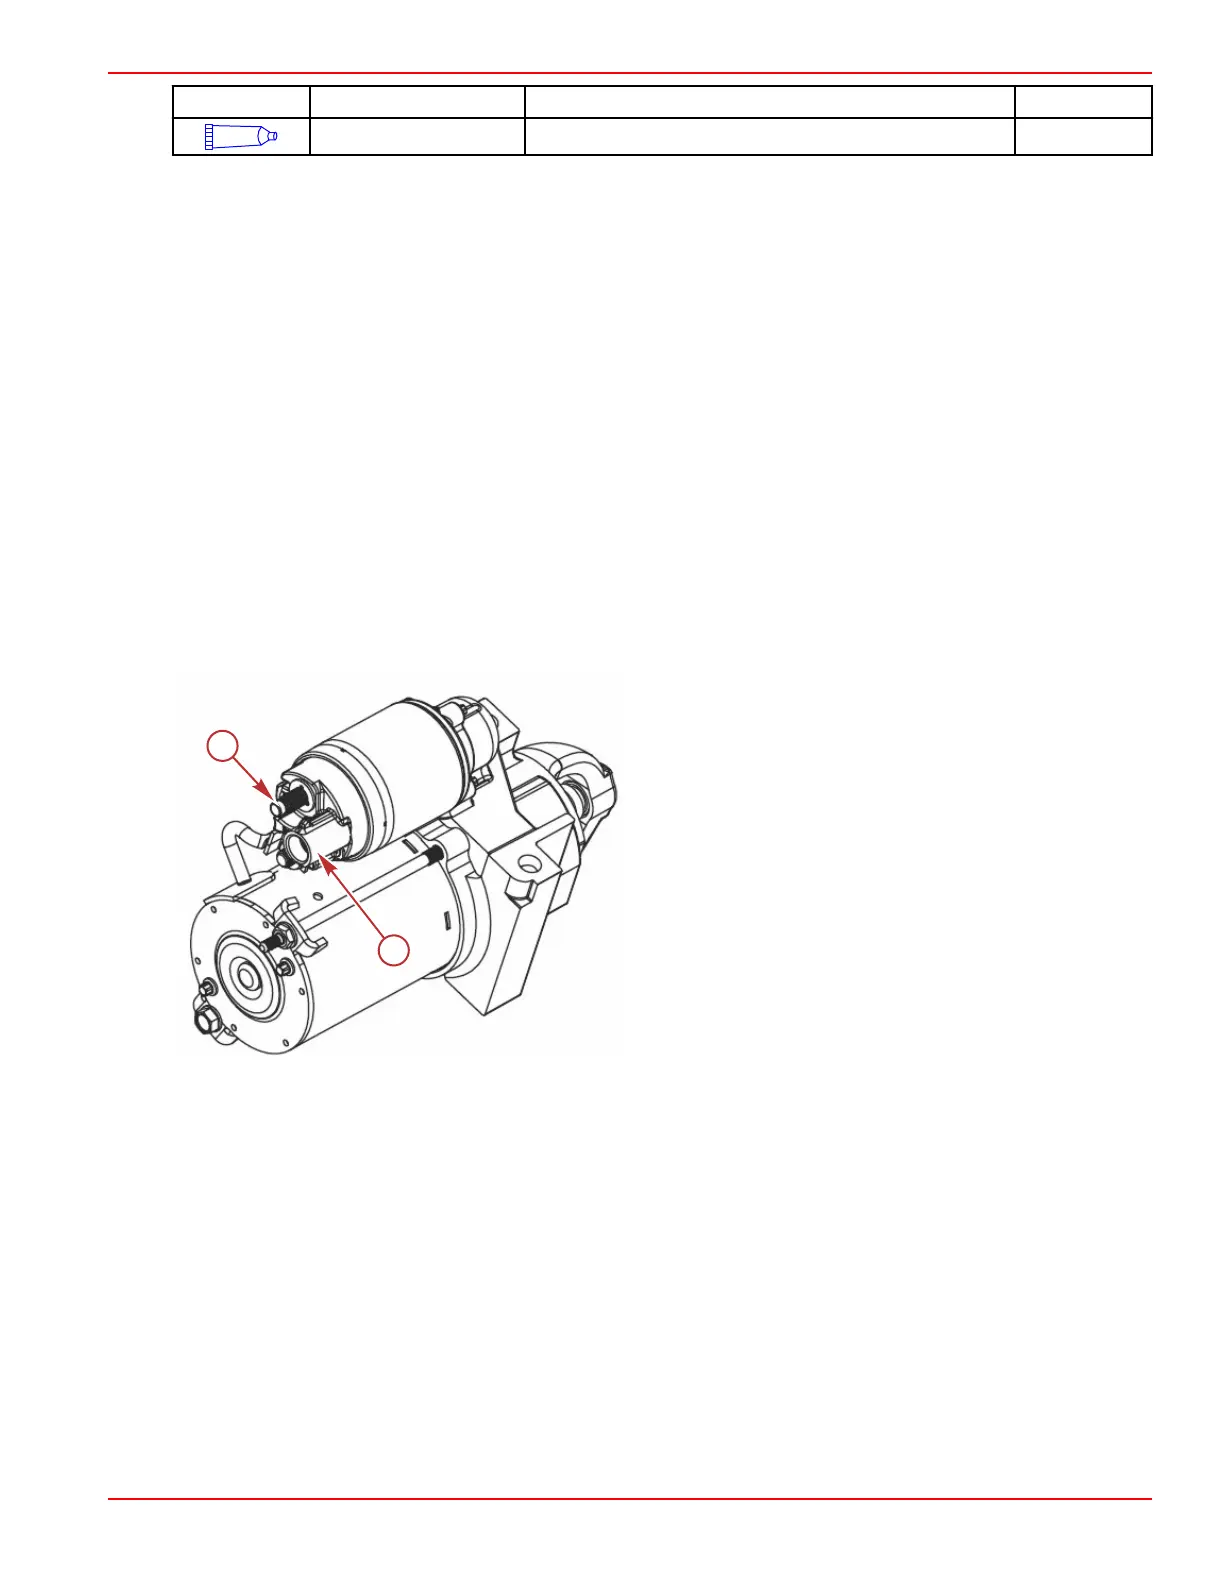
Starter electrical connections
a - Solenoid "S" terminal
b - Positive (+) battery terminal
5. Connect the negative (–) meter lead directly to an unpainted metal surface on the starter housing.
6. Crank the engine over with the key switch for 10–15 seconds while observing the voltmeter.
• A reading of 9.5 volts or more indicates that the battery is supplying sufficient voltage to the starter to operate
properly. If the starter does not function properly, the starter or the engine are malfunctioning. Remove the spark
plugs and try turning the engine over by hand to rule out an engine problem.
• A reading below 9.5 volts indicates too much voltage loss between the battery and the starter motor. Check all
components between the starter motor and the battery for damage, wear, and proper application. If no obvious
defects are spotted, complete the Voltage Drop Test.
Verify that at least 9.5 volts are available to the solenoid at terminal "S," during cranking. Low voltage at the starter solenoid
can cause intermittent operation of the solenoid contacts and shorten the life of the solenoid.
1. Connect the positive (+) voltmeter lead to terminal "S" on the starter solenoid (yellow/red wire from the starter relay).
2. Connect the negative (–) voltmeter lead to an unpainted surface of the starter housing.
3. Crank the engine over and observe the voltmeter. If the reading is less than 9.5 volts, there could be an issue with the
starter relay, the yellow/red wire that connects the relay to the solenoid, or the circuit that supplies the voltage to terminal
87 of the relay (refer to Starting System Electrical Diagrams for circuit details).
Starting System
90-8M0099748 eng DECEMBER 2015 © 2016 Mercury Marine Page 4A-11
 Loading...