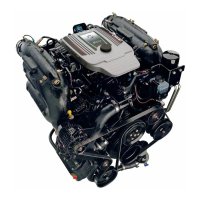
2. Using an E5 Torx® socket, remove the screws retaining the solenoid to the starter.
a - E5 Torx screws (3)
b - Starter solenoid
c - Starter motor
3. Remove the solenoid from the drive housing.
Installation
1. Set the solenoid in position on top of the starter housing.
2. Insert the E5 Torx screws into the mounting holes and tighten to the specified torque.
Description
Nm lb‑in. lb‑ft
Starter solenoid mounting screws, E5 Torx 4.25 37.5 –
3. Attach the jumper wire from the drive housing to the lower stud on the solenoid. Secure it with the previously removed nut.
Starter Installation
IMPORTANT: The special mounting shim (if equipped) installed between the starter motor and the engine block must be
reused.
1. Place the starter motor into position and install the mounting bolts. Tighten the starter mounting bolts to the specified
torque.
Description
Nm lb‑in. lb‑ft
Starter mounting bolts 47.5 – 35
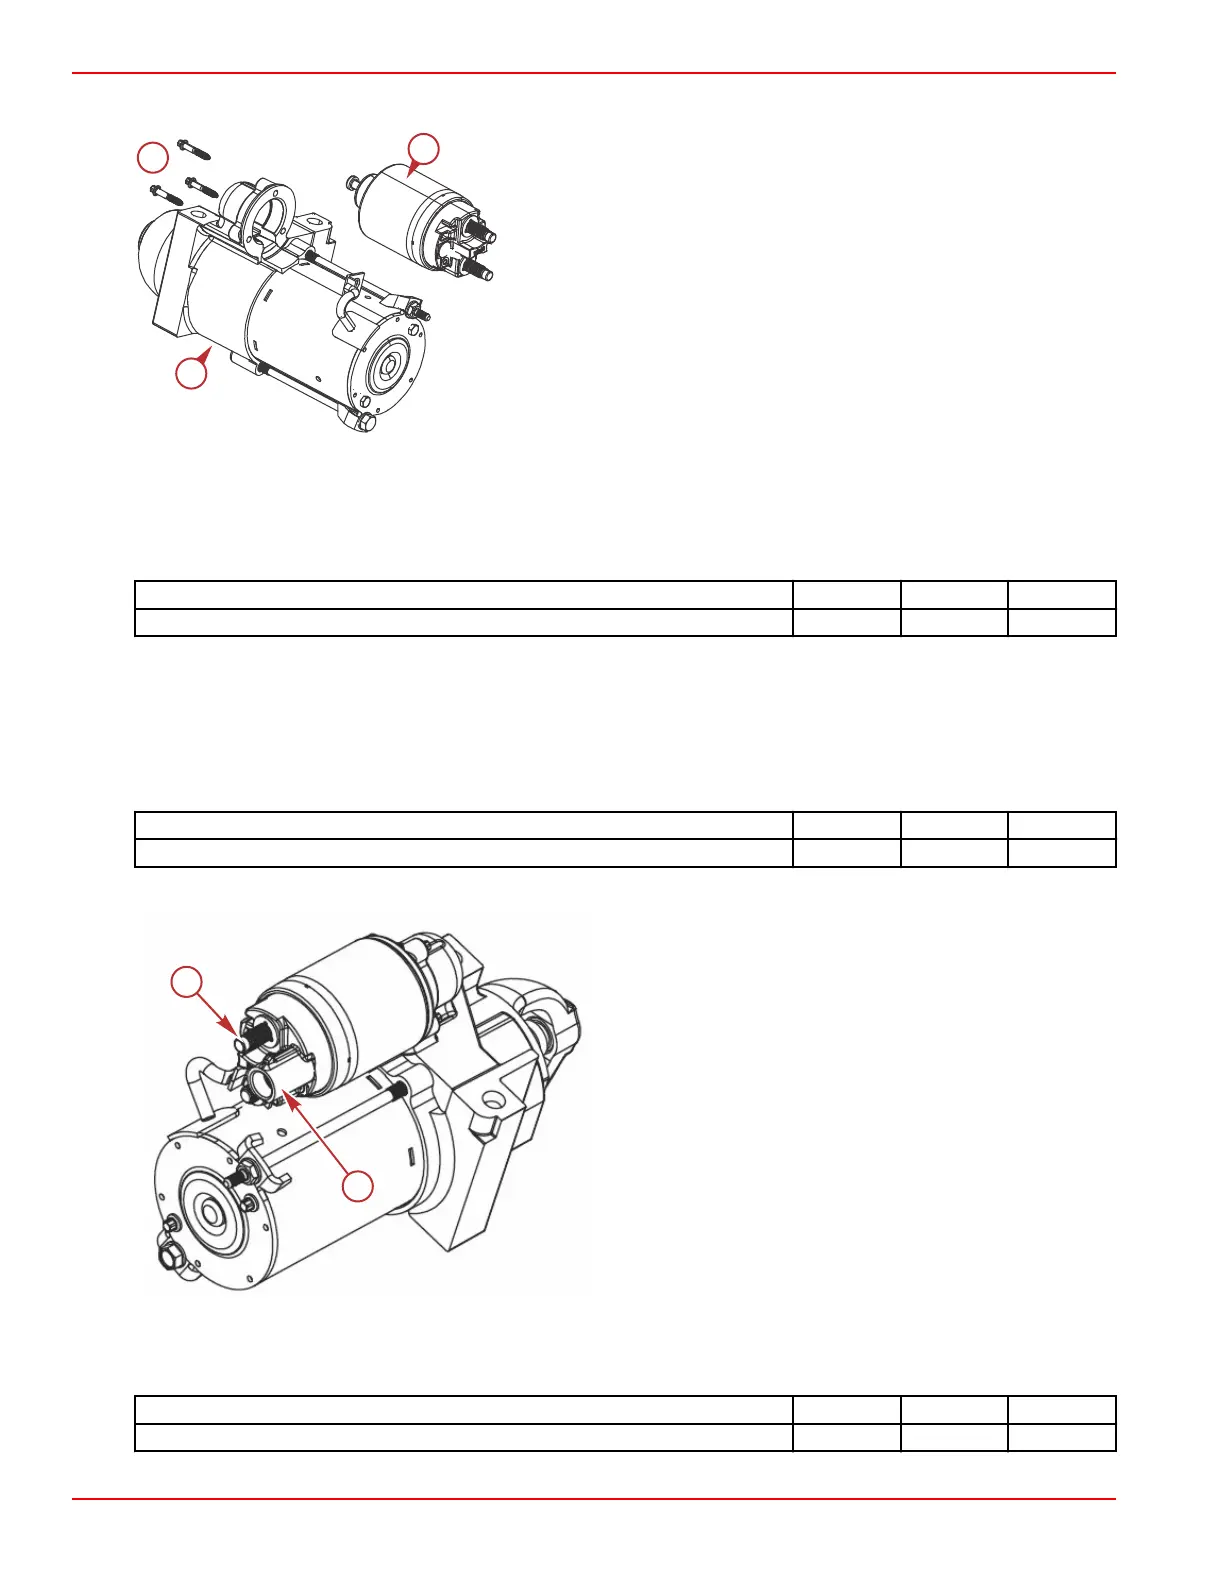
2. Connect the yellow/red wire connector to the solenoid "S" terminal.
Starter electrical connections
a - Solenoid "S" terminal
b - Positive (+) battery terminal
3. Connect the positive (+) battery cable to the positive (+) battery terminal. Tighten the terminal nut to the specified torque.
NOTE: The positive battery cable should be connected from the battery to the hot stud, and then to the starter.
Description
Nm lb‑in. lb‑ft
Battery terminal nut 9.5 84 –
4. Coat all terminals with Liquid Neoprene.
Starting System
Page 4A-10 © 2016 Mercury Marine 90-8M0099748 eng DECEMBER 2015
 Loading...