A-2-4
Making the EtherNet/IP Connection Settings with the Sysmac
Studio
This section describes the procedure to make the EtherNet/IP connection settings with the Sysmac
Studio.
Here, we take the following system configuration as an example to describe how to set the
EtherNet/IP connection settings.
Example: System that connects the built-in EtherNet/IP port on Controller 1 and the built-in
EtherNet/IP port on Controller 2 via Ethernet
•
Set the settings so that values in the network variable Net_Out1 allocated for Controller 2 are sent to
the network variable Net_In1 allocated for Controller 1 at the set RPI of 50 ms cycle.
• This example assumes the programs for both Controllers 1 and 2 are registered in the same project.
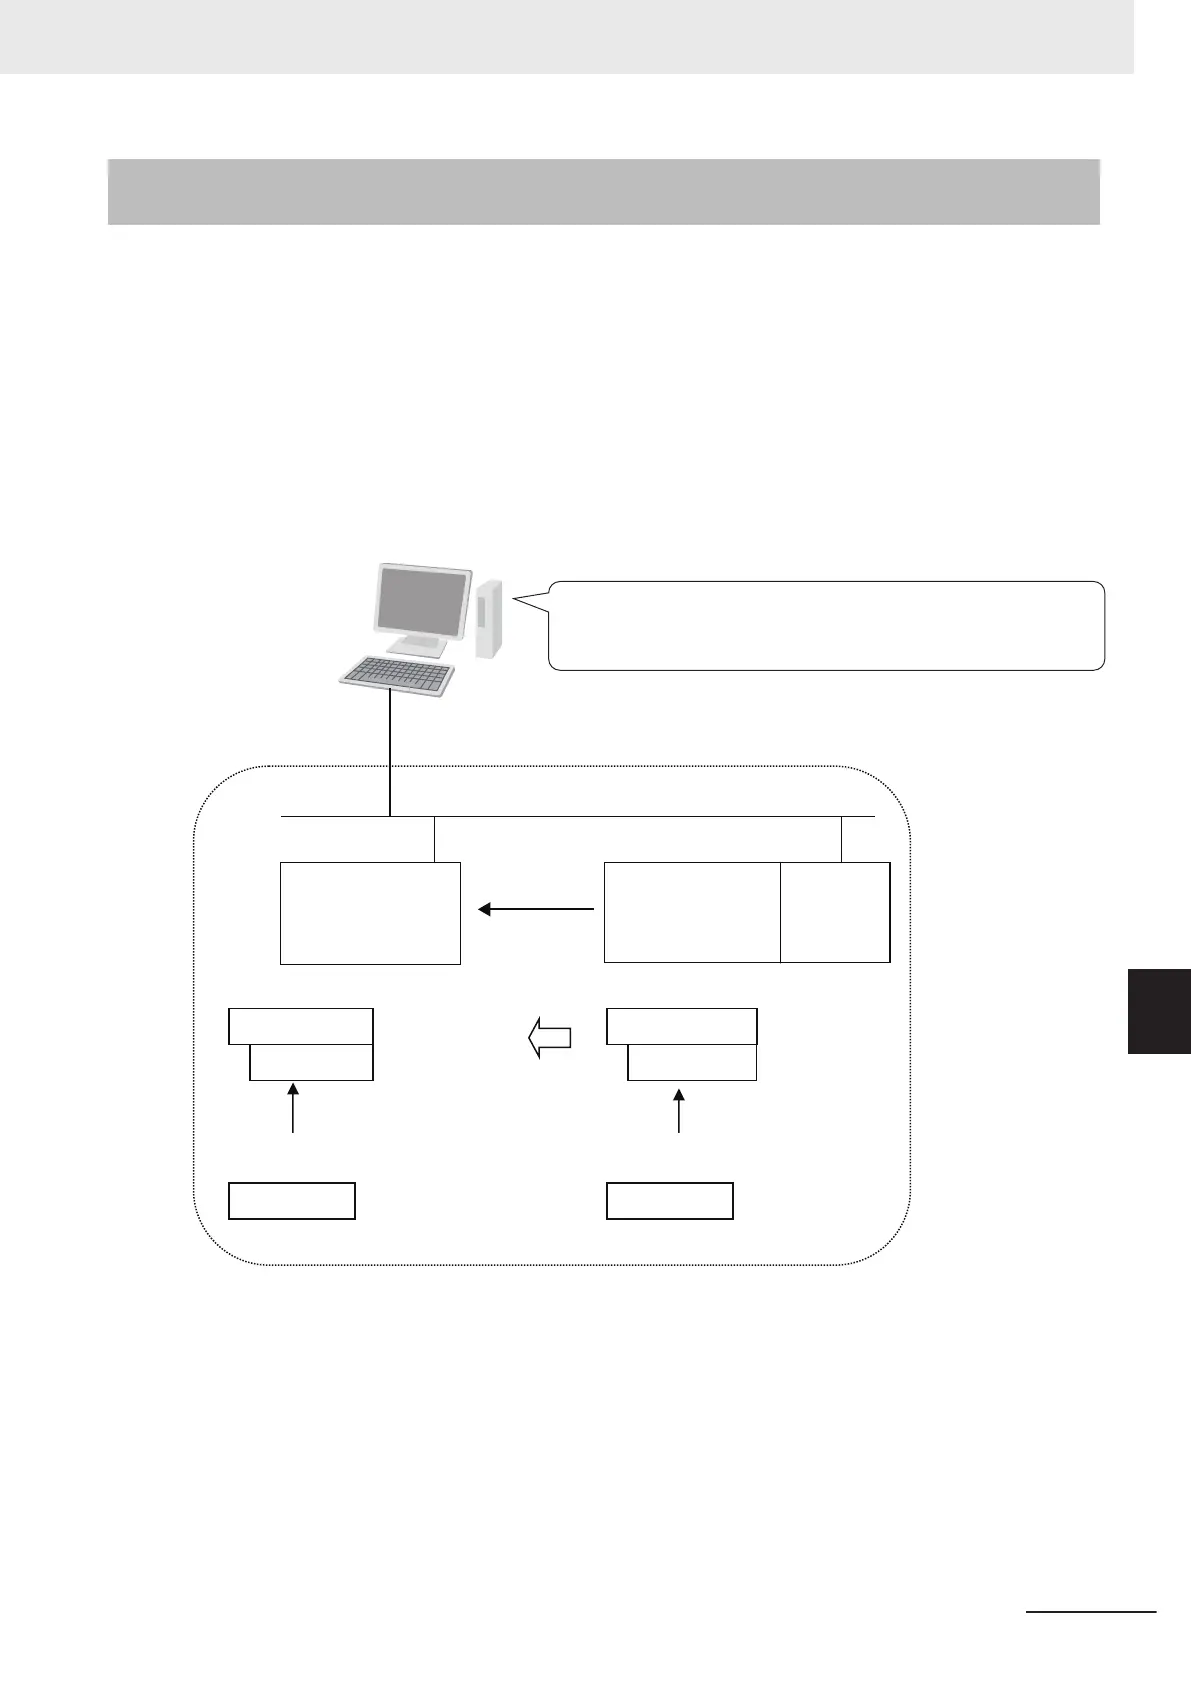
Controller 1
(NJ501-1500:
Built-in EtherNet/IP
Port)
Controller 2
(NJ501-1500)
Originator device Target device
Sysmac Studio
Ethenet
Net_Out1
Target device tag set
Net_In1
(Tag set)
Originator device tag set
Net_Out1
(Data type: WORD)
Network variable
(Network Publish attribute: Output)
Net_In1
(Data type: WORD)
Network variable
(Network Publish attribute: Input)
Net_Out1Net_In1
(Tag)
(Tag set)
(Tag)
Convert the network variable to the tag.
Project on the Sysmac Studio
Controllers 1 and 2 are respectively named as follows and registered in the same project.
· Controller_1 (Controller 1: NJ501-1500 (Built-in EtherNet/IP Port))
· Controller_2 (Controller 2: NJ501-1500)
CJ1W-EIP21
(NJ)
Follow the flow below to set the settings to Controllers 1 and 2 for which to establish EtherNet/IP con-
nections.
The required settings for the originator device and the target device are shown below
.
Appendices
A-9
NJ/NX-series CPU Unit Built-in EtherNet/IP Port User’s Manual (W506)
A-2 Use the Sysmac Studio to Set the Tag Data Links (EtherNet/IP Connections)
A
A-2-4 Making the EtherNet/IP Connection Settings with the Sysmac Stu-
dio
 Loading...