10-2
CAM PULLEY/CRANKSHAFT/ PISTON/CYLINDER HRX217HYA • HRX217HZA
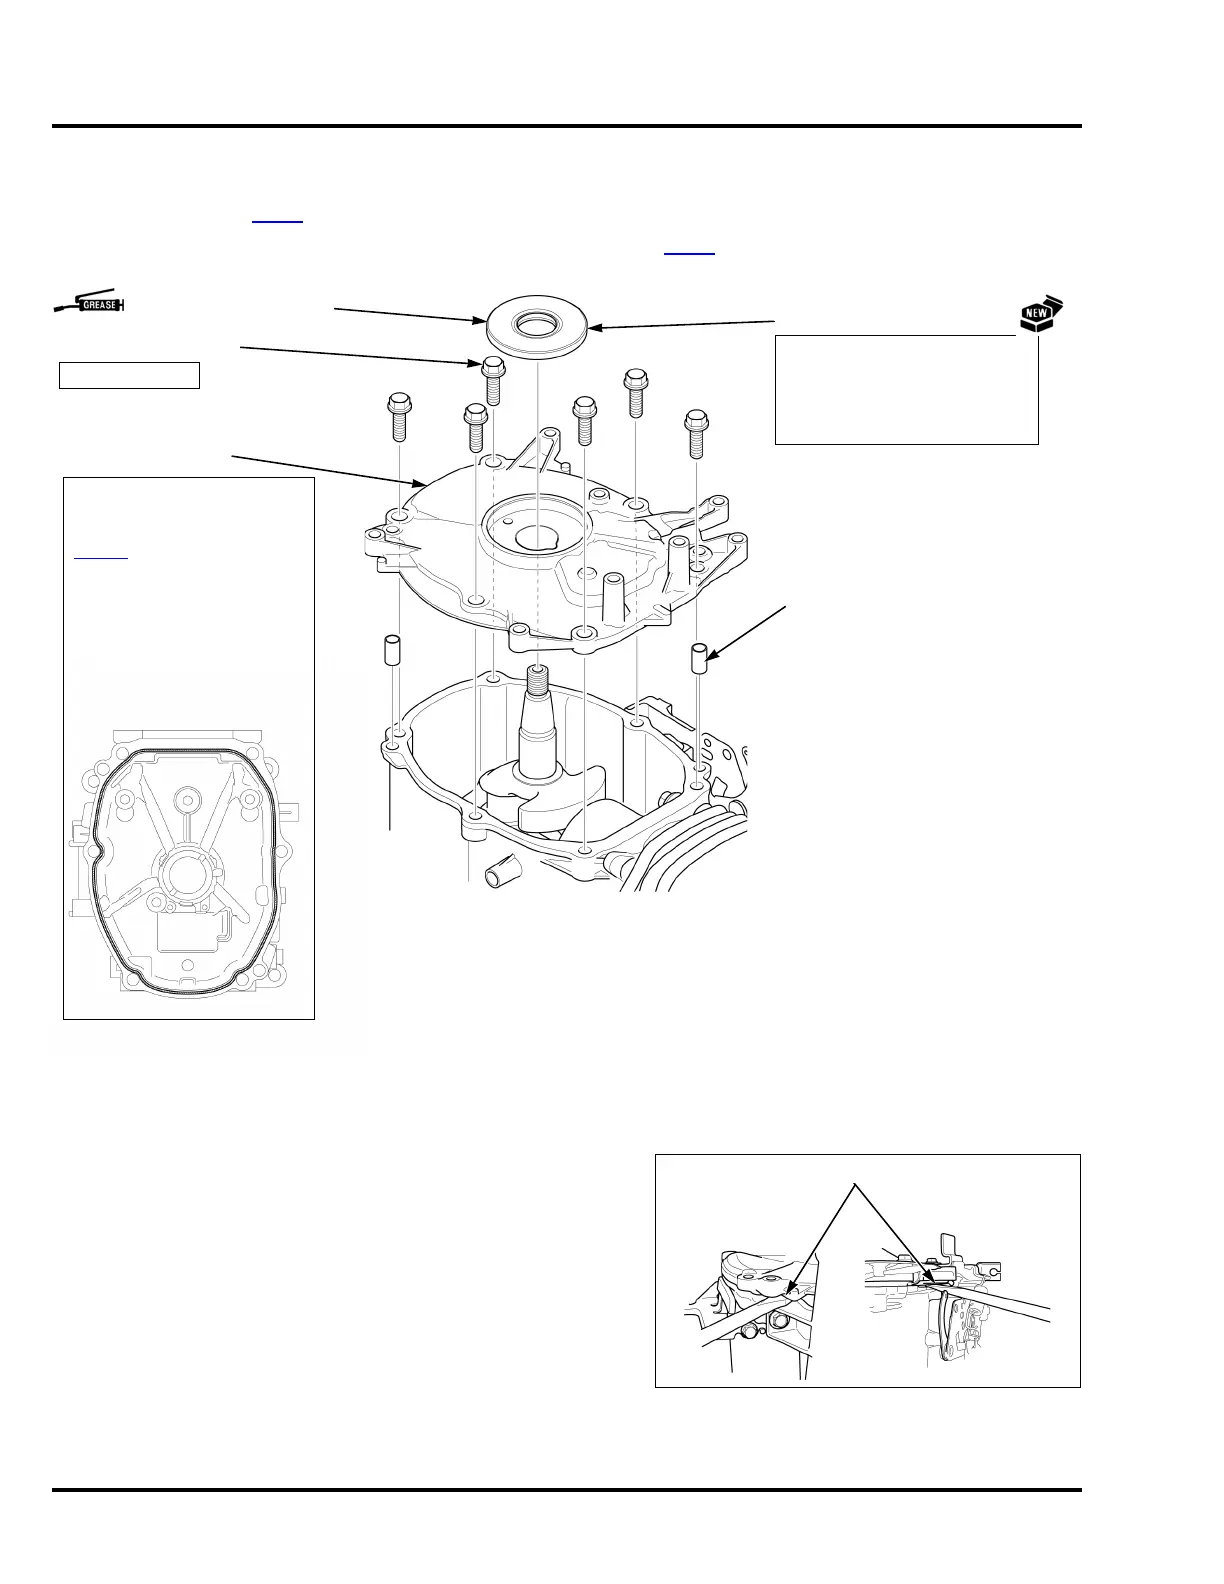
1. CRANKCASE COVER REMOVAL/INSTALLATION
Remove the flywheel (P. 9 - 7 ).
Be sure to reconnect the breather tube to the cover after installation (P. 8 - 2
).
CRANKCASE COVER REMOVAL
Set the piston at top dead center of the compression stroke.
Remove the six crankcase cover bolts.
Insert a screwdriver or equivalent tool into the recesses as shown,
and remove the crankcase cover.
REMOVAL:
Carefully remove with a
screwdriver at the pry points
(P. 1 0- 2
).
INSTALLATION:
Thoroughly clean both
surfaces, and then apply a
bead [Ø 1.0 - 2.0 mm (Ø 0.04 -
0.08 in)] of liquid gasket
(Hondabond HT, Loctite 5900,
or equivalent).
24 N•m (18 ft-lb)
8 x 25 mm BOLT (6)
DOWEL PIN (2)
CRANKCASE COVER
(Apply grease to the lips)
OIL SEAL (28 x 41.25 x 6 mm)
INSTALLATION:
Be careful not to damage the lip
of the oil seal when installing the
crankcase cover with the oil seal.
 Loading...