13-2
TRANSMISSION HRX217HYA • HRX217HZA
1. REMOVAL
Removal of the blade brake clutch is not required for
transmission removal; however, if the mower has been in
service for some time, it is a good idea to remove the belt for
inspection. Replace the belt if it is worn or cracked.
1. Drain the fuel tank.
2. Drain the engine oil (P. 3 - 6
).
3. Put a protective pad on the workbench. Turn the mower
upside down and rest the recoil starter on the workbench
pad. Position the handlebars on the floor and secure the
mower.
4. Remove the rear scroll (P. 12-4
).
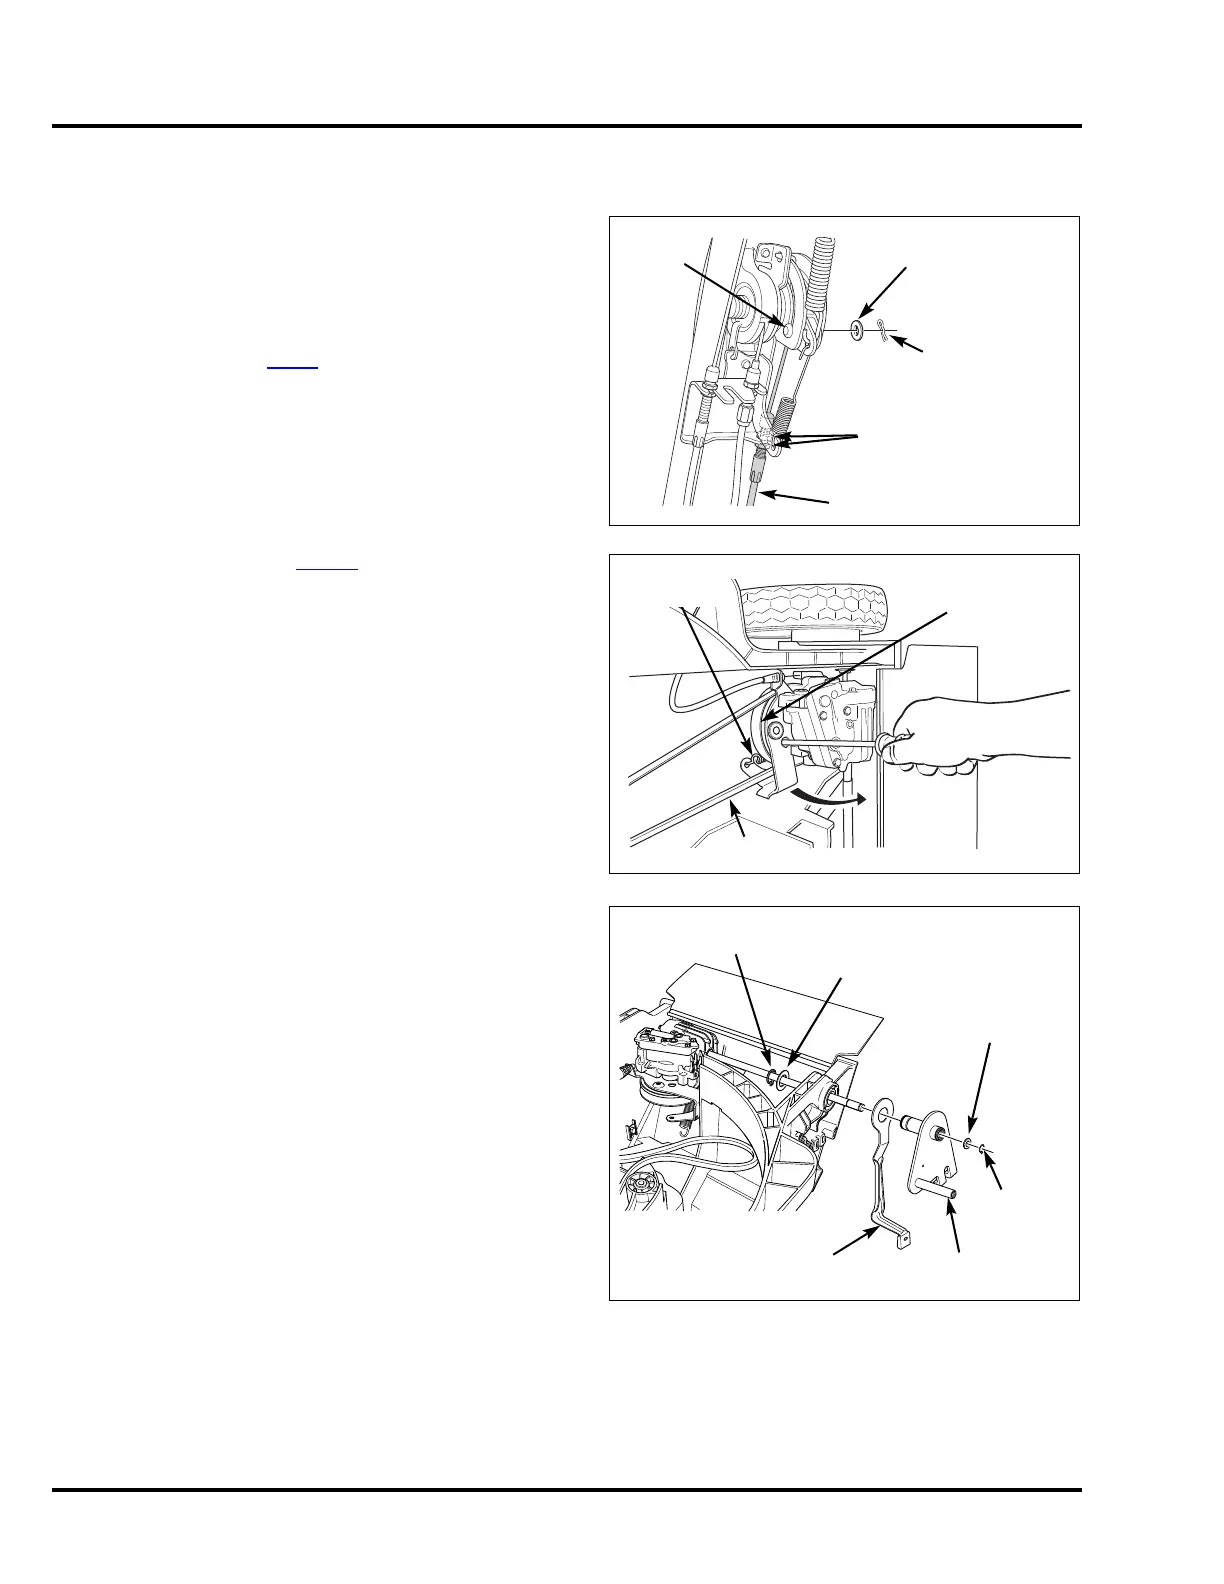
5. Remove the cotter pin, washer, and pin securing the clutch
cable to the change lever.
6. Loosen the two lock nuts and disconnect the cable from
the handle. Leave the cable connected at the
transmission.
7. Cut the tie straps securing the cables to the handle pipe.
8. Insert a screwdriver or rod into the hole in the transmission
cable bracket, and pivot the transmission to remove the
belt from the pulley. Disconnect the drive belt tension
spring from the cable bracket.
9. Remove the rear wheels, drive gears, ratchet keys,
ratchet return springs, and wheel covers.
10.Remove the two 13 mm circlips and washers from the
axle.
11. Remove the two 22 mm circlips and plain washers from
the inside of the rear adjusters, and remove the adjuster
arms and adjuster plates.
CLUTCH CABLE
WASHER
COTTER PIN
LOCK NUTS
PIN
DRIVEN
PULLEY
BELT
TENSION
SPRING
CIRCLIP,
13 mm (2)
ADJUSTER
PLATE (R)
CIRCLIP,
22 mm (2)
ADJUSTER
ARM (R)
PLAIN WASHER,
22 mm (2)
WASHER,
13 mm (2)
 Loading...