Rockwell Automation Publication 750-TG100B-EN-P - June 2019 195
Input Bay Components Chapter 8
5. Pull out on the tab at the top of the fuse holder and remove the fuse.
Install the 240V Power Distribution Fuse
Install the 240V power distribution fuse in the reverse order of removal.
Roof Fan 240V Control
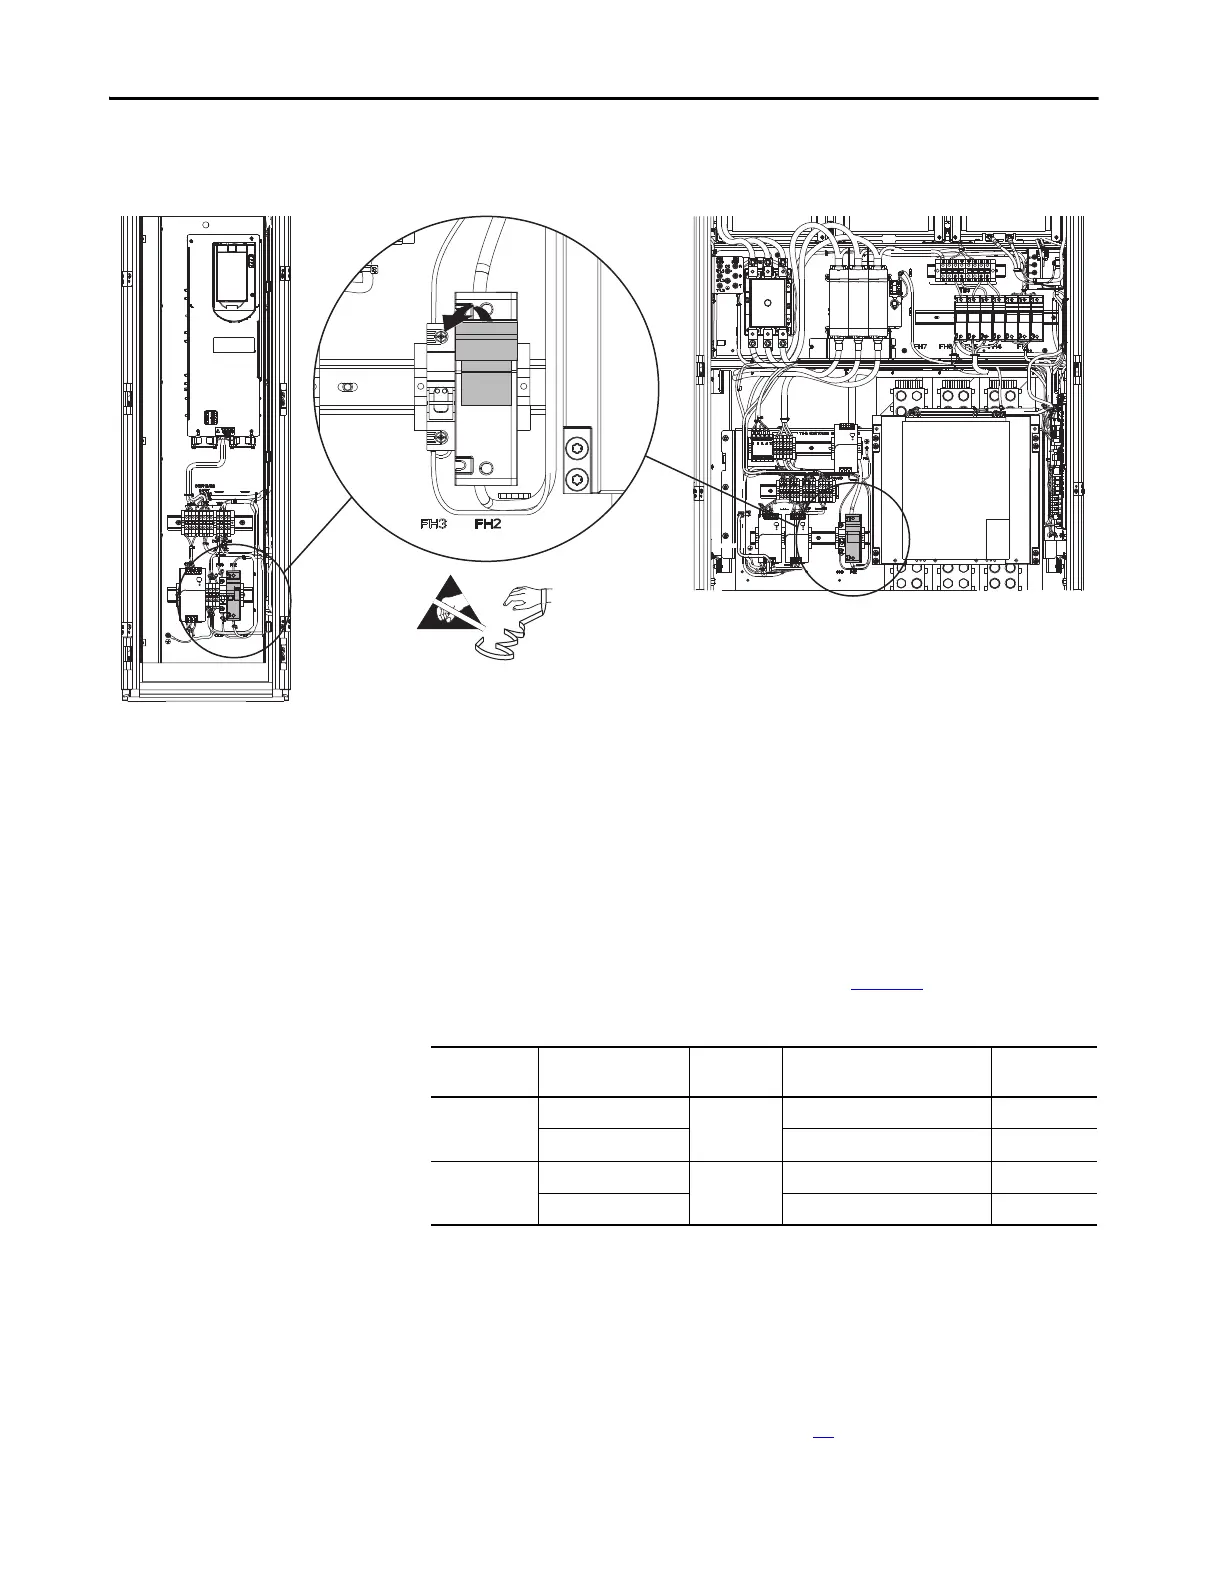
Power Fuse (FH3)
Replacement
Replace the roof fan 240V control power fuse (labeled FH3) with the
appropriate kit catalog number that is identified in Tab le 1 6
.
Remove the Roof Fan 240V Control Power Fuse
Fuse holder (labeled FH3) is on the control panel in the input bay. Follow these
steps to remove and replace the roof fan 240V control power fuse.
1. Review the Product Advisories on page 14
.
Frame 8 Input Bay Frame 10 Input Bay
Table 16 - Roof Fan 240V Control Power Fuse (FH3) Kit Ratings
Frame Size Voltage Class IP Rating Fuse Kit Cat. No. Fuse Amp
Rating
8 and 9 400V/480V/600V IP21 / IP54 SK-RM-IBFH3-FUSE3B-F8 2
690V SK-RM-IBFH3-FUSE3A-F8 2
10…12 400V/480V/600V IP21 / IP54 SK-RM-IBFH3-FUSE3D-F10 4
690V SK-RM-IBFH3-FUSE3C-F10 4
 Loading...


