143
Installing the Wave Expansion Board
Up to two optional Wave Expansion Boards (SRX Series) can
be installed in the RD-700GX.
Wave Expansion Boards store Wave data, Patches, and
Rhythm Sets, and by equipping the RD-700GX with these
boards, you can greatly expand your sound palette.
For more information about the wave expansion board tones,
refer to the patch list included with the wave expansion board.
However, some of the tone names may be displayed
differently on the RD-700GX. Check 40page as you refer to
the tone names.
901
• To avoid the risk of damage to internal components that
can be caused by static electricity, please carefully
observe the following whenever you handle the board.
1
• Before you touch the board, always first grasp a metal
object (such as a water pipe), so you are sure that any
static electricity you might have been carrying has
been discharged.
2
• When handling the board, grasp it only by its edges.
Avoid touching any of the electronic components or
connectors.
• Use a Philips screwdriver that is suitable for the size of the
screw (a number 2 screwdriver). If an unsuitable
screwdriver is used, the head of the screw may be
stripped.
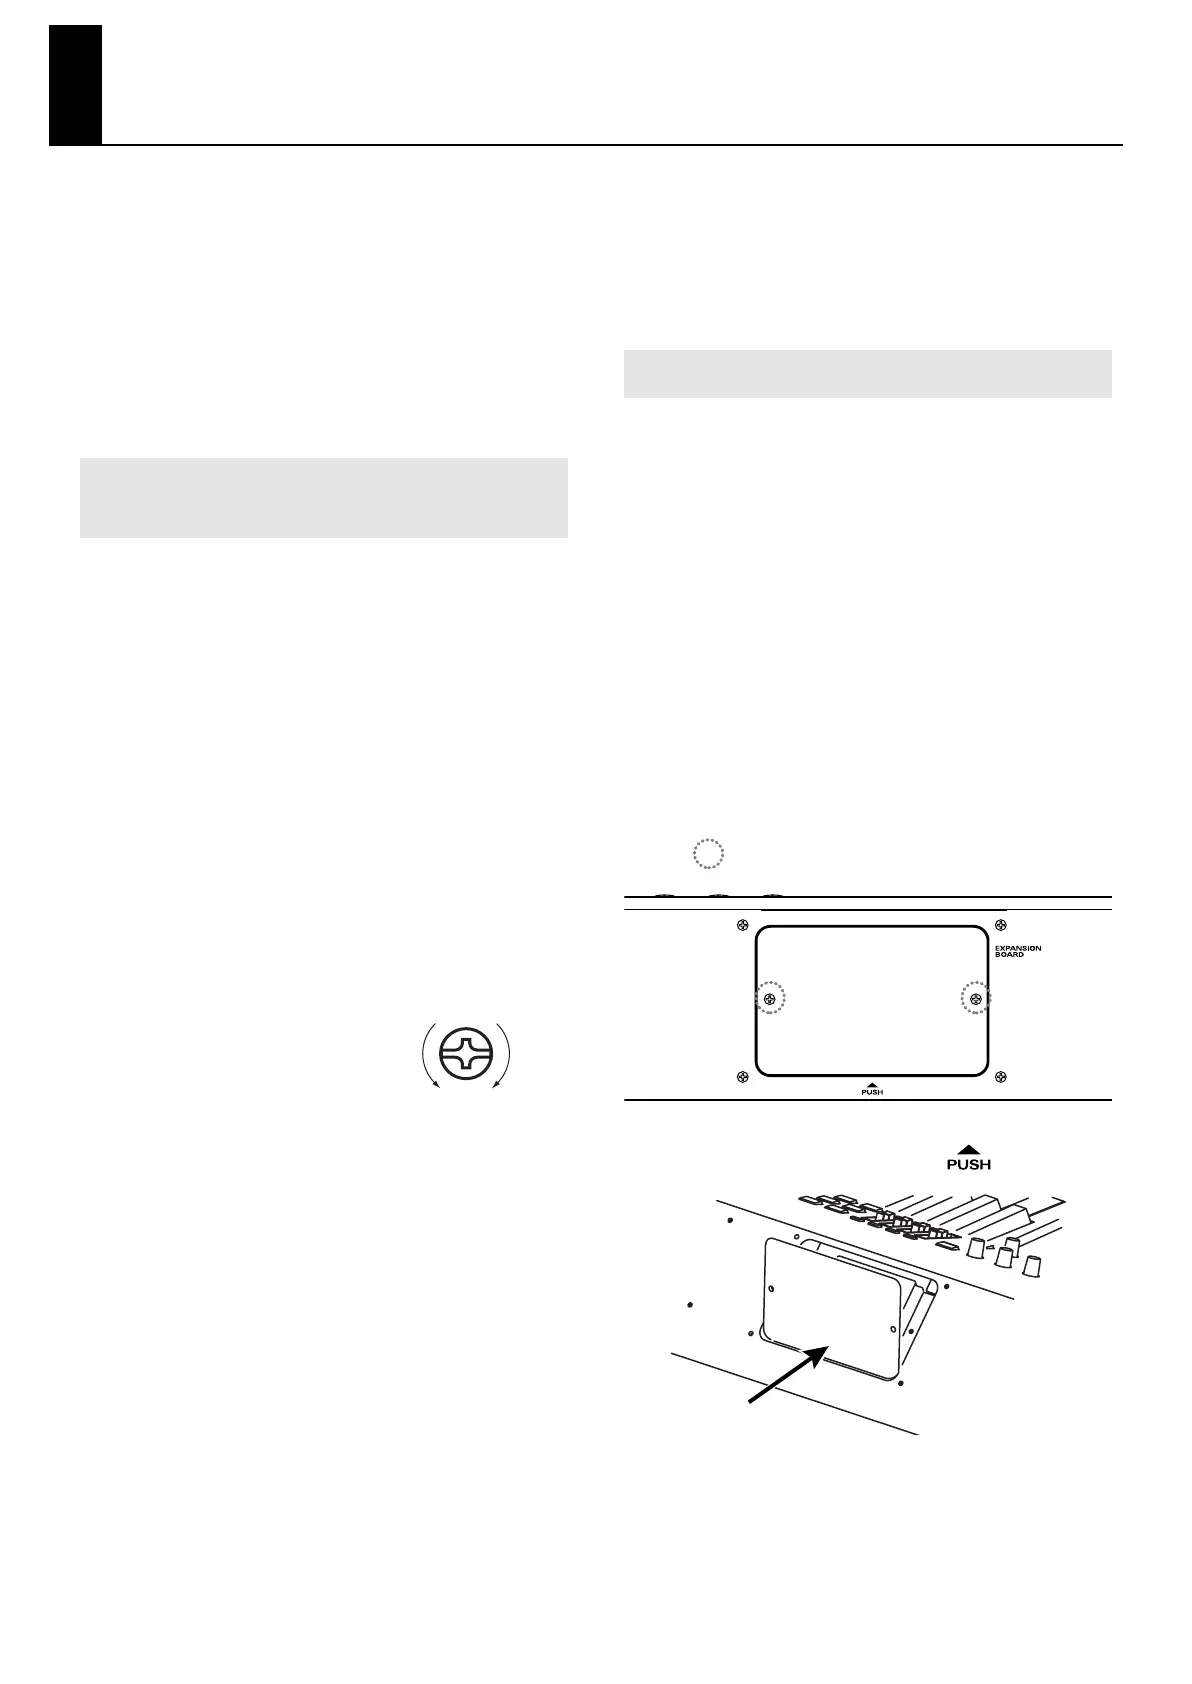
• To remove a screw, rotate the
screwdriver counter-clockwise.
To tighten a screw, rotate the
screwdriver clockwise.
• Be careful that the screws you remove do not drop into the
interior of the RD-700GX.
• Do not leave the rear panel cover removed. After
installation of the Wave Expansion Boards is complete, be
sure to replace the cover.
911
• Do not touch any of the printed circuit pathways or
connection terminals.
912
• Never use excessive force when installing a circuit board.
If it doesn’t fit properly on the first attempt, remove the
board and try again.
913
• When circuit board installation is complete, double-check
your work.
914
• Always turn the unit off and unplug the power cord before
attempting installation of the circuit board.
915
• Install only the specified circuit board(s) (SRX Series).
Remove only the specified screws.
• Be careful not to cut your hand on the edge of the
installation bay.
Install the Wave Expansion Boards after removing the rear
panel cover.
There are two slots (A and B) into which a board can be
installed. Specify which slot’s board is to be used by pressing
EXPANSION [A] or [B] button on the front panel when using
waves, tones, or Rhythm Sets from the wave expansion
boards.
1.
Before installing any Wave Expansion Board, turn
off the power on the RD-700GX and all devices
connected to it.
2.
Refer to the following illustration of the RD-
700GX’s rear panel, and remove the screws
indicated. Then, remove the cover.
fig.00-02e
You can remove the cover easily by pressing on the
lower part of the cover (above the mark).
fig.00-03e
Cautions When Installing an Wave
Expansion Board
tightenloosen
Installing SRX Series Boards
push
RD-700GX_e.book 143 ページ 2008年2月13日 水曜日 午後5時49分
 Loading...