CHASSIS 6-69
CLUTCH MASTER CYLINDER REASSEMBLY
AND REMOUNTING
Reassemble the master cylinder in the reverse order of removal
and disassembly. Pay attention to the following points:
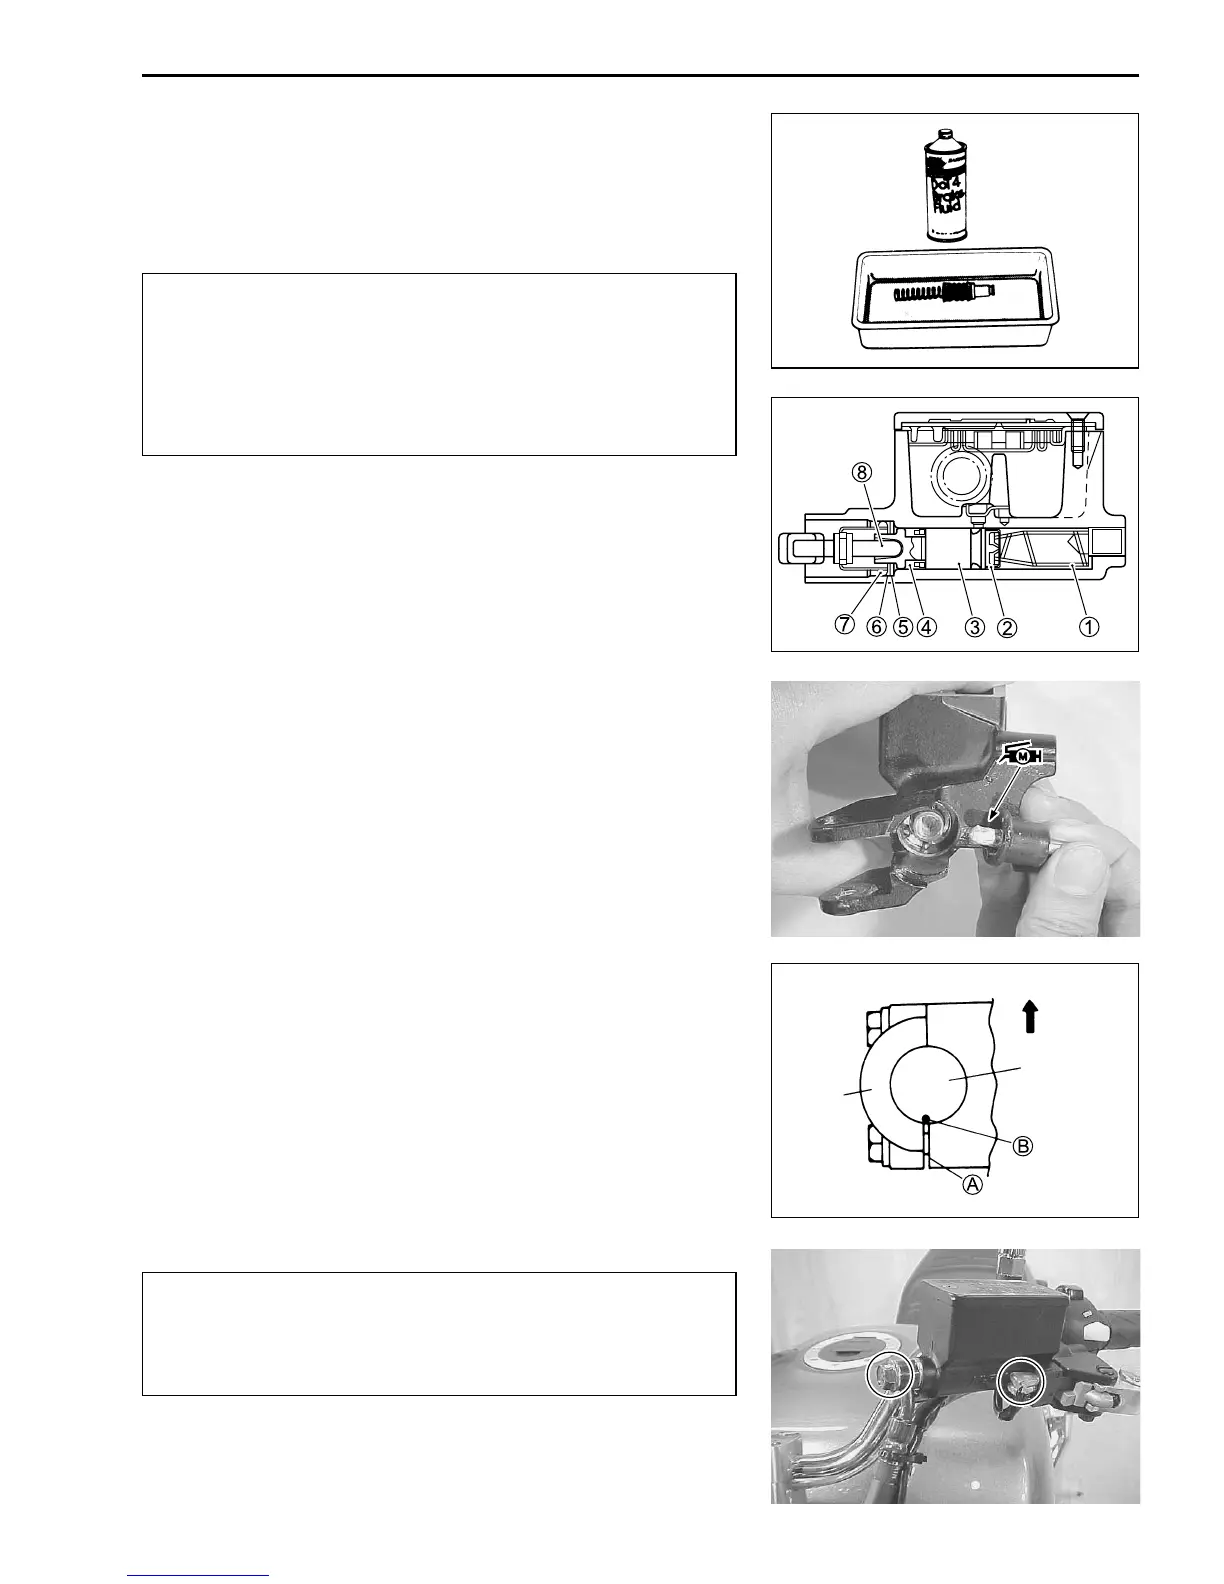
* Wash the master cylinder components with fresh brake
fluid before reassembly. Never use cleaning solvent or
gasoline to wash them.
* Do not wipe the components with a rag.
* Apply brake fluid to the cylinder bore and all the com-
ponent to be inserted into the bore.
O Specification and Classification: DOT 4
• Apply brake fluid to the piston/cup set and install them to the
clutch master cylinder.
1 Spring
2 Primary cup
3 Piston
4 Secondary cup
5 Stopper plate
6 Circlip
7 Dust boot
8 Push rod
• Apply SUZUKI MOLY PASTE to the push rod.
• Install the push rod and dust boot.
Z 99000-25140: SUZUKI MOLY PASTE
• When remounting the master cylinder on the handlebars, align
the master cylinder holder’s mating surface A with punched
mark B on the handlebars and tighten the upper clamp bolt
first as shown.
""
""
" Clutch master cylinder mounting bolt:
10 N
.
m (1.0 kgf
.
m, 7.3 lb-ft)
Clutch master cylinder union bolt: 23 N
.
m
(2.3 kgf
.
m, 16.5 lb-ft)
• Connect the clutch lever position switch lead wire.
* The seal washers should be replaced by the new ones
to prevent fluid leakage.
* Bleed air from the system after reassembling the mas-
ter cylinder. (2-17)
Master
cylinder
holder
Upper
Handlebars
 Loading...