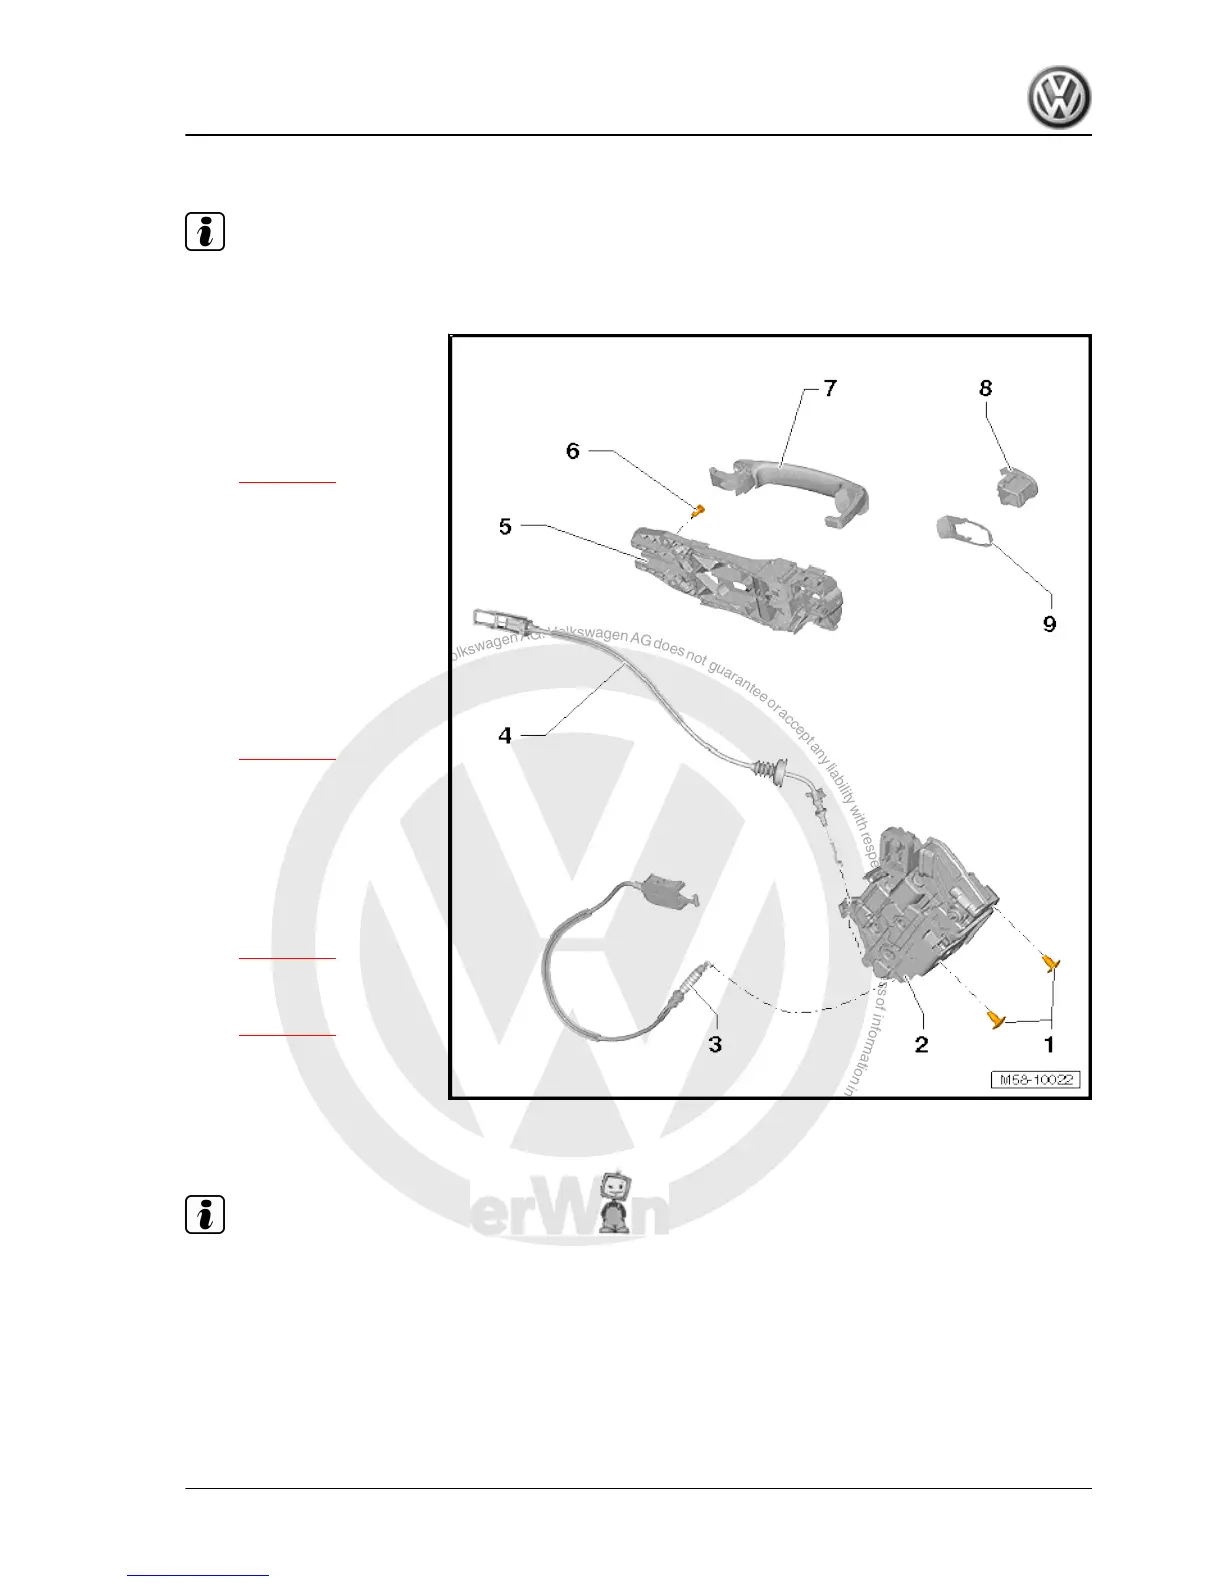
2.6 Assembly overview - door handle and door lock
Note
The right side is shown. The left side is similar.
1 - Bolt
❑ Qty. 2.
❑ Specified torque: 18 Nm
2 - Door lock
❑ Removing and installing
⇒ page 140
3 - Cable
❑ From door lock -2- to
bearing bracket -5-
4 - Cable
❑ From inner door handle
to door lock -2-
❑ With grommet to pas‐
sage on cover.
5 - Bearing bracket
❑ Removing and installing
⇒ page 143
6 - Bolt
❑ Specified torque: 1 Nm
❑ Bearing bracket is loos‐
ened from door when
this bolt is loosened.
7 - Door handle
❑ Removing and installing
⇒ page 138
8 - Cover
❑ Removing and installing
⇒ page 135
9 - Base
2.7 Removing and installing cover cap
Note
The removal and installation sequence is only for the right cover
cap. The removal and installation of the left cover cap is analo‐
gous.
2.7.1 Tools
Special tools and workshop equipment required
Jetta 2011 ➤ , Jetta Hybrid 2013 ➤
General body repairs, exterior - Edition 08.2012
2. Door components 135

 Loading...