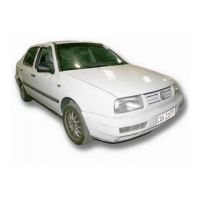
– Unclip wind deflector -1- from carrier unit -2- -arrows-.
Caution
The wind deflector and the pivot point are preloaded by the
wind deflector spring. This preload must not be released by
loosening the pivot point screws as otherwise the thread in the
assembly unit will become damaged.
– Press pivot point -3- against assembly unit -2-, thereby pre‐
serving preload when screws are removed.
– Remove screws -4- on left first and then on right, ensuring that
pressure is applied against respective pivot point -3- to pre‐
serve preload.
– Remove pivot points -3- with springs and wind deflector -1-.
1.9.2 Installing
Carry out following work:
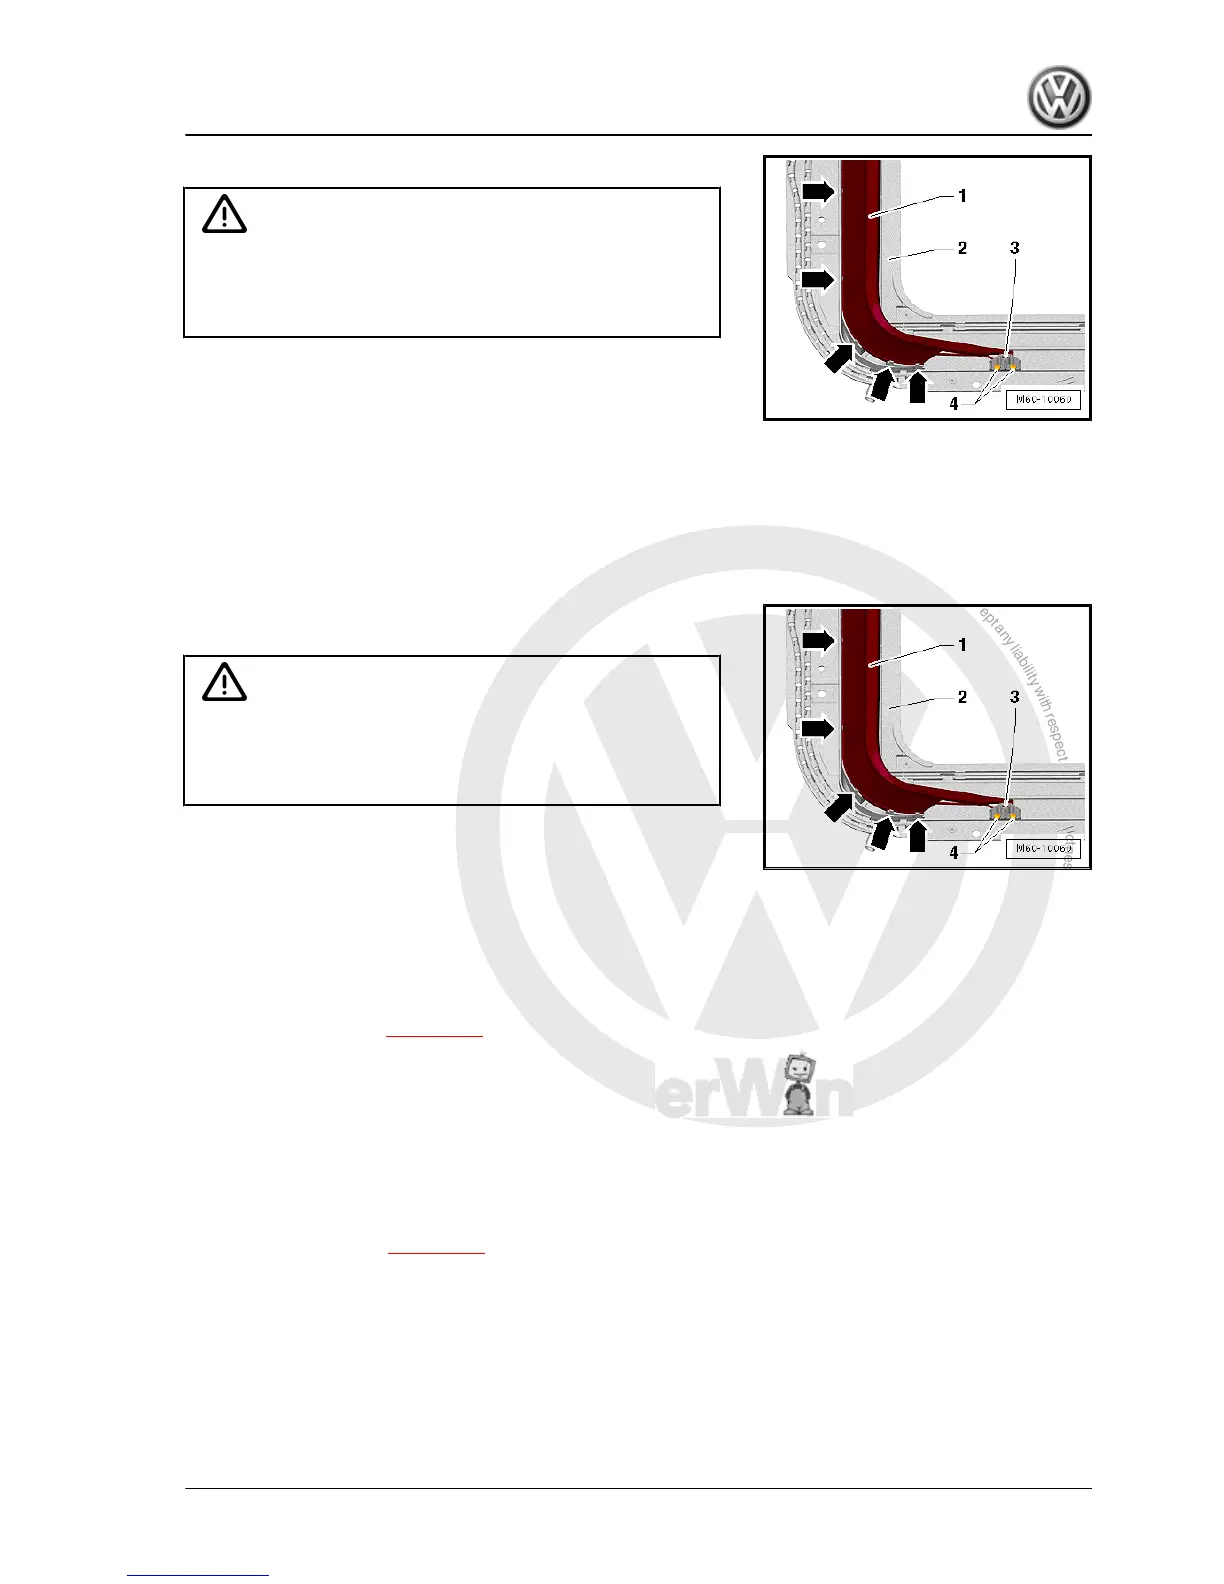
– Place wind deflector -1- together with springs and pivot points
-3- on assembly unit -2-.
Caution
The wind deflector and the pivot point are preloaded by the
wind deflector spring. This preload must not be introduced by
screwing in the pivot point screws as otherwise the thread in
the assembly unit will become damaged.
– Press pivot point -3- against assembly unit -2-, thereby intro‐
ducing preload when screws are screwed in.
– Screw in screws -4- on left first and then on right, ensuring that
pressure is applied against respective pivot point -3- to pre‐
serve preload.
Specified torque for bolts -4-: 1.5 Nm.
– Clip wind deflector -1- into carrier unit -2- -arrows-.
– Installing carrier unit ⇒ page 165 .
1.10 Removing and installing sliding headlin‐
ing
1.10.1 Removing
Carry out following work:
– Remove glass panel ⇒ page 157 .
– Push sliding headliner a little towards the rear.
Jetta 2011 ➤ , Jetta Hybrid 2013 ➤
General body repairs, exterior - Edition 08.2012
1. Sunroof with glass panel 161

 Loading...