Carry out following work:
– Fit lock carrier -1- on longitudinal members -2-.
– Screw in guide pins -T10093- on left and right sides.
– Moving from service position ⇒ page 5
Further installation is performed in the reverse order of removal.
• During assembly, ensure that all connectors and hose con‐
nections are properly installed.
– Align lock carrier together with add-on parts -1- to longitudinal
members and between wings ⇒ Body Repairs; Rep. gr. 00 ;
Body gaps/shut lines; Body - front .
1.5 Removing and installing pressure hoses
1.5.1 Pressure hose with push-on coupling
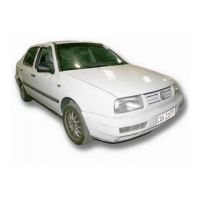
Releasing pressure hose
Carry out following work:
– Disengage retaining clip -1- in direction of -arrow a-.
– Pull pressure hose -2- in direction of -arrow b- out of coupling
-3-.
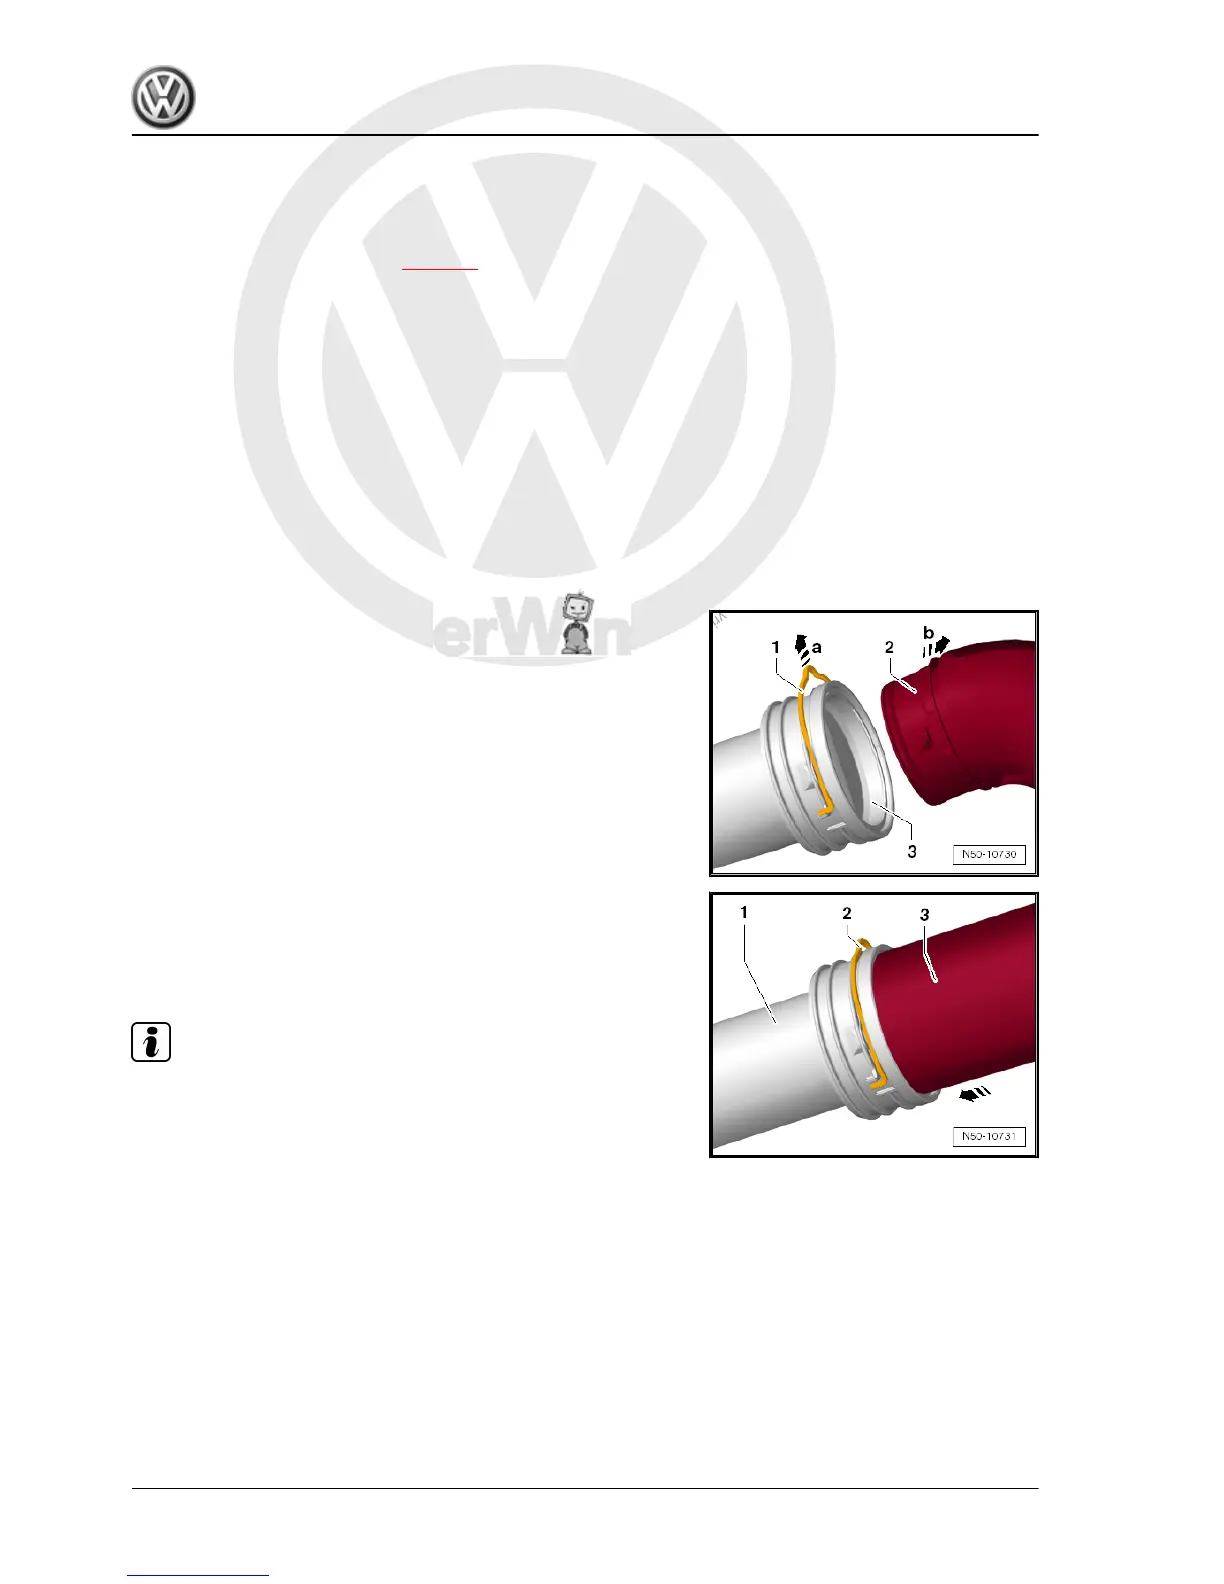
Fitting pressure hose so that it latches into place
Carry out following work:
• Ensure that the retaining clip -2- is in the upper position.
– Insert pressure hose -3- in direction of -arrow- into coupling
-1-.
– Press retaining clip -2- all the way downwards.
Note
♦
If the retaining clip cannot be pushed down fully, the pressure
hose is not inserted sufficiently in the coupling.
♦
Press pressure hose again and lock retaining clip.
• Check push-on coupling by pulling on it.
Jetta 2011 ➤ , Jetta Hybrid 2013 ➤
General body repairs, exterior - Edition 08.2012
8 Rep. gr.50 - Body - front

 Loading...