Specified torque for bolt -4-: 9 Nm.
– After completing adjustments, perform corrosion protection
measures on hinge and bolts.
– Turn adjustment buffer -2- to adjust.
– Adjust rear lid -1- at striker plate ⇒ page 65 .
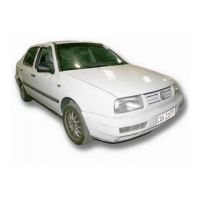
2.10.1 Adjusting striker plate
Note
♦
By loosening the bolts -1-, it is possible to move the striker
plate -2- in the oversized holes -arrows a- and -b-.
♦
Adjust striker plate -2- so that the recess of the rear lid lock
with rotary latch is centred relative to the striker plate -2- when
it engages.
Carry out following work:
– Remove cover of striker plate in lock carrier cover.
– Loosen bolts -1-.
– Move striker pin -2- into upper position and tighten the bolts
-1-.
– Close rear lid and make sure adjustment has been carried out
correctly.
Specified torque of bolts -1-: 18 Nm
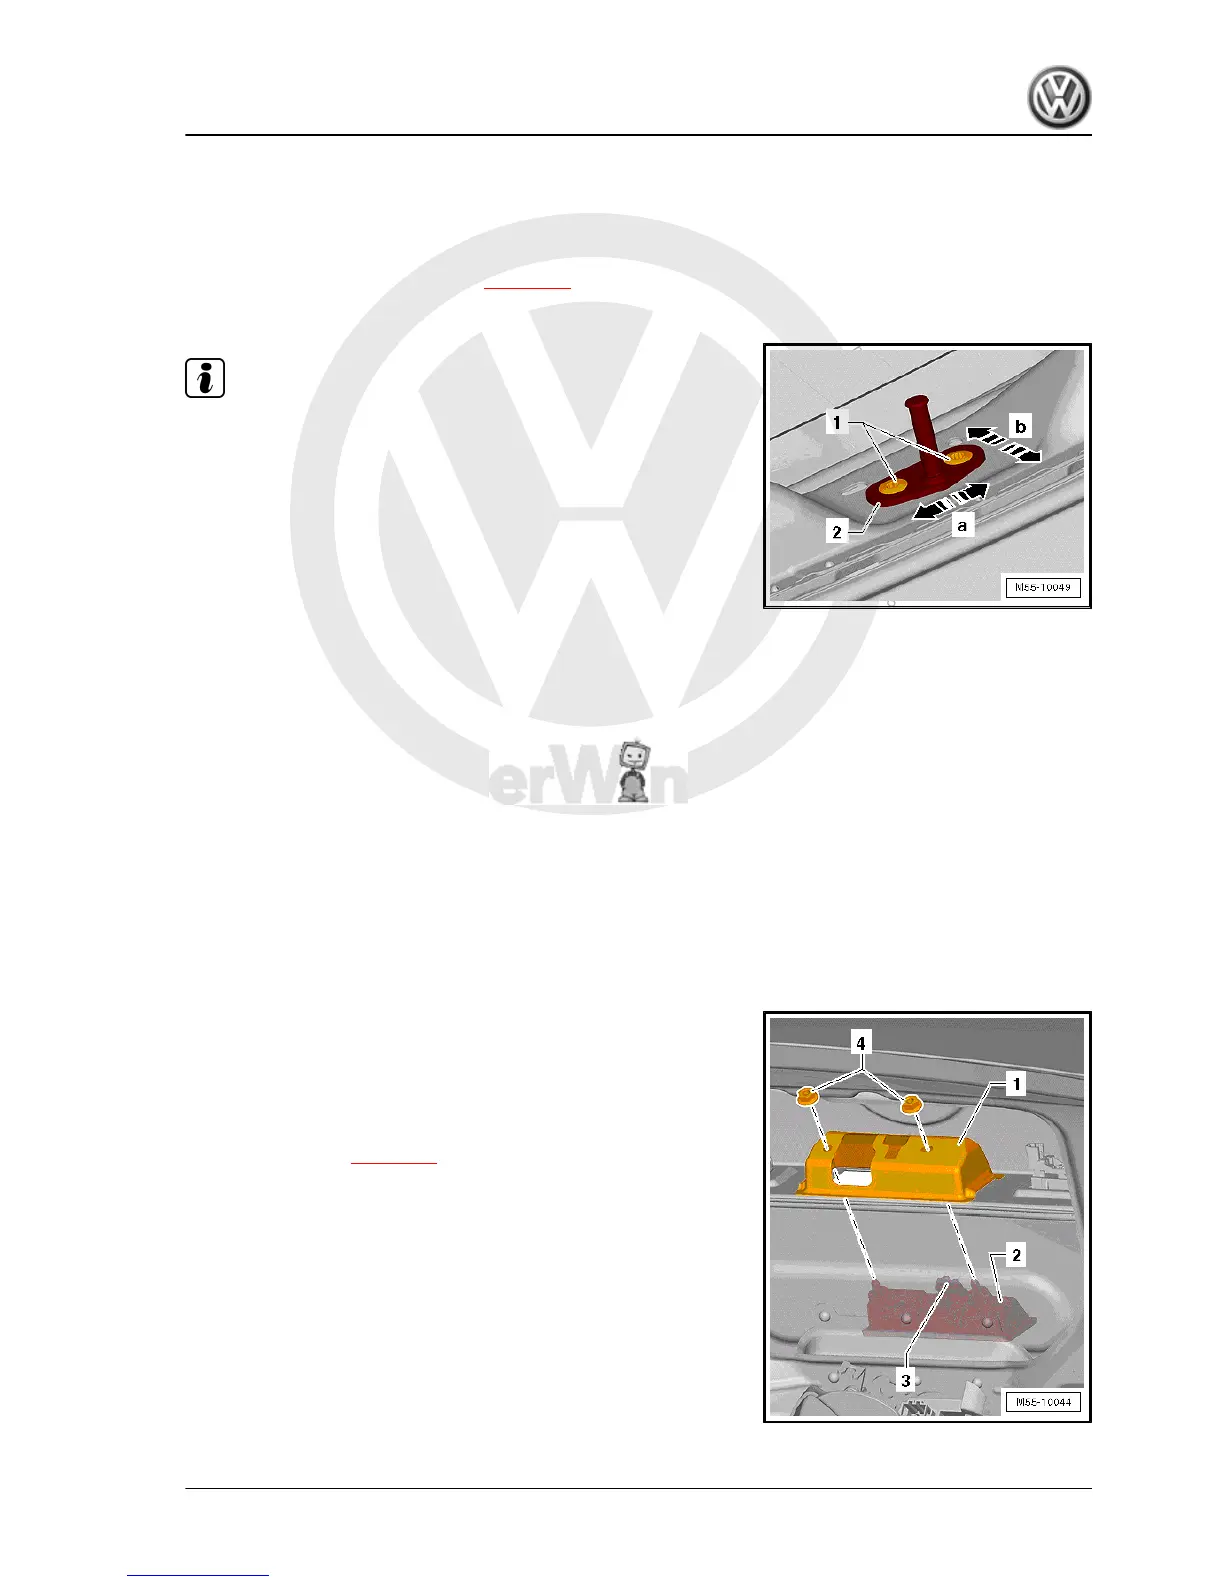
2.11 Removing and installing rear lid handle
release button -E234-
2.11.1 Removing
Carry out following work:
– Remove rear lid trim ⇒ General body repairs, interior; Rep.
gr. 70 ; Rear lid trim .
– Detach connector -3- from button connection -2-.
– Undo nuts -4- from threaded bolts of rear lid handle release
button -E234- and remove covering part -1- upwards.
– Remove button -2- from rear lid.
In case of electrical malfunction, rear lid can be opened using lock
emergency release ⇒ page 66 . Emergency release is acces‐
sible through an aperture in rear lid trim.
Jetta 2011 ➤ , Jetta Hybrid 2013 ➤
General body repairs, exterior - Edition 08.2012
2. Rear lid 65

 Loading...