Administrator’s Guide for SIP-T2 Series/T19(P) E2/T4 Series IP Phones
68
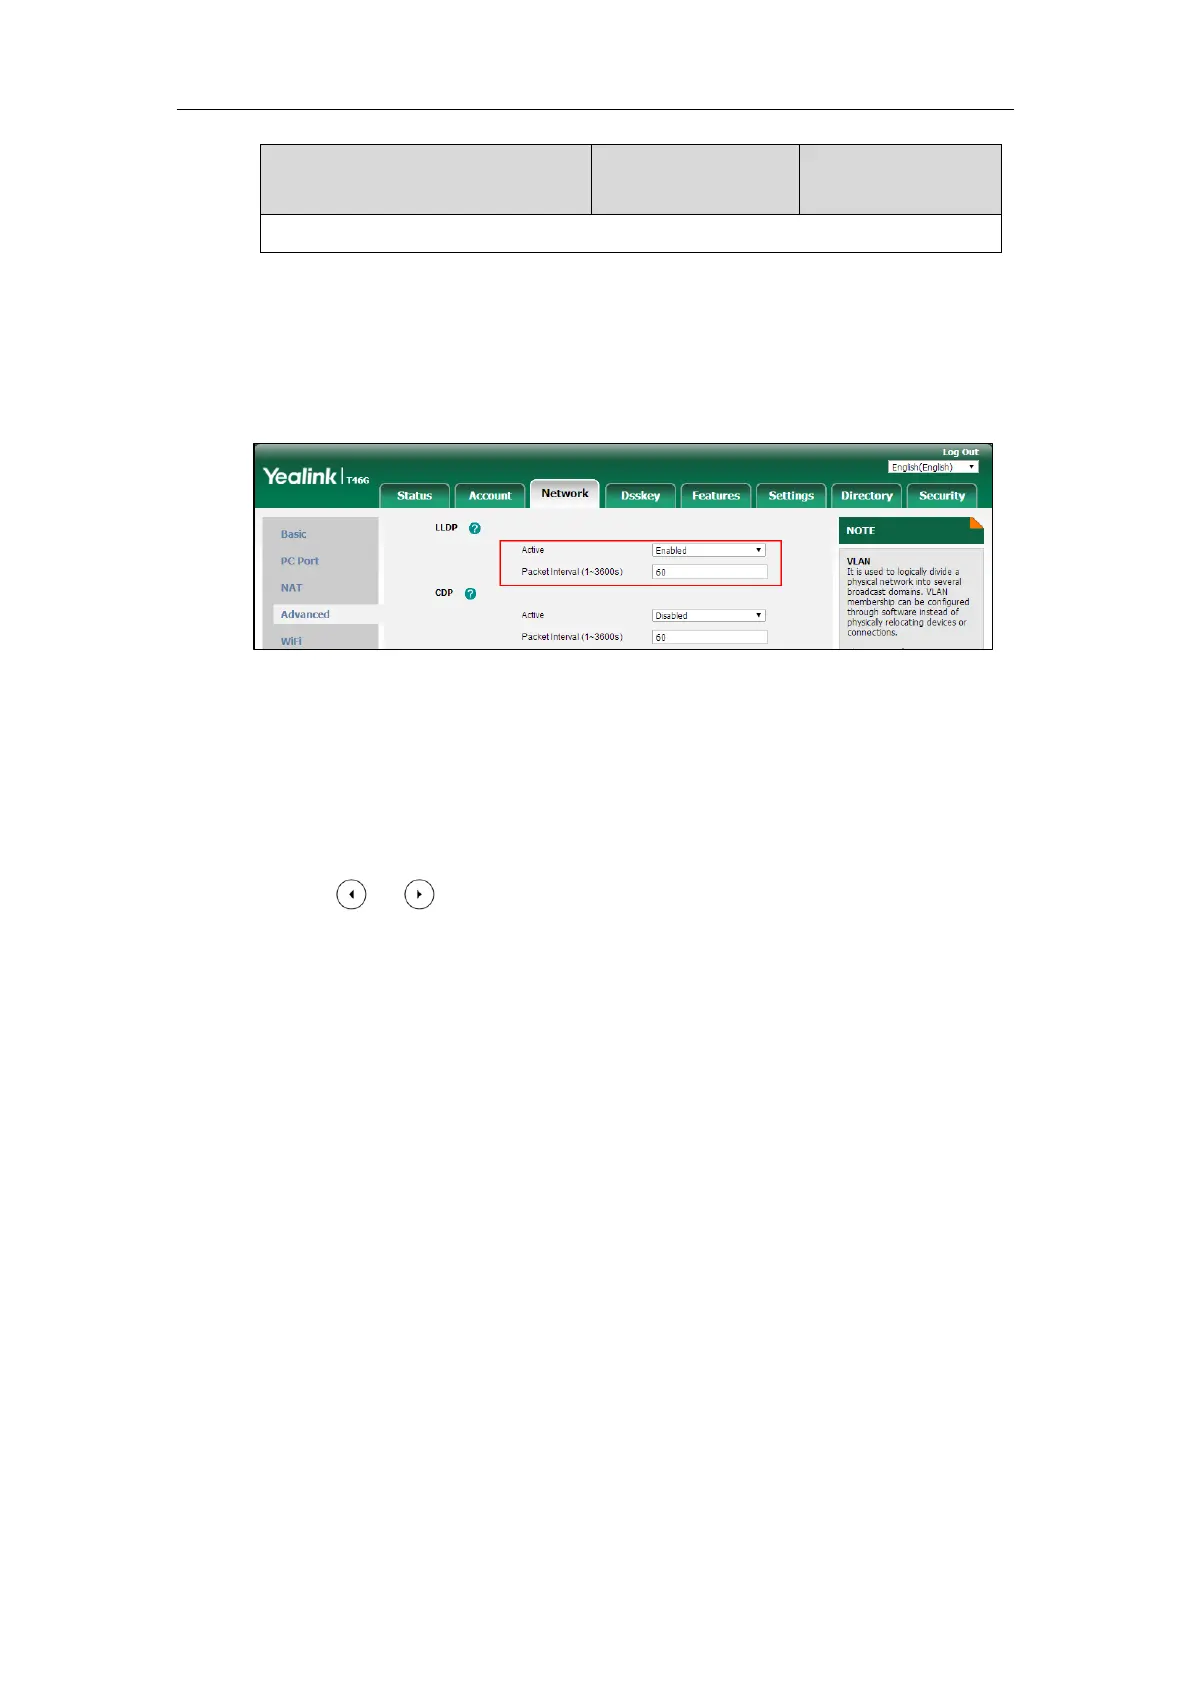
Menu->Advanced (default password: admin) ->Network->LLDP->Packet Interval
To configure LLDP feature via web user interface:
1. Click on Network->Advanced.
2. In the LLDP block, select the desired value from the pull-down list of Active.
3. Enter the desired time interval in the Packet Interval (1~3600s) field.
4. Click Confirm to accept the change.
A dialog box pops up to prompt that the settings will take effect after a reboot.
5. Click OK to reboot the phone.
To configure LLDP feature via phone user interface:
1. Press Menu->Advanced (default password: admin) ->Network->LLDP->LLDP Status.
2. Press or , or the Switch soft key to select the desired value from the LLDP Status
field.
3. Enter the priority value (1-3600s) in the Packet Interval field.
4. Press the Save soft key to accept the change.
A dialog box pops up to prompt that the settings will take effect after a reboot.
5. Click OK to reboot the phone.
CDP
CDP (Cisco Discovery Protocol) allows IP phones to receive and/or transmit device-related
information from/to directly connected devices on the network that are also using the protocol,
and store the information about other devices.
When CDP feature is enabled on IP phones, the IP phones periodically advertise their own
information to the directly connected CDP-enabled switch. The IP phones can also receive CDP
packets from the connected switch. When the VLAN configurations on the IP phones are
different from the ones sent by the switch, the IP phones perform an update and reboot. This
allows the IP phones to be plugged into any switch, obtain their VLAN IDs, and then start
communications with the call control.
 Loading...