5-10
IM 04L51B01-01EN
6
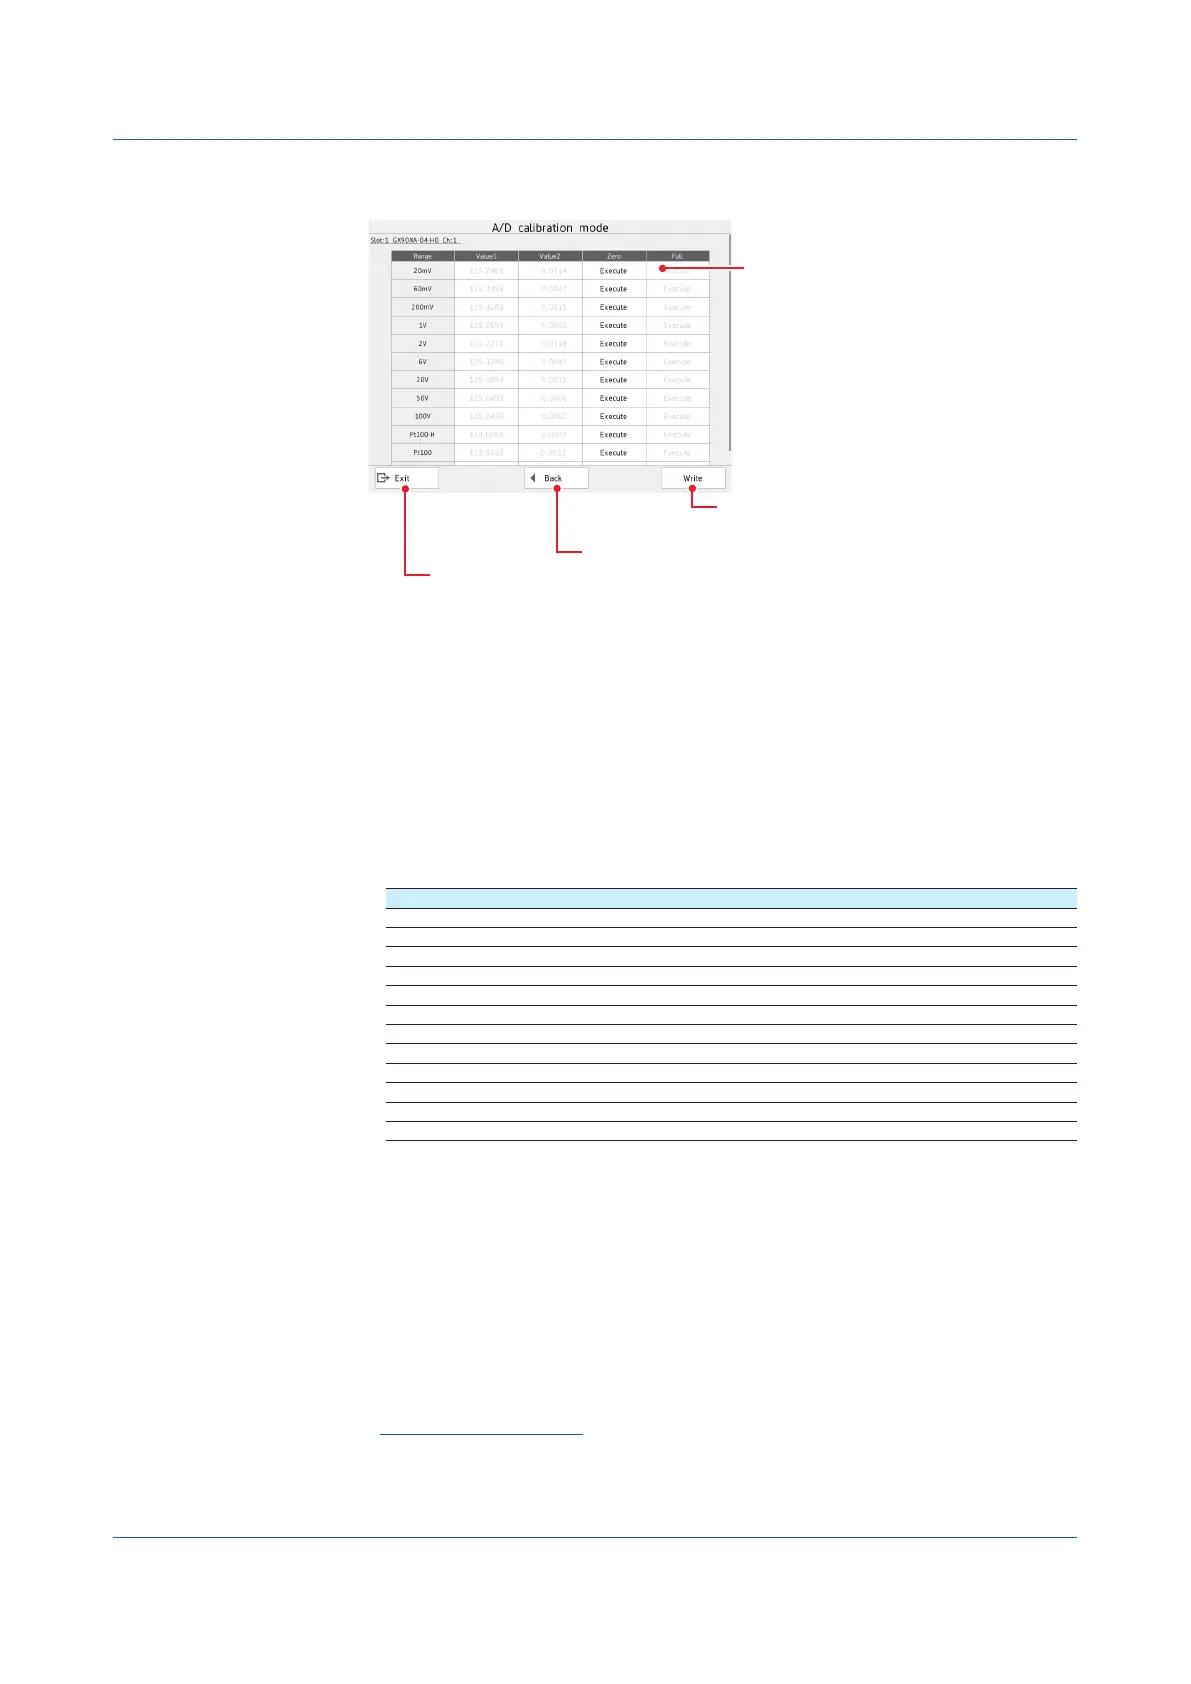
Select the channel you want to calibrate, and tap Next.
Writes (saves) calibration values
Returns to the module selection screen
Exits from calibration mode
Calibrates the selected range
7
Short the input terminals of the channel to you want to calibrate.
8
Tap Execute under Zero for the range you want to calibrate.
When calibration is complete, the message “Execution is complete” will appear.
9
Wire the calibration instrument to the input terminals of the channel you want to
calibrate.
10
Enter the reference value of the range to be calibrated according to the following table,
and tap Execute under Full.
When the calibration is complete, the message “Execution is complete” and the calibration value
appear.
Range Reference value
20 mV 20 mV
60 mV 60 mV
200 mV 200 mV
1 V 1 V
2 V 2 V
6 V 6 V
20 V 20 V
50 V 50 V
100 V 100 V
Pt100-H 160 Ω
Pt100 500 Ω
Cu10 GE 50 Ω
11
For each range you want to calibrate, repeat steps 7 to 10.
12
When all the ranges have been calibrated, tap Save.
The calibration values will be saved.
13
To calibrate a different channel, tap Back, and perform steps 6 to 12.
To calibrate a different module, tap Back, and carry out the steps from unit selection
(step 4) or module selection (step 5).
14
Tapping Close displays a confirmation screen. Tap OK to end calibration mode.
Operation complete
5.1 Maintenance

 Loading...