CLUTCH/DRIVEN PULLEY
REMOVAL
● Remove the LH. crankcase cover. (
)Xh
@)X?g
@V/Xg
@?V/X?f
@@@@@@@@@@@??V/Xf
@?hfV/X?e
@?hf?V/Xe
@? N1e
@? J5e
@?hf?W.Ye
@@@@@@@@@@@?eW.Y?e
@??W.Yf
@?W.Y?f
@W.Yg
@(Y?g
(Yh
7-2)
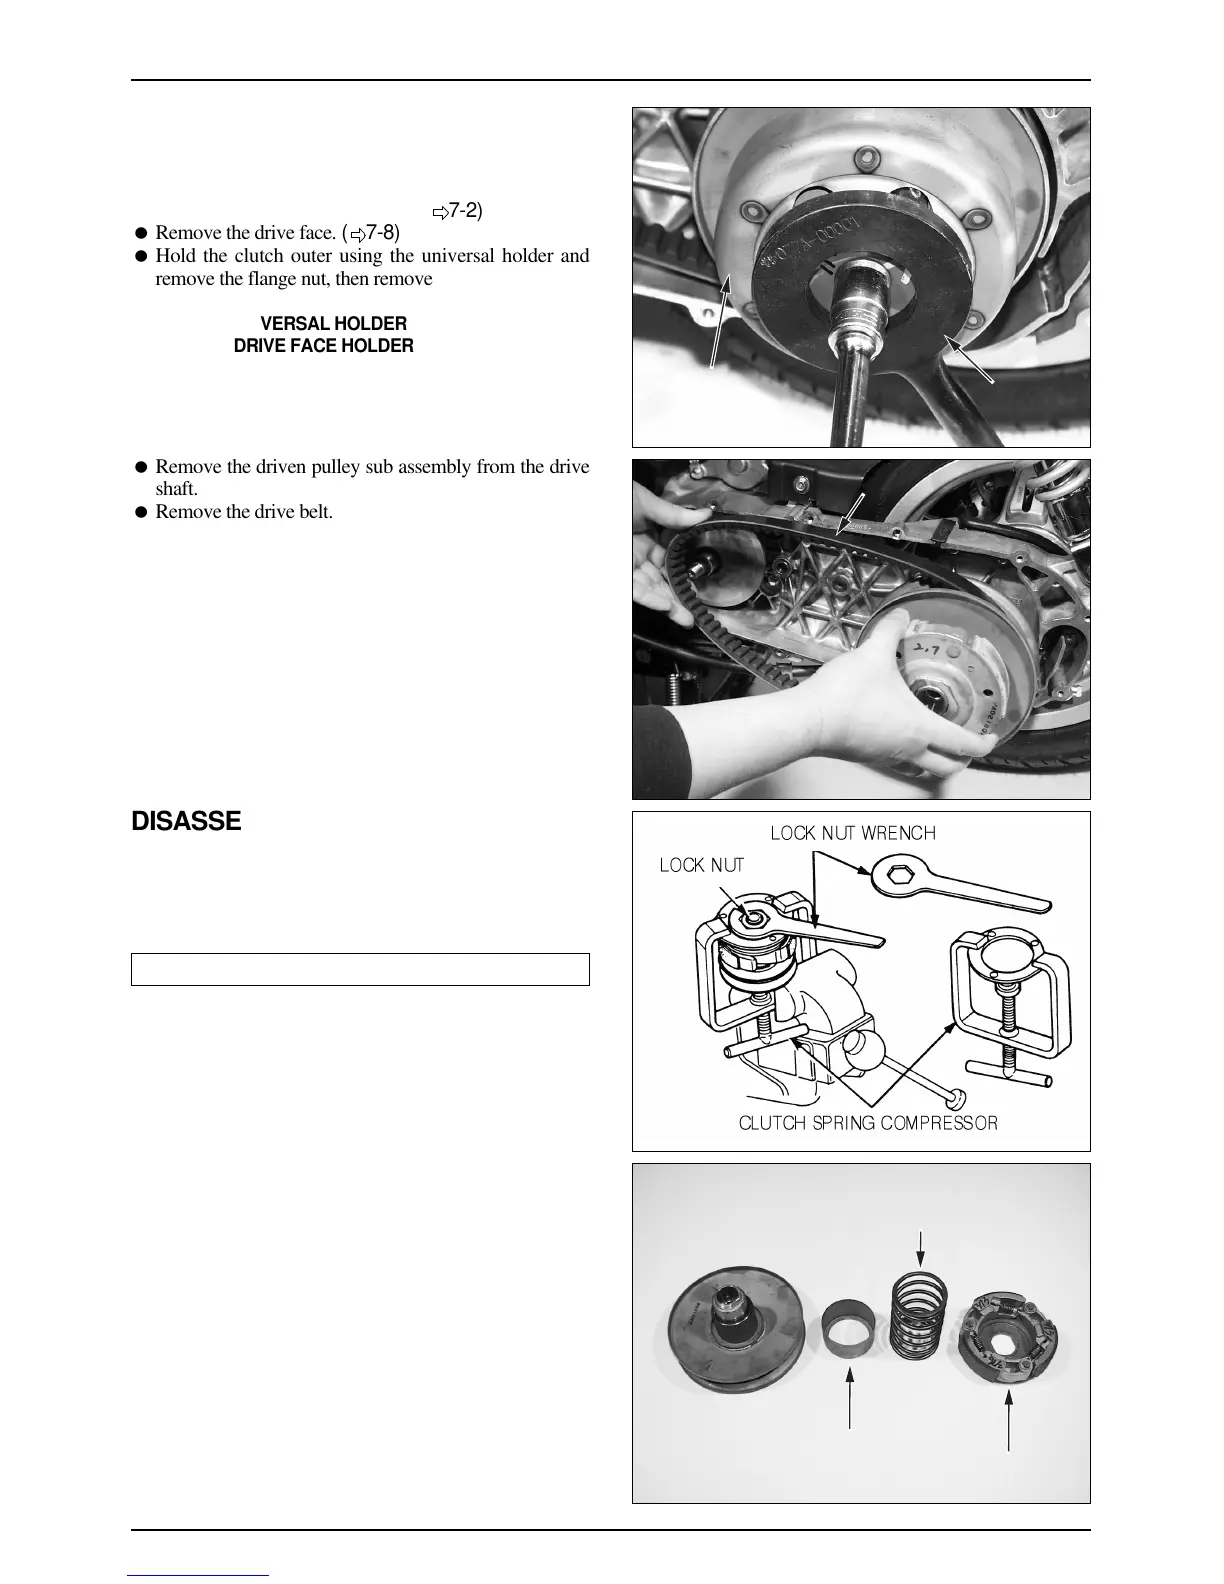
● Remove the drive face. (
)Xh
@)X?g
@V/Xg
@?V/X?f
@@@@@@@@@@@??V/Xf
@?hfV/X?e
@?hf?V/Xe
@? N1e
@? J5e
@?hf?W.Ye
@@@@@@@@@@@?eW.Y?e
@??W.Yf
@?W.Y?f
@W.Yg
@(Y?g
(Yh
7-8)
● Hold the clutch outer using the universal holder and
remove the flange nut, then remove the clutch outer.
TOOLS : UNIVERSAL HOLDER
DRIVE FACE HOLDER
● Remove the driven pulley sub assembly from the drive
shaft.
● Remove the drive belt.
DISASSEMBLY
● Install a clutch spring compressor on the pulley
assembly and tighten the tool to gain access to the nut.
NOTE
·Do not overtighten the compressor.
● Hold the clutch spring compressor in a vise as shown
and remove the lock nut using the lock nut wrench.
● Loosen the clutch spring compressor and disassembly
the clutch and spring from the driven pulley.
TOOLS : CLUTCH SPRING COMPRESSOR
LOCK NUT WRENCH
● Remove the drive plate, driven face spring and driven
face spring guide.
7-11
LH. CRANKCASE COVER/KICK STARTER/CONTINUOUSLY VARIABLE TRANSMISSION
 Loading...