3-10
If the Positions of Dots Shift...
When the condition for printing (medium thickness/head height/setting of pinch roller pressure/ink type/etc.) has
been changed, perform the following operation to correct the ink drop position for bidirectional (Bi) printing and
obtain the proper printing result.
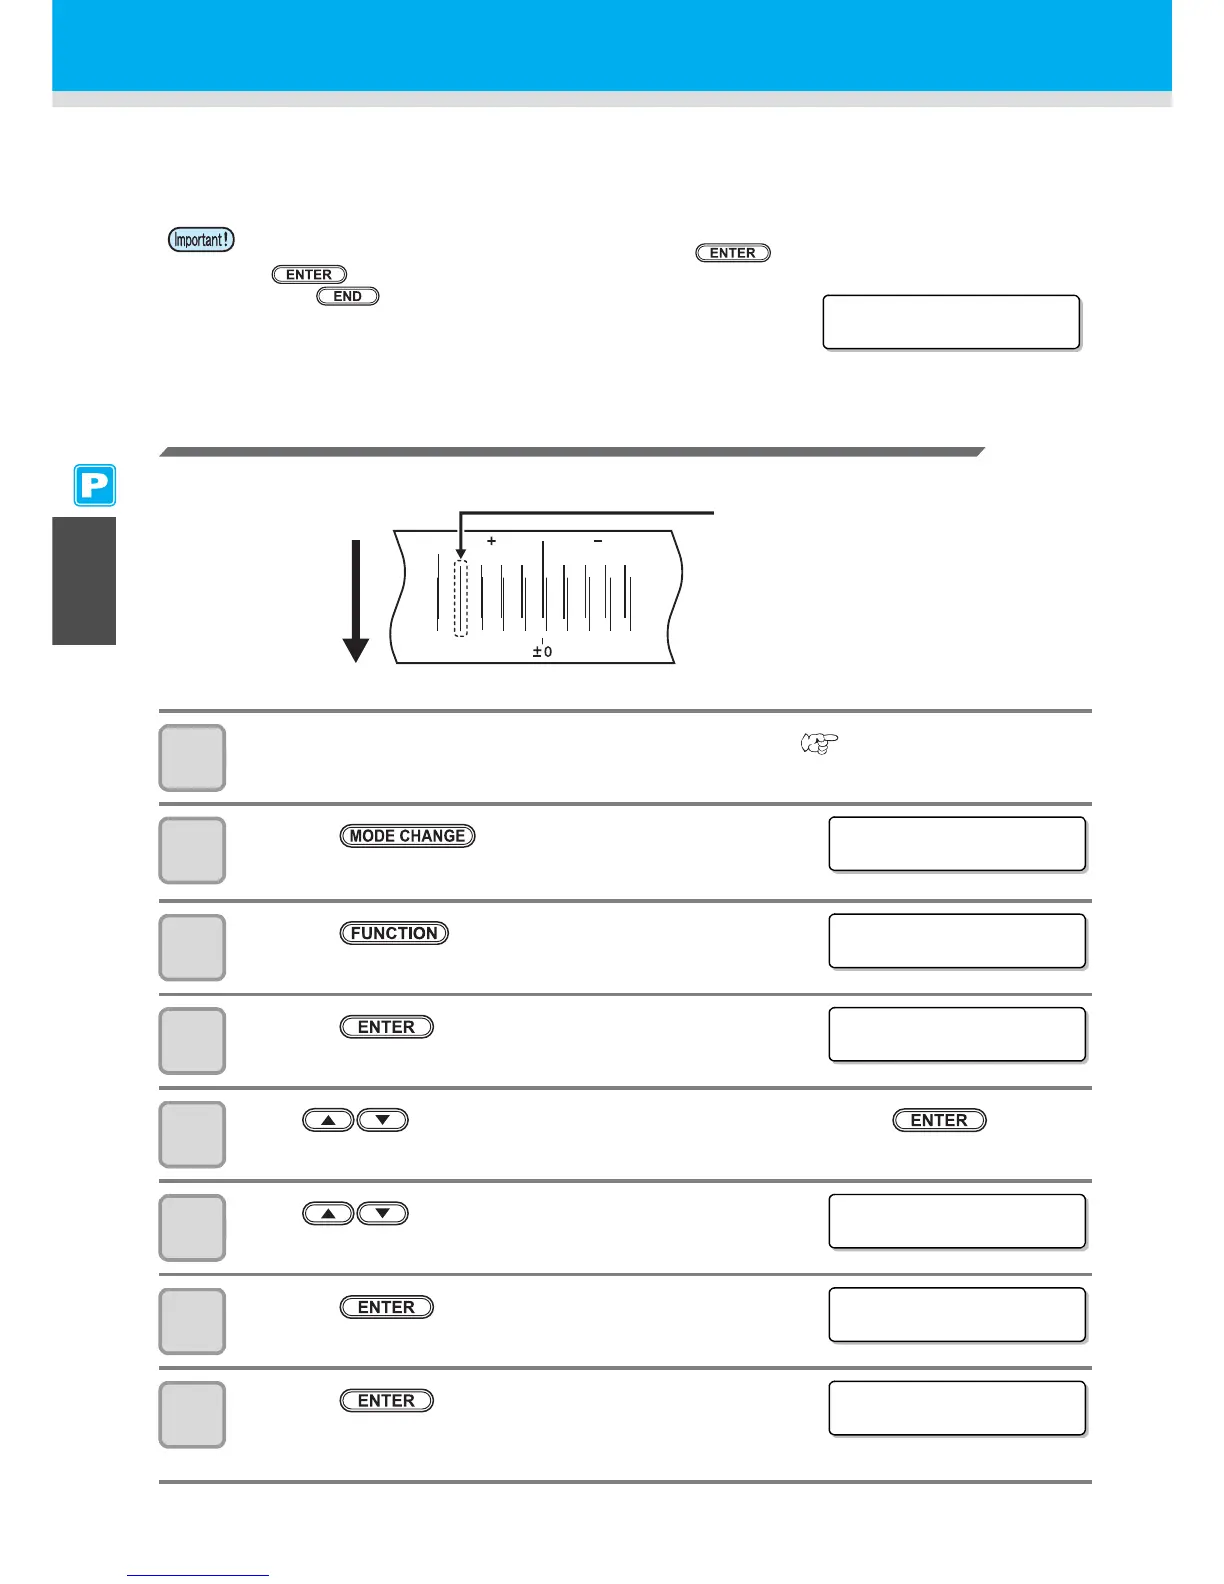
Example of a Printed Pattern
1
Set a medium on the machine and set a printing origin. ( P. 2-15, P. 2-33)
• In order to print a pattern, a medium that is 500 mm wide and at least 400 mm long is necessary.
2
Press the key in LOCAL to select the
printing mode.
3
Press the key.
4
Press the key.
5
Press to select one of the types (1 to 4) and press the key.
6
Press to select [DROP.POScorrect].
7
Press the key.
8
Press the key to start pattern printing.
• Multiple test patterns are printed. (The printed patterns are called
Pattern 1, Pattern 2, Pattern 3... in the order of printing.)
• When detecting the medium and when the mode is in cut mode, if you correct the dot position as it is,
the following screen will be displayed by pressing the key in Step 7. In this case, press the
key to switch the setting of pinch roller pressure to the print mode and then print the pattern.
• If the key is pressed, switching operation will not be
performed.
The fourth in the + direction from
the 0 position is indicated as a
straight line.
In this case, the dot position
correction value is 4.0.
Output
direction
 Loading...


